Showing posts with label Heart Stencil. Show all posts

Monday, January 28, 2019

So In Love Scrapbook Layout with Karla Yungwirth


Hello friends! It’s Karla back today with a scrapbook layout of my youngest daughter and our family. Those baby days went so fast and were so busy that I’m glad I’m finally getting to create some pages of this special time. I’m featuring the Love Chipboard, the XOXO Chipboard and the Heart stencil on this double page layout today, and while I had originally planned to use these on Valentines Day cards or tags, I just love how they worked for these pages. You could also use them for a wedding or anniversary theme!


I decided to emboss the Love Chipboard embellishment with Emerald Creek Magical Mysteries Embossing Powders in Dragon’s Egg and Kiss of the Fairy, creating an ombre effect. This worked great for my title after stamping the ‘So In’ sentiment using a Ranger Letter It stamp set. I really love mixing fonts for titles to create extra interest.  I combined several papers including Cocoa Vanilla Midnight, Maggie Holmes Bloom and some handmade watercolour paper that my oldest daughter, Stephanie, created for me for my birthday!


I used the January sketch from the Scrapbook & Cards Today SCT 2019 365 Online Class. I love using sketches as a way to start my pages! I stamped some cute Hello Bluebird stamps creating a little subtitle under the Polaroid frame and used some Distress Oxide inks to sponge various edges.


Using the Heart Stencil in the 6x6 size I first lightly inked the background using Distress Oxide Inks in pink and orange and then added a Shimmerz texture paste to add glimmer. Some SpiegelMom Scraps and Studio Katia sequins, along with various diecut ephemera embellishments and buttons, added just a bit more bling!


I fussy cut some of the gorgeous flowers from the watercolour paper my daughter gave me and then embellished the XOXO Chipboard with Emerald Creek Magical Mysteries Mermaid Fin and Baked Velvet Dusk, Lim and Aegean Sea Powders. I love how easy it is to customize the chipboard to match whatever project I’m making!


Southern Ridge Trading Company Supplies Used:


Other Supplies Used:

- Emerald Creek Craft Supplies: Magical Mysteries - Kiss Of The Fairy, Mermaid Fin & Dragons Egg Embossing Powder and Seth Apter - Baked Velvet Embossing Powder: Mediterranean Kit 
- Stamps by Hello Bluebird, Ranger and BoBunny
- Patterned Paper and Embellishments by Maggie Holmes, Cocoa Vanilla and Handpainted papers by Stephanie O’Handley
- Sequins by SpiegelMom Scraps and Studio Katia
- Ranger Ink: Distress Oxide Inks
- Shimmerz Puttin On The Glitz Paste-Eez

Thanks so much for stopping by today! Be sure to head over to the Southern Ridge Trading Company Shop to see what goodies you find to inspire your crafting!

Hugs,
Karla


Wednesday, January 23, 2019

Adore Tag with Katelyn Grosart

Hey Southern Ridge Trading Company fans, Katelyn here. It's hard to believe that Valentine's Day is right around the corner and it's time to start thinking about creating tags and cards. For today's post, I've created this Adore Tag which is perfect to give to your loved ones. You'll want to read below as I share with you how to recreate my tag at home. 


To start, you'll need a Chipboard Tag. Choose two pieces of Valentine's Day themed patterned paper. Trace the tag around one of the pieces of paper and cut the tag out. Cut the second piece of patterned paper to 2 3/4" x 3 3/4". Distress the edges of each patterned paper piece. Ink the edges of the patterned paper pieces and chipboard tag using Black Soot Distress Ink and a blending tool with foam.


Apply two coats of Candied Apple Distress Paint to the Adore Swirl Word. Once the paint has dried, rub Black Soot Distress Crayon around the edges of the word.


Choose one Med Key Hole. Apply Emboss It Ink to the key hole. Sprinkle Hammered Metal Embossing Powder overtop of the key hole. Tap off the excess powder and emboss with a heat tool.


The last piece that you'll need is the Flourish Heart. Apply Emboss It Ink to the heart. Sprinkle Sweet Valentine Embossing Powder overtop of the heart. Tap off the excess powder and emboss with a heat tool.


Cut a piece of lace that measures 3".


You'll need four 10mm light pink roses, four small pink flowers, four 15mm white roses and four 10mm red roses. 


Adhere the tag patterned paper piece to the chipboard tag. Adhere the 2 3/4" patterned paper piece to the patterned paper tag.


Punch a hole at the top of the tag. Place the Heart Stencil over top of the tag. Using a palette knife, spread Transparent Matte Texture Paste through the stencil randomly in the top left and bottom right corners of the patterned paper tag.


Once the texture paste is dry, adhere the lace 1 5/8" from the bottom of the tag. Foam square the flourish heart to the middle of the tag.


Adhere the key hole to the middle of the flourish heart. Adhere the Adore word overtop of the key hole.


On the top left hand side of the heart, adhere two red roses, two pink flowers, two pink roses and on white rose. On the bottom right hand side of the heart adhere three white roses, two pink roses, two pink flowers and two red roses.


To finish off the tag, tie a piece of red ribbon through the top of the tag.


Here are a few closeup photos of the finished tag.


And here's the finished Adore Tag.


Southern Ridge Trading Company Supplies Used:

- Flourish Heart
- Roses: 10mm Red, 15mm White and 10mm Pink

Other Supplies Used:

- Emerald Creek Craft Supplies: Hammered Metal Embossing Powder and Sweet Valentine Embossing Powder
- Tim Holtz for Ranger Ink: Distress Ink - Black Soot, Distress Crayon - Black Soot and Blending Tool with Foam
- Ranger Ink: Emboss It Ink Dabber and Texture Paste - Transparent Matte
- Authentique: Sweetheart - Sweetheart Two and Sweetheart Three
- Misc: Red Seam Binding Ribbon, White Lace, Pink Flowers and Heat Tool

Until Next Time!

- Katelyn


Monday, January 14, 2019

Love You Card with Karla Yungwirth

Hello friends! It’s Karla back today with a sweet Valentine Card with matching envelope using the Southern Ridge Trading Company 6x6 Heart Stencil and the Heart O Graph Doily Chipboard. I can see myself using this heart stencil for so many different projects! 


I coated the top of the Heart O Graph Doily with Emerald Creek Magical Mysteries Kiss Of The Fairy Embossing Powder to give a beautiful pink shine. The ombré pink heart background on the script patterned paper was created using the Heart Stencil and Distress Oxide Inks. Cocoa Vanilla papers and embellishments coordinated nicely!


I stamped sentiments on the front and inside using the Ranger Letter It ‘Loves’ stamp set and decorated a kraft envelope by stencilling the pretty hearts again. I added a few more SpiegelMom Scraps and Studio Katia sequins inside and this card is ready to give to someone special!


You can see just how I created this card in this process video here. 

Southern Ridge Trading Company Supplies Used:


Other Supplies Used:

- Emerald Creek Craft Supplies:  Magical Mysteries - Kiss Of The Fairy Embossing Powder and  Aroma - Black Cherry Embossing Powder
- Ranger Ink: Distress Oxide Inks, Matte Medium and Letter It ‘Loves’ Stamps
- Sequins by SpiegelMom Scraps and Studio Katia
- Cocoa Vanilla: ‘Midnight’ Collection Papers and Diecut Ephemera

Thanks so much for stopping by today! I hope this card gives you some ideas on how you’d like to use the gorgeous goodies in the SRTC shop to create your own valentine card!   Have a crafty week my friends!

Hugs,
Karla


Wednesday, December 26, 2018

Memories & Blessed Stand Up Canvas with Laura Gilhuly

Good Morning!
I hope you all had a very Merry Christmas and all your holiday wishes came true!

This year I made many gifts for friends...this is one for a very dear and sweet friend who has become like family


I started with the medium wood stand up canvas and covered it with gesso, I then used the small heart stencil with texture paste and allowed to dry naturally.  I layered different colours of grey and turquoise mists.


I embossed the title, mini connected hearts, and border pieces 


I followed the same process for the other side


To add some more visual interest I added some lights!

Southern Ridge Trading Company Supplies Used:

- Memories Swirl Word
- Blessed Fun Word
- Mini Connected Hearts
- Medium Wood Stand Up Canvas
- Heart Stencil - Small 
- Heart Flourish 


- Laura


Friday, February 9, 2018

Adore Valentine's Day Card with Deb Riddell

Hello everyone and thank you for stopping by, it’s Deb Riddell here with you today to share a quick and easy Valentine’s Day card created with Southern Ridge Trading Company’s Heart stencil, Taneesha Heart and Love and Hearts Banner chipboard and Wood Adore Tags.


I was inspired by Julia Chupik of Paradise Lost who made a beautiful card with water based pigment ink (click here to see her process video).  I admired her use of white space on her card which I always struggle with so decided to give it a go myself.

I started with a piece of plain old white copy paper, spritzed some Frankly Scarlet and Raspberry Infusions with water  and dipped and dragged the copy paper through it.  Once dried, I randomly stamped the paper with the Ledger Script stamp and Vintage Photo Distress Archival ink and then stenciled hearts onto the background with Southern Ridge’s Heart stencil and Ranger Transparent Gloss Texture Paste.


The Taneesha Heart chipboard was covered with white gesso and then dipped repeatedly into diluted Worn Lipstick and Picked Raspberry Distress inks on my craft mat.  The edges were inked with Ground Espresso Distress ink and then some Indian Gold Nuvo Mousse was diluted with more water and randomly applied to the heart with my finger.


I forgot to take a picture of the Hearts Banner before I put it onto the card, sorry about that!  The Hearts Banner chipboard was also covered with white gesso and this time I coloured it with Worn Lipstick and Picked Raspberry Distress Oxide inks and more diluted Indian Gold Nuvo Mousse.  As you can see, the stenciled Heart background was adhered to a kraft cardstock card blank.


The Wood Adore Tag was first coloured with Vintage Photo Distress Stain and once it had dried, Tarnished Brass Distress Crayon was rubbed over the surface and then quickly removed to only leave it in the recessed ‘adore’ word.


And then the card was assembled, the Hearts Banner was adhered along the top edge.


And the Taneesha Heart nestled on an angle below the banner with the Wood Adore Tag added to the center of the heart with a brad coloured with Gold Mixative.


You can see the texture and shine from the stenciled hearts and the Nuvo Mousse in the picture below.


I hope that you’ve enjoyed seeing how my Adore Valentine’s Day card came together, I haven’t quite mastered the use of white space as expertly as Julia but I do like the way it turned out.


Southern Ridge Trading Company Supplies Used:


Other Supplies Used:

- Paper Artsy: Infusions Coloured Stains
- Ranger Ink: Distress Oxide Ink, Distress Ink, Distress Stain, Distress Crayon, Gold Mixative, Distress Archival Ink and Transparent Gloss Texture Paste
- Stampers Anonymous: Ledger Script stamp
- Tonic Studios: Nuvo Mousse
- Miscellaneous: Copy Paper, Kraft Cardstock, Brad and White Gesso

Thanks as always for stopping by today and hope that you’ve been inspired to make a Valentine’s Day card for your sweetie too, happy creating!


Saturday, January 27, 2018

Love Tag with Katelyn Grosart

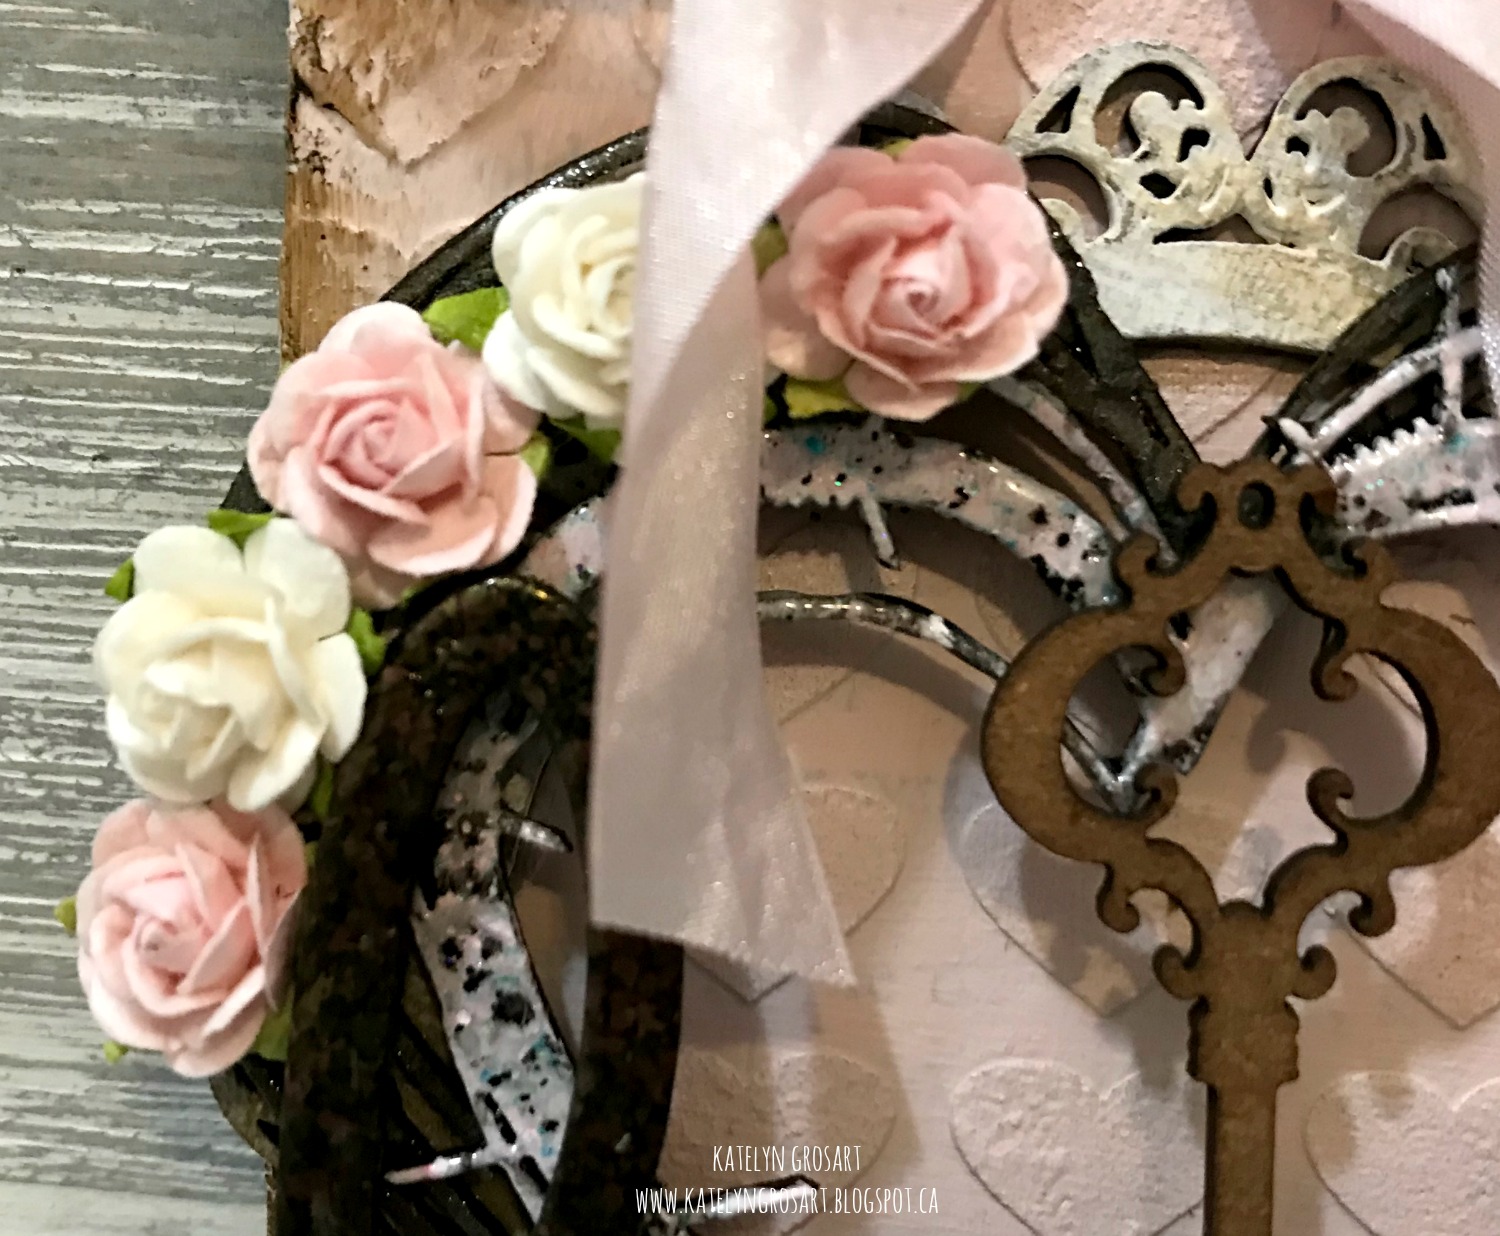
Hey Southern Ridge Trading Company fans, Katelyn here. Today, I've created for you a shabby chic Love Tag, that's perfect for Valentine's Day as it's only a few weeks away. You'll want to read below as I share with you how I created my Love Tag so that you can recreate it at home.


To start, trace the Chipboard Tag around a piece of book page. Use Distress Collage Medium - Matte to decoupage the book page onto the chipboard tag. Set aside to dry.


Once the book page has dried, place the Heart Stencil overtop of the bookpage. Using a palette knife, spread Embossing Paste over top of the stencil. Set the tag aside to dry.


With the embossing paste dry, apply a coat of Vintage Lace and Blush Paint to the entire surface of the tag.


Once the paint has dried on the tag, rub Walnut Stain and Vintage Photo Distress Crayon on the edges of the tag.


Take the Love Word out of the package. Apply a coat of Emboss It Ink to the word. Sprinkle Burnt Copper Leaves embossing powder over the entire surface of the word. Tap off the excess powder and emboss with your heat tool. 


Take one Vintage Scroll Key out of the package. Apply Vintage Photo Distress Ink to the entire surface of the key using a blending tool with foam.


Next, you'll need the Barbed Wire Heart Frame. Apply a coat of Emboss It Ink to the heart. Sprinkle Pastel Pink embossing powder over the entire surface of the heart. Tap off the excess powder and emboss with your heat tool. Once the Pastel Pink embossing powder has dried, apply a coat of Emboss It Ink to the now pink heart. Sprinkle Fractured Ice embossing powder over the entire surface of the pink heart. Tap off the excess powder and emboss with your heat tool.     


Take the small heart out of the Abstract Heart Frames package. Apply a coat of Mixed Media Medium to the heart. Quickly place the Mixed Media Transfer Foil in Patina overtop of the heart and rub the foil onto the heart. In the areas that didn't get foil, apply Black Soot Distress Ink using a blending tool and foam. 


Take out the small Doily Frame and apply two coats of Snowflake paint to the frame. Once the paint has dried, lightly rub Vintage Photo Distress Crayon randomly onto the frame.


Adhere a piece of lace to the bottom of the tag.


Adhere the doily frame to the middle of the tag. Adhere the abstract heart to the middle of the doily frame.


Adhere the barbed wire heart to the middle of the abstract heart. Adhere the key to the middle of the barbed wire heart.


Adhere the love word to the bottom of the hearts. To add some extra detail to the love, add three rhinestones. In the bottom right hand side of the hearts, adhere two cream roses and three pink roses. In the top left hand side of the hearts, adhere two cream roses and three pink roses.


To finish the Love Tag, tie a pink bow at the top of the tag.


Here are a few close up shots of my tag.


Here's the finished tag.


Southern Ridge Trading Company Supplies Used:

- Doily Circle Frame
- 10mm Roses: Cream and Pink

Other Supplies Used:

- Emerald Creek Craft Supplies: Burnt Copper Leaves Embossing Powder, Fractured Ice Embossing Powder and Pastel Pink Embossing Powder
- Paper Artsy: Fresco Finish Chalk Acrylics - Snowflake Vintage Lace and Blush 
- Ranger Ink: Emboss It Ink Dabber
- Tim Holtz for Ranger Ink: Distress Ink - Vintage Photo & Black Soot, Distress Crayon - Vintage Photo & Walnut Stain, Distress Collage Medium - Matte, Distress Collage Brush and Blending Tool with Foam
- Stampendous: Dreamweaver Stencil - Regular Embossing Paste
- Therm o web: Rebekah Meier - Mixed Media Medium and Mixed Media Transfer Foil - Patina
- Want 2 Scrap: Rhinestones
- Tombow: Mono Multi Liquid Glue
- Misc: Book Page and Light Pink Ribbon

Until Next Time!

- Katelyn