Showing posts with label Chipboard Tag. Show all posts

Monday, March 2, 2020

Foiled Tag Wall Hanging with Karla Yungwirth

Hello friends, it’s Karla back today with a fun project using a Chipboard Tag,  6”x6” Star Stencil and the Primitive Stars Chipboard. I’ve been having a great time with the new icraft /Thermoweb DecoFoil Transfer Gel Duo and Foils, so I thought I’d combine them with these fun SRTC products and a Simple Stories inspirational quote to make a foiled tag wall hanging.


I started by cutting down the 6x8 piece of Simple Stories paper to fit the chipboard tag. Then I used the DecoFoil pen to colour in the areas of the letters and applied Ranger Foil and DecoFoil by allowing it to dry for a couple minutes and then pressing the foils on. The Ranger foil will work with the pressure of your hand, but the DecoFoil needs to be put through a diecut machine - so I used my Cuttlebug. I achieved a variegated colour by pressing parts of different colours of the Ranger foil to each letter and then running it through the Cuttlebug with Iridescent DecoFoil over top.  I then used the star stencil and the transfer gel to apply a thin layer of gel to various areas of the background. By using washi tape I was able to do only 2 stars at a time. After that dried, about an hour, I used the Cuttlebug again to press the DecoFoil on. I used 2 extra pieces of cardstock as shims and ran it through as if I was using a steel die.


In a similar way, I used the deco foil pen to coat the chipboard stars (which come in a set of 18!) and then applied Lapis Watercolor DecoFoil to the top, running it through my diecut machine to adhere. The chipboard is thin enough that it ran through the machine using only the plates I would normally use with steel dies.


I glued the tag paper to the chipboard, trimmed any excess and inked the edges with Kraftin’ Kimmie Krafty Kolours Ink.


I added some white rope from the dollar store to the top of the tag, and glued on the stars , using foam tape to pop some up.


A few Wild Whisper sequins finished off this inspirational tag, which I can hang on my wall or give as a gift!


Southern Ridge Trading Company Supplies Used:

- Chipboard Tag

Other Supplies Used:

- Simple Stories Patterned Paper
- Thermoweb/iCraft DecoFoil: Transfer Gel Duo, Pen and Foils
- Ranger Ink: Foils
- Wild Whisper Designs: Sequins
- Kraftin’ Kimmie: Krafty Kolours Ink
- Cuttlebug Machine
- White Rope – Dollarama
Thanks so much for stopping by! I hope you have an amazing week ahead!
Hugs,
Karla

Saturday, February 29, 2020

Tea Time Card with Nancy Nickel

Hello, everyone! 
It's Nancy here with a fun new project share!

I've combined the Large Tags
and some pieces from the Tea Time Set.

Here's my card:


My card is an A2 size. 


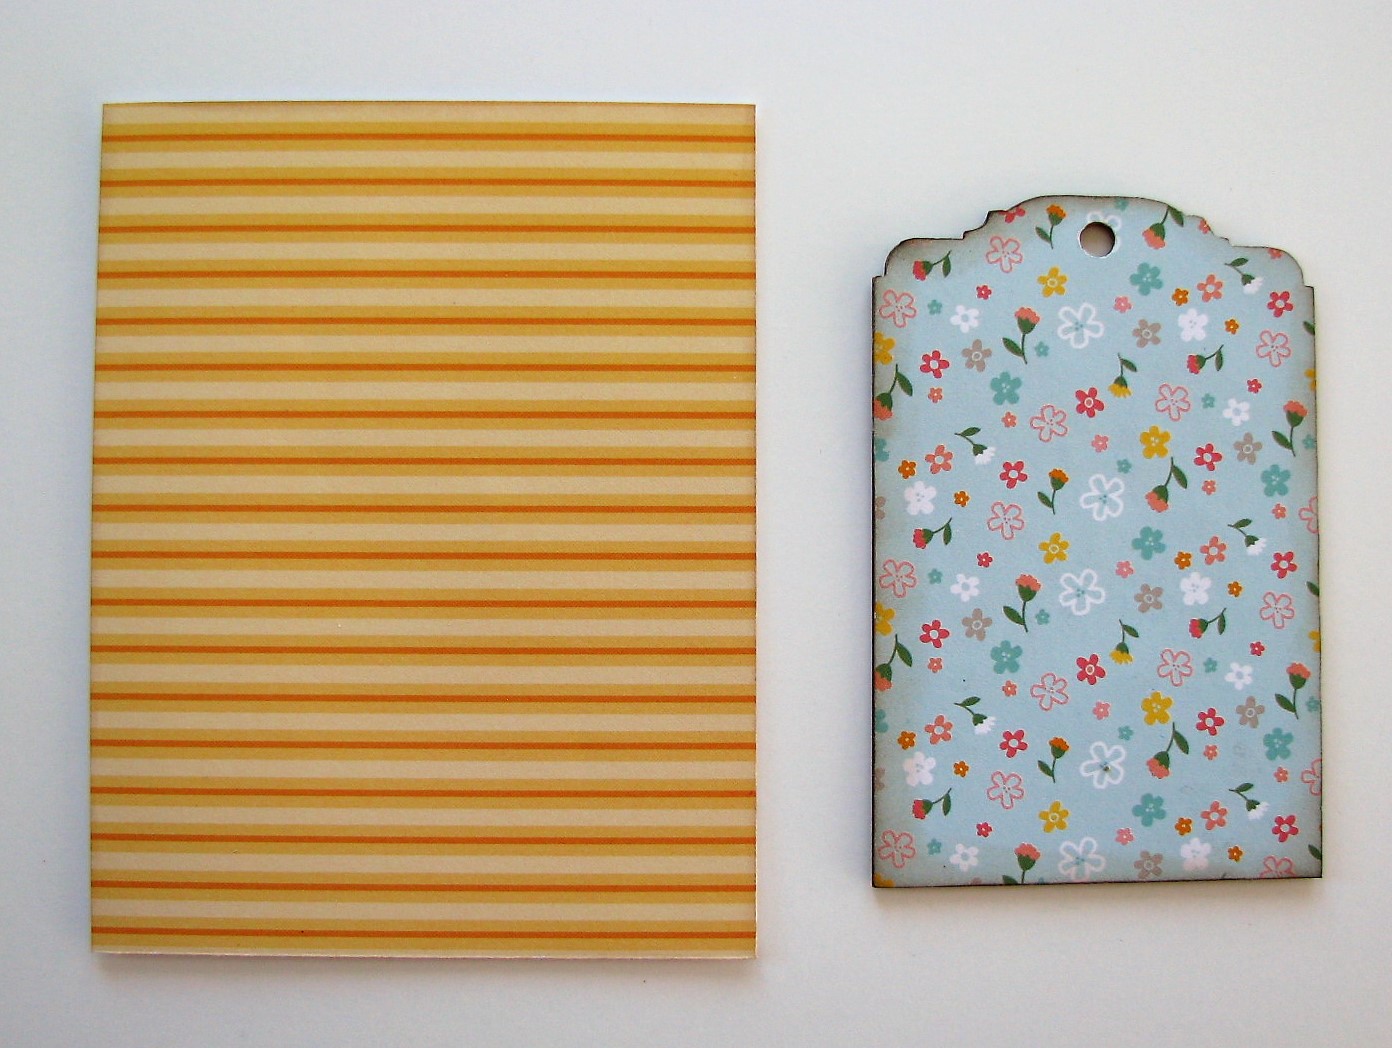
Here's a look at the pieces before I got started. 
The tag measures 4 1/2" x 3".
The Tea Time set has lots of elements. 
I used the "Tea Time" and one cup with saucer.


I made my card base from white cardstock, and covered it with a striped paper.
The I covered the tag with the pretty floral paper.
I added a white ribbon to the top of the tag,
and adhered the tag in place on the card base.


I then inked the chipboard pieces; first with yellow ink, and then with embossing ink.
I sprinkled everything with clear embossing powder, and heat set it.
I added a little piece of doily to the bottom of the tag,
and then adhered the chipboard pieces in place on the tag.


Here you can see how shiny the pieces are
with the floral design showing through nicely!
Finally, I added a few white sequins to the tag.


This would be such a fun card to send to a friend,
inviting her over for tea!

Southern Ridge Trading Company Products Used:


Other Supplies Used:

- American Crafts: Patterned Papers
- Imagine Crafts: Memento Dew Drop - Dandelion Ink
- Embossing Ink
- Clear Embossing Powder
- Heat Gun
- Offray Ribbon

* * * * *
Thanks so much for stopping by today!
I'll be back soon with more creative fun!

* * * * *

Wednesday, February 12, 2020

Sweet Tag with Katelyn Grosart

Hey Southern Ridge Trading Company fans, Katelyn here. Today, I'm thrilled to be sharing with you my Sweet Tag. To create my tag, I've used a variety of our Love themed chipboard pieces. You'll want to read below as I share with you how to recreate my Sweet Tag at home.


To start, you'll need a Chipboard Tag. Ink the edges of the tag using Walnut Stain Distress Ink and a blending tool with foam. 


Trace the chipboard tag around a piece of patterned paper of your choosing. Cut the tag out. Punch a hole at the top of the paper tag. Distress the edges of the paper tag. Ink the edges of the paper tag using Walnut Stain Distress Ink and a blending tool with foam.


You'll need two patterned papers that coordinate with the paper used for the tag. Cut one piece that measures 2 3/4" x 3 3/4" and cut a piece out of the other patterned paper that measures 2 1/2" x 3 1/2". Fussy cut or die cut a frame out of coordinating paper. Distress the edges of the paper. Ink the edges of the papers and frame using Walnut Stain Distress Ink and a blending tool with foam.


From the Corrogated Hearts, you'll need the medium heart. Apply Emboss It Ink to the heart and sprinkle White Satin Pearl Embossing Powder over the entire surface of the heart. Tap off the excess powder and emboss with a heat tool. Ink the edges of the heart using Walnut Stain Distress Ink and a blending tool with foam.


Choose one of the keyholes from the Med Key Holes package. Apply Emboss It Ink to the keyhole and sprinkle Molten Dimensions - White Wonder Embossing Powder over the entire surface of the keyhole. Tap off the excess powder and emboss with a heat tool. 


From the Word Mix #2 package, you'll need the Sweet word. Apply Emboss It Ink to the word and sprinkle Molten Dimensions - White Wonder Embossing Powder over the entire surface of the word. Tap off the excess powder and emboss with a heat tool. 


Next, you'll need the Barbed Wire Heart Frame. Apply two coats of Victorian Velvet Distress Paint to the frame. Once the frame has dried, ink the edges of the frame using Walnut Stain Distress Ink and a blending too with foam.


Apply two coats of Candied Apple Distress Paint to the Jessie Heart. Ink the edges of the heart using Walnut Stain Distress Ink and a blending tool with foam.


From the Love & Hearts package, you'll need two hearts. Apply two coats of Candied Apple Distress Paint to one of the hearts. Apply two coats of Spun Sugar Distress Paint to the other heart. Once the hearts have dried, ink the edges of the hearts using Walnut Stain Distress Ink and a blending tool with foam.


The last thing you'll need is two large white roses, two small white roses, eight red roses, four pink roses and three aqua flowers.


Adhere the paper tag to the chipboard tag. Adhere the 2 1/2" patterned paper piece to the 2 3/4" patterned paper piece. Foam square the 2 3/4" paper to the middle of the paper tag. Adhere the frame to the 2 3/4" paper.


Foam square the large red heart to the middle of the 2 3/4" paper. Adhere the corrogated heart to the middle of the large red heart. Adhere the barbed wire heart frame overtop of the corrogated heart.


Adhere the keyhole to the middle of the barbed wire frame. Adhere the two hearts as desired to the keyhole. Adhere the sweet word to the middle of the hearts.


On the bottom right hand side of the large red heart, adhere one large white roses, two pink roses, four red roses, one aqua rose and two white roses.


On the top left hand side of the barbed wire heart frame, adhere one large white roses, two pink roses, four red roses and two aqua rose.


To finish the tag, tie a bow at the top of the tag using White Seam Binding Ribbon.


Here are a few closeup photos of the finished tag.


Here is the finished Sweet Tag.


Southern Ridge Trading Company Supplies Used:

- Love & Hearts
- 20mm Roses: White
- 15mm Roses: Pink
- 10mm Roses: White, Red and Aqua

Other Supplies Used:

- Emerald Creek Craft Supplies: Molten Dimensions - White Wonder Embossing Powder and White Satin Pearl Embossing Powder
- Tim Holtz for Ranger Ink: Distress Paint - Candied Apple, Spun Sugar & Victorian Velvet, Distress Ink - Walnut Stain and Blending Tool with Foam
- Ranger Ink: Emboss It Dabber
- Mintay Papers: Love Letters Collection
- Misc: White Seam Binding Ribbon

Thanks so much for joining my today!

- Katelyn


Wednesday, January 15, 2020

Love Valentine's Day Card with Nancy Nickel

Hello, everyone!

It's Nancy here today to share a fun Valentine project.
I've made a Glittery Love Valentine card,
using some fabulous chipboard pieces from Southern Ridge Trading Company!

Here's my sparkly card:


Here's what I used to make it:


First I cut the background paper and adhered it to the front of the A2 Card Base.
Then I glued the pink paper to the front of the chipboard tag.
I trimmed around it with my blade, and then inked all the edges.
I looped some red glittery ribbon through the top of the tag,
and then added a ribbon bow.
I added glue to the front of the "Love" and two chipboard hearts.
While the glue was still wet, I sprinkled the red glitter liberally over top.


Once the glue was all dry, I adhered the chipboard tag and hearts in place on the card base.


Here's a close-up look at the "love"-ly word!
You may also notice that there's random glitter .
I forgot to brush off all the loose glitter once it was dry...oops! 
I did that after the photos were taken. 


It's such a pretty combination of products!


Southern Ridge Trading Company Products Used:


Other Supplies Used:

- Papers: Recollections - Cardstock, Bo Bunny - Crazy Love
- Glitter: Glitters Galore - Fire Engine Red
- Glue: Best Glue Ever
- Ribbon: Celebrate It

* * * * *
Thanks so much for stopping by today!
I'll be back soon with more creative fun!

* * * * *

Friday, October 25, 2019

Happy Birthday Gift Tag with Katelyn Grosart

Hey Southern Ridge Trading Company fans, Katelyn here. I'm thrilled to be back on the blog today sharing my Happy Birthday Gift Tag perfect to add to a gift bag or wrapped gift. To create my tag, I've used a variety of our popular fall and everyday chipboard pieces. You'll want to read below as I share with you how to recreate my Happy Birthday Gift Tag at home.


To start, you'll need one Chipboard Tag. Trace the chipboard tag around a fall piece of patterned paper. Cut the paper tag out. Punch the hole at the top of the paper tag. Ink the edges of the paper tag using Vintage Photo Distress Ink and a blending tool with foam.


Next, you'll need five Itty Bitty Maple Leaves.


From the Fall Leaves, you'll need to choose three of the leaves. Apply Emboss It Ink to two of the leaves and sprinkle Baked Texture - Taos Sunset Embossing Powder over each leaf. Tap off the excess powder and emboss with a heat tool. Apply Emboss It Ink to the other leaves and sprinkle Baked Texture - Chunky Rust Embossing Powder over the leaf. Tap off the excess powder and emboss with a heat tool. 


Choose two Tribal Feathers from the Tribal Feather Mix package. Apply Emboss It Ink to one of the leaves and sprinkle Baked Texture - Chunky Rust Embossing Powder over the feather. Tap off the excess powder and emboss with a heat tool. Apply Emboss It Ink to the other feather and sprinkle Forest Foliage Embossing Powder over the feather. Tap off the excess powder and emboss with a heat tool. 


From the Birthday Greetings sentiments, cut out one of the Happy Birthdays. Apply Emboss It Ink to the Happy Birthday sentiment and sprinkle Burnt Copper Embossing Powder over the sentiment. Tap off the excess powder and emboss with a heat tool.  


You'll need the small Abstract Circle Frame from the Abstract Circle Frames. Apply Emboss It Ink to the frame and sprinkle Weathered Wood Embossing Powder over the frame. Tap off the excess powder and emboss with a heat tool.  


The last chipboard piece you'll need is the damask ornament.


Adhere the paper tag to the chipboard tag.


Adhere the abstract circle frame to the damask ornament. Apply foam squares to the left hand side of the damask ornament and adhere to the middle right hand side of the tag.


Adhere one of the Taos Sunset leaves in the top left side of the frame. Adhere the two feathers to the middle of the frame. Adhere the remaining embossed leaves to the bottom right side of the frame.


Adhere the Happy Birthday sentiment to the middle of the circle frame. Adhere the five itty bitty maple leaves around the frame as desired. 


To finish the tag, tie a piece of twine to the top of the tag.


Here are a few closeup photos of the tag.


Here is the finished Happy Birthday Gift Tag.


Southern Ridge Trading Company Supplies Used:

- Damask Ornament

Other Supplies Used:

- Emerald Creek Craft Supplies: Weathered Wood Embossing Powder, Forest Foliage Embossing Powder, Baked Texture - Chunky Rust & Taos Sunset Embossing Powder and Burnt Copper Leaves Embossing Powder
- Prima Marketing Inc.: Autumn Sunset Collection
- Tim Holtz for Ranger Ink: Vintage Photo Distress Ink and a Blending Tool with Foam
- Ranger Ink: Emboss It Dabber
- Misc: Twine

Thanks so much for joining my today!

- Katelyn