Saturday, February 29, 2020

Tea Time Card with Nancy Nickel

Hello, everyone! 
It's Nancy here with a fun new project share!

I've combined the Large Tags
and some pieces from the Tea Time Set.

Here's my card:


My card is an A2 size. 


Here's a look at the pieces before I got started. 
The tag measures 4 1/2" x 3".
The Tea Time set has lots of elements. 
I used the "Tea Time" and one cup with saucer.


I made my card base from white cardstock, and covered it with a striped paper.
The I covered the tag with the pretty floral paper.
I added a white ribbon to the top of the tag,
and adhered the tag in place on the card base.


I then inked the chipboard pieces; first with yellow ink, and then with embossing ink.
I sprinkled everything with clear embossing powder, and heat set it.
I added a little piece of doily to the bottom of the tag,
and then adhered the chipboard pieces in place on the tag.


Here you can see how shiny the pieces are
with the floral design showing through nicely!
Finally, I added a few white sequins to the tag.


This would be such a fun card to send to a friend,
inviting her over for tea!

Southern Ridge Trading Company Products Used:


Other Supplies Used:

- American Crafts: Patterned Papers
- Imagine Crafts: Memento Dew Drop - Dandelion Ink
- Embossing Ink
- Clear Embossing Powder
- Heat Gun
- Offray Ribbon

* * * * *
Thanks so much for stopping by today!
I'll be back soon with more creative fun!

* * * * *

Wednesday, February 26, 2020

Glow, Shine, Radiate Wall Hanging with Katelyn Grosart

Hey Southern Ridge Trading Company fans, Katelyn here. Today, I'm sharing with you my Glow, Shine, Radiate Wall Hanging perfect to add to any place in your home. To create my wall hanging, I've used a variety of our everyday themed chipboard pieces. You'll want to read below as I share with you how to recreate my Glow, Shine, Radiate Wall Hanging at home.


To start, choose two pieces of patterned paper that coordinate together. From the first patterned paper, die cut a 4 1/4" Fitted Fishtails. From the second piece of patterned paper, die cut a 3 3/4" Fitted Fishtails. Distress the edges of the fishtails. Ink the edges of the fishtails using Black Soot Distress Ink and a blending tool with foam.


From the Radiate Word Mix, you'll need the Glow, Shine and Radiate words. Apply a coat of Emboss It Ink to each word. Sprinkle Black Magic Molten Dimensions Embossing Powder over the entire surface of each word. Tap off the excess powder and emboss with a heat tool.


Next, you'll need the Leaf Filagree. Cut one of the filagree in half. Apply two coats of Pine Needles Distress Paint to one of the filagree pieces. Apply two coats of Twisted Citron Distress Paint to the other filagree piece. 


The next piece you'll need is the Oval Arrow Frame. Apply a coat of Emboss It Ink to the frame. Sprinkle White Wonder Molten Dimensions Embossing Powder over the entire surface of the frame. Tap off the excess powder and emboss with a heat tool.


From the Itty Bitty Butterflies, you'll need to take seven out of the package. Apply two coats of Twisted Citron Distress Paint to two of the butterflies. Apply a coat of Art Alchemy Impasto Paint - Wild Iris to two of the butterflies. Apply a coat of Art Alchemy Impasto Paint - Raspberry Pink to three of the butterflies. Ink the edges of the butterflies using Black Soot Distress Ink and a blending tool with foam.


Adhere the 3 3/4" Fitted Fishtail to the 4 1/4" Fitted Fishtail.


Adhere the Oval Arrow frame overtop of the 3 3/4" fitted fishtail.


Adhere the two leaf filagree pieces to the bottom left side of the oval arrow frame as desired.


Adhere the Glow, Shine, Radiate words to the middle inside of the oval arrow frame. The Radiate word will sit slightly on the leaf filagree and on the right side of the frame.


Adhere a pink and lime butterfly to the top right corner of the frame as desired. Adhere the other five butterflies on the left hand side of the frame, placing them in amongst the filagree and frame as desired.


To finish the wall hanging, punch two holes at the top. Tie a piece of twine through each hole to create a hanger.


Here are a few closeup photos of the finished wall hanging.


Here is the finished Glow, Shine, Radiate Wall Hanging.


Southern Ridge Trading Company Supplies Used:


Other Supplies Used:

- Emerald Creek Craft Supplies: Molten Dimensions - Black Magic and White Wonder Embossing Powder
- Elizabeth Craft Designs: Fitted Fishtails
- Tim Holtz for Ranger Ink: Distress Ink - Black Soot, Distress Paint - Twisted Citron & Pine Needles and Blending Tool with Foam
- Ranger Ink: Emboss It Ink
- Prima Marketing: Art Alchemy Impasto Paint - Wild Iris and Raspberry Pink
- Carta Bella: Botanical Garden Collection
- Misc: White Twine

Thanks so much for joining my today!

- Katelyn


Friday, February 21, 2020

Cat Bookmarks with Ruchi

Hello friends!! Ruchi here from Ruchi's Crafeteria and I'm back with my inspirational project.

Today I've created some Bookmarks. Here are they...


I chose some bright colours for my projects. Picked SRTC Cat chipboards and applied different metallic paints on them. 


Did some doodling using my Posca markers on these cute cats :)


Lastly added baker twine and clip charms to my bookmarks and doodled few more dots to complete my projects.


That’s it for today!! Hope you like my today's project. Don’t forget to check SRTC shop for these chipboards and some other awesome designs.

Southern Ridge Trading Company Supplies Used:

6 Cats

Other Supplies Used:

- Posca Markers
- Expressions Craft: Metallic Paints
- Baker Twine and charms are from my stash.

See ya next time.
Till then happy crafting!!
Ruchi


Wednesday, February 19, 2020

XOXO Altered Brush with Karen Jiles


Hi there, 

It’s Karen sharing an XOXO Altered Brush that I created with the Infinity Love Mix and Oval Arrow Frame Chipboard sets.  The chipboard sets were so easy to coordinate with this mixed media project. The colour choices and mediums used were perfect. Take a peek at my tutorial below.


Step 1: Apply 2 coats of white gesso to the 4in. paintbrush and XOXO word and heart arrow chipboard.


Step 2: Tap on some shimmer powders (Green Parade and Volet Brocade) and spray water onto the brush and chipboard. Set the brush and chipboard aside to dry.


Step 3: Adhere flowers, dyed ribbon and chipboard to the brush. Note: I dyed the ribbon using the same shimmer powders to coordinate with the project.


Step 4: Add beaded pins, highlight flowers and tap on some gesso to enhance the overall design.


Step 5: Continue embellishing as desired.

Southern Ridge Trading Company Supplies Used:


Other Supplies Used:

- 4in Paintbrush (Base)
- Nuvo Shimmer Powders (Green Parade, Volet Brocade)
- Flowers
- Beaded Pins
- Dyed Ribbon
- Paintbrush
- Scissors
- Gesso (White)
- Paintbrush
- E6000
- Hot Glue
- Heat Gun

Thanks so much for visiting today!


Saturday, February 15, 2020

Masculine Happy Birthday Card with Nancy Nickel

Hello, everyone! It's Nancy back with you today.
I have made a Masculine Birthday card, using a fun glitter design technique,along with some fabulous chipboard pieces from Southern Ridge Trading Company!
Here's the card I made: 


I'm afraid I don't have any process photos for you.
It's sometimes hard enough to get regular photos this time of year
but getting good photos of all this glitter was even more difficult. ;o)
This is a fun technique that I've been wanting to try for ages,
so I'll walk you through it.


I began by making an A2 tent-fold card from black cardstock.
I then cut a piece of sticker paper at 4" x 5 1/4".
I peeled back the protective layer from the sticker paper,
and adhered the stencil in place.
I thought this stencil was perfect for a masculine birthday card,
as it's all full of gears and numbers.


Once the stencil was securely in place,
I generously sprinkled it with the blue glitter.
Using my fingers, I burnished it all very well,
then gave it a really thorough brushing with the glitter brush.
Then I peeled off the stencil,
and generously sprinkled it with the silver glitter.
I repeated the burnishing and brushing,
and was left with a fabulous glittered design!
It's so fun and easy, and I think it's very effective!


Next, I took my chipboard "Happy Birthday"
and inked it up with embossing ink.
I sprinkled it with black embossing powder,
and heat set it.
Now the words are so dark and shiny!


To finish off the card,
I adhered the glittered piece onto the card base with foam tape.
Then I adhered the chipboard in place on the card front.


I can't wait to try this technique with another stencil!
It's so much fun to do!

* * * * * 

Southern Ridge Trading Company Products Used:


Other Supplies Used:

- Papers: Recollections - Cardstock
- Sticker Paper
- Glitter: Glitters Galore - Blue Jewel, Reflection
- Glitter Brush
- Stencil: Carabelle Studio
- ScraPerfect - Best Glue Ever, Perfect Cleaning Cloth
 - Embossing Powder: Glitters Galore - Black Detail
- Embossing Ink: Stampendous

* * * * *
Thanks so much for stopping by today!
I'll be back soon with more creative fun!

Wednesday, February 12, 2020

Sweet Tag with Katelyn Grosart

Hey Southern Ridge Trading Company fans, Katelyn here. Today, I'm thrilled to be sharing with you my Sweet Tag. To create my tag, I've used a variety of our Love themed chipboard pieces. You'll want to read below as I share with you how to recreate my Sweet Tag at home.


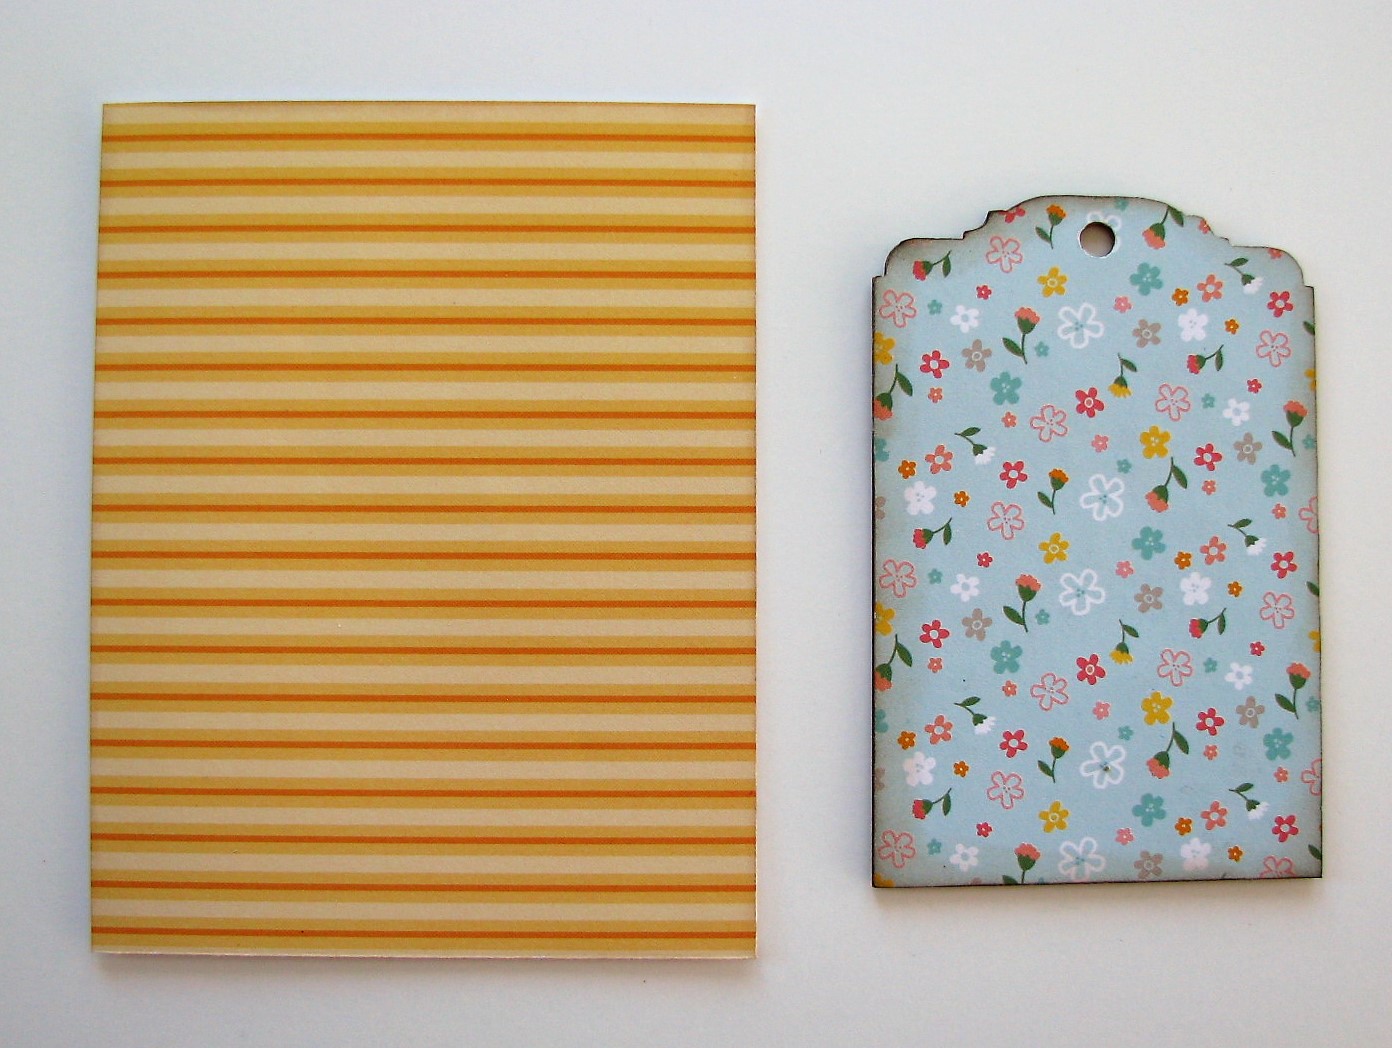
To start, you'll need a Chipboard Tag. Ink the edges of the tag using Walnut Stain Distress Ink and a blending tool with foam. 


Trace the chipboard tag around a piece of patterned paper of your choosing. Cut the tag out. Punch a hole at the top of the paper tag. Distress the edges of the paper tag. Ink the edges of the paper tag using Walnut Stain Distress Ink and a blending tool with foam.


You'll need two patterned papers that coordinate with the paper used for the tag. Cut one piece that measures 2 3/4" x 3 3/4" and cut a piece out of the other patterned paper that measures 2 1/2" x 3 1/2". Fussy cut or die cut a frame out of coordinating paper. Distress the edges of the paper. Ink the edges of the papers and frame using Walnut Stain Distress Ink and a blending tool with foam.


From the Corrogated Hearts, you'll need the medium heart. Apply Emboss It Ink to the heart and sprinkle White Satin Pearl Embossing Powder over the entire surface of the heart. Tap off the excess powder and emboss with a heat tool. Ink the edges of the heart using Walnut Stain Distress Ink and a blending tool with foam.


Choose one of the keyholes from the Med Key Holes package. Apply Emboss It Ink to the keyhole and sprinkle Molten Dimensions - White Wonder Embossing Powder over the entire surface of the keyhole. Tap off the excess powder and emboss with a heat tool. 


From the Word Mix #2 package, you'll need the Sweet word. Apply Emboss It Ink to the word and sprinkle Molten Dimensions - White Wonder Embossing Powder over the entire surface of the word. Tap off the excess powder and emboss with a heat tool. 


Next, you'll need the Barbed Wire Heart Frame. Apply two coats of Victorian Velvet Distress Paint to the frame. Once the frame has dried, ink the edges of the frame using Walnut Stain Distress Ink and a blending too with foam.


Apply two coats of Candied Apple Distress Paint to the Jessie Heart. Ink the edges of the heart using Walnut Stain Distress Ink and a blending tool with foam.


From the Love & Hearts package, you'll need two hearts. Apply two coats of Candied Apple Distress Paint to one of the hearts. Apply two coats of Spun Sugar Distress Paint to the other heart. Once the hearts have dried, ink the edges of the hearts using Walnut Stain Distress Ink and a blending tool with foam.


The last thing you'll need is two large white roses, two small white roses, eight red roses, four pink roses and three aqua flowers.


Adhere the paper tag to the chipboard tag. Adhere the 2 1/2" patterned paper piece to the 2 3/4" patterned paper piece. Foam square the 2 3/4" paper to the middle of the paper tag. Adhere the frame to the 2 3/4" paper.


Foam square the large red heart to the middle of the 2 3/4" paper. Adhere the corrogated heart to the middle of the large red heart. Adhere the barbed wire heart frame overtop of the corrogated heart.


Adhere the keyhole to the middle of the barbed wire frame. Adhere the two hearts as desired to the keyhole. Adhere the sweet word to the middle of the hearts.


On the bottom right hand side of the large red heart, adhere one large white roses, two pink roses, four red roses, one aqua rose and two white roses.


On the top left hand side of the barbed wire heart frame, adhere one large white roses, two pink roses, four red roses and two aqua rose.


To finish the tag, tie a bow at the top of the tag using White Seam Binding Ribbon.


Here are a few closeup photos of the finished tag.


Here is the finished Sweet Tag.


Southern Ridge Trading Company Supplies Used:

- Love & Hearts
- 20mm Roses: White
- 15mm Roses: Pink
- 10mm Roses: White, Red and Aqua

Other Supplies Used:

- Emerald Creek Craft Supplies: Molten Dimensions - White Wonder Embossing Powder and White Satin Pearl Embossing Powder
- Tim Holtz for Ranger Ink: Distress Paint - Candied Apple, Spun Sugar & Victorian Velvet, Distress Ink - Walnut Stain and Blending Tool with Foam
- Ranger Ink: Emboss It Dabber
- Mintay Papers: Love Letters Collection
- Misc: White Seam Binding Ribbon

Thanks so much for joining my today!

- Katelyn