Monday, June 27, 2016

Live, Love & Enjoy Life Always! with Charlene Byrd

Hello everyone!


Thanks for joining me on the blog! Today’s layout is fun, simple and captures the contagious smile on my friends face. The title says it all “Live, Love & Enjoy Life Always’! Anytime we are around my husband’s childhood friend Paul, all we do is laugh! I love his laugh and I love that this picture and layout captures that!


To create the chipboard gear clock I painted on Black Gesso. You could also use any black acrylic paint. Apply as many coats as needed to give you a solid coverage. I then added VersaMark and a thick layer of clear Ultra Thick Embossing Powder and heat set it.

I added Tim Holtz Black Soot Distress Stain to the honeycomb chipboard. I like the stain better than paint for this as I find the paint settles in the crevasses where I don’t want extra paint. A paint dauber would work well too.


Southern Ridge Chipboard Used:


Other Products Used:

- Black Gesso
- Tsukineko/Imagine Crafts: VersaMark
- Ranger Ink: UTEE
- Ranger Ink/Tim Holtz: Black Soot Distress ink
-My Mind’s Eye: Pattern Paper, Brads and Diecuts
- Dictionary paper for the flowers
- Pins
- Seam Binding Ribbon
- Metal Smile charm
- Black string
- Honeycomb stamp
- Black ink

Remember to play along in the monthly challenge over on the 
Southern Ridge Trading Company blogEach month enter for your chance to win 4 designs from the online store - chipboard.ca -$20 (before tax) retail value of YOUR OWN CHOOSING! 

Thanks for joining me,
Happy Creating!

Charlene

Friday, June 24, 2016

Media Board with Katelyn Grosart

Hey Southern Ridge Trading Company fans, Katelyn here, and I'm back on the blog today to share with you some more inspiration for our current monthly challenge which is "Anything Masculine". There is still seven days to participate in our challenge and we would love to see your projects. With this month's challenge in mind, I created a masculine Memories canvas featuring a variety of chipboard pieces along with one of the brand new stencils that were just released. I will show you below how I transformed my chipboard pieces into grungy masculine masterpieces.


To start, apply VersaMark Ink to the edges of the 9" x 12" media board. Once the ink has been applied, sprinkle Burnt Copper Leaves Embossing Powder around the edges and tap off excess. After all four edges have been covered, emboss with a heat tool. Set aside to cool down.


After the media board edges have been embossed, cut one piece of patterned paper to 8 3/4" x 11 3/4" and a second piece of patterned paper to 8 1/2" x 11 1/2". Set the 8 3/4" patterned piece aside.
 Using the fence stencil, apply texture paste through it, in the top left and bottom right hand corners of the 8 1/2" patterned paper. Once the texture paste has slightly dried, spray Worn Leather Colour Bloom, Perfect Pearls Mist and Dylusions Vibrant Turquoise spray randomly on the patterned paper with the texture paste. Set aside to dry. 


Once the background piece is finished, it's time to move on to the chipboard pieces. The first set of chipboard pieces that you'll need are the Fence Pattern and the Med. Gears. When it comes to the fence pattern you'll need 5 pieces, randomly cut them apart, so that it gives interested behind your other papers and chipboard layers. You'll need to choose two gears from the Med. Gears package.  Once you have the fence pattern pieces and the gears in front of you, paint each piece with Vintage Photo Distress Paint. Once the paint is dry, apply a layer of VersaMark to each piece and then sprinkle Burnt Copper Leaves Embossing Powder overtop, tap off excess. Don't worry if the pieces aren't entirely covered. Heat emboss the pieces with a heat tool.


The second set of chipboard pieces that you'll work with are the Chain Frames, you'll need the large and small chain frames out of the set.  Cover each piece with a coat of Vintage Photo Distress Paint. Once the paint is dry, cover each chain frame in a layer of VersaMark. After the VersaMark has been applied, sprinkle a layer of Metal Hammered Embossing Powder over top and tap off excess. It's fine if the pieces aren't completely covered. Heat emboss the chains with a heat tool.


The last set of chipboard pieces that you'll work with are the Memories Word and one of the Med. Gears. Cover each chipboard piece in a layer of Walnut Stain Distress Paint. Once the paint has dried, cover each piece in a layer of VersaMark Ink. After the pieces have been inked, sprinkle a layer of Metal Hammered embossing powder onto them and tap off excess. Don't worry if the pieces aren't completely covered with embossing powder. Heat emboss the pieces with a heat tool.


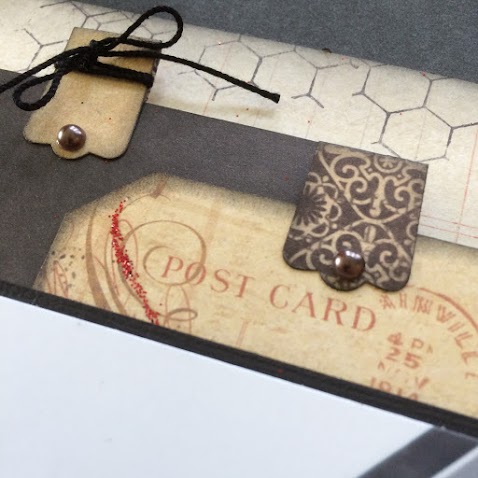
Before adhering the top piece of patterned paper that has the stenciling done on it, make sure to ink the edges of both patterned pieces with Vintage Photo Distress Ink. Before adhering the stenciled pattern paper piece to the media board, adhere one brown gear in the bottom right hand corner and the second brown gear in the top left hand corner over top of the 8 3/4" piece of patterned paper. Once the gears have been adhered, adhere the stenciled patterned paper over top, make sure to roll the bottom right and top left hand corners so that the gears show.


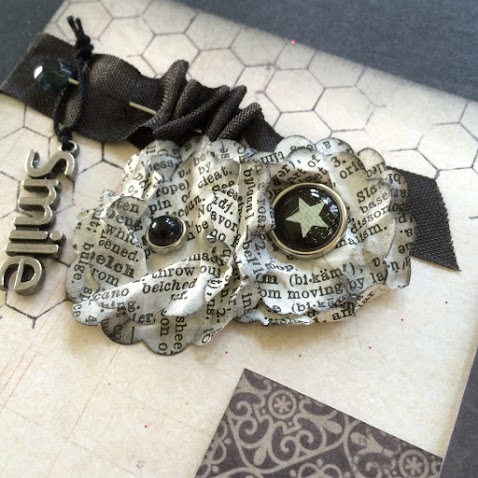
To finish the piece, adhere the fence pattern 1/2" in from the edge of the stenciled patterned paper. in the bottom right hand corner you will end up with none and that's fine. Once the fence pattern has been adhered, then you can add your third paper layer which is a 4" x 6" and a  4 1/4" x 6 1/4" piece of patterned paper. After the last set of patterned pieces have been adhered, add the large chain frame around the photo and the small chain frame to the bottom right of it. To finish the inside of the chain, add the third gear with the black and silver embossing powder on it to the centre of the small chain frame. Add the Memories word to the bottom left. To add some extra detail,  add some charms and flowers to the top left and bottom right hand corners.


Southern Ridge Trading Company Products Used:

- Fence Stencil
- 15mm Brown & Black Roses
- 10mm Brown Roses

Other Products Used:

- Emerald Creek Craft Supplies: Hammered Metal & Burnt Copper Leaves Embossing Powder, Lightbulb & Pocket Watch Charms
- Prima Marketing: Colour Bloom Spray - Worn Leather
- Ranger Ink: Texture Paste & Perfect Pearls Mist - Perfect Pearls
- Ranger Ink/Dina Wakley: Palette Knife & 9"x12" Media Boards
- Ranger Ink/Dylusions: Vibrant Turquoise Ink Spray
- Ranger Ink/Tim Holtz: Vintage Photo & Walnut Stain Distress Paint & Vintage Photo Distress Ink
- Tsukineko/Imagine Crafts: VersaMark
- Tim Holtz Ideaology: Found Relatives
- 7 Dots Studio: Fortune Teller, Charted, Tarot & Sunny


Remember to play along in the monthly challenge over on the 
Southern Ridge Trading Company blogEach month enter for your chance to win 4 designs from the online store - chipboard.ca -$20 (before tax) retail value of YOUR OWN CHOOSING! 

Until Next Time!


-Katelyn

Wednesday, June 22, 2016

Love Album Cover with Ava Gavloski

Ava here to welcome you to another inspirational post at  Southern Ridge Trading Co.
My son Andrew, is returning home from an 8 month contract working in Asia and as soon as I saw the Fish net/Miniature ocean set of chippies I knew this would reflect the ambience of memories.


Here are the steps to my Mixed Media composition.

Start with layering the different paper and burlap elements onto the front cover of the album.

Take the Fish Net Pattern chipboard and select a design to trim from the main template. Once I was happy with the layered design, I moved everything off the album and started prepping the elements.

Place your chipboard pieces into a misting cardboard unit and mist both the net and star fish from the mini ocean set.  I sprayed Tatter Angels glimmer mist from Canvas Corp Brands onto the chipboard pieces.  The glimmer really pop's the fine detail cuts from these chipboard pieces.


While the chipboard was drying, I sprayed Tatter Angels mist onto the front cover or my album along with a layer of co-orgated paper.  Allowing that to dry.


Time to layer all the elements onto the album using Gel Medium with a sprinkle of a mixture of shells, beads, cheese cloth and sequence's.


Once all dried, I adhered some pearl ribbon and  splashed some glimmer mist from the bottle spray tube onto the front cover.


I hope this composition inspires you to take wonderful photo's from your oceanside time and create with these fine detailed chipboard pieces.


Southern Ridge Trading Company Chipboard Used:


Other Supplies Used:

Michaels Arts & Crafts:  Recollections Mixed Media Collage, burlap
Michaels Recollections: Mix Media Album
Canvas Corp Brands: Tattered Angel Glimmer Mist,  Nautical Sayings on Ivory Cardstock

Remember to play along in the monthly challenge over on the Southern Ridge Trading Company blogEach month enter for your chance to win 4 designs from the online store - chipboard.ca -$20 (before tax) retail value of YOUR OWN CHOOSING! 

Thanks for stopping in to see my creation.  
-Ava


Friday, June 17, 2016

You're A Keeper Canvas with Deb Riddell

Hello, Deb here again to share another project for our June challenge, Anything Masculine.  With summer soon to be upon us I decided to make a fishing themed reverse canvas, using Southern Ridge Trading Company’s Fish 1 and Cattail Bushes chipboard pieces.


I’ve a few step by step photos to show you how I made it, read on for the how to!

I started out with a 6” x 8” stretched artist’s canvas and covered it front and back with a coat of gesso and then painted the inner recess on the back of the canvas with a couple of shades of blue acrylic paint and added some ‘rings’ on the surface of the water with a Dylusions white paint pen.


I then covered the edges of the reverse canvas with scrapbooking paper that had a fish motif (from an ancient Provo Craft ‘Fish All Day’ Scrap Pad that I had in my stash) and stamped some marsh grass here and there using Potting Soil Archival ink and a stamp from Artistic Outpost’s Keeper stamp set.

The Fish 1 chipboard piece was coloured with Distress Crayons (I used Peeled Paint, Twisted Citron, Picked Raspberry, Squeezed Lemonade and Picket Fence) and then I embossed the belly of the trout with some Emerald Creek Craft Supplies Iridescent Shimmer embossing powder.


The Cattail Bushes chipboard pieces were also both coloured with Distress Crayons; Peeled Paint, Twisted Citron, Vintage Photo and Walnut Ink.

I then stamped more images from the Artistic Outpost Keeper stamp set, using either Vintage Photo Distress ink or Potting Soil Archival ink onto cardstock, and clear embossed the stamped images.  The stamp of the young fellow holding his prize catch was water coloured with Distress markers as was the fish from the same stamp set.


The fishing lure, ruler and sentiment were stamped onto cardstock coloured with Old Paper Distress paint and then the sentiment was die cut with a Sizzix Ornate Labels #3 die.  All of the stamped images were edged with Vintage Photo Distress ink after being fussy cut or die cut.

And then it was time to assemble the reverse canvas.  The cattail bushes were glued in place with E6000 glue and the fish was glued over top of the cattails with a couple of pieces of black fun foam underneath to give some dimension. You can see that I also stamped a few dragonflies here and there on the painted background, using a stamp from an old Crafty Secrets Wildflowers stamp set I had in my stash and Potting Soil Archival ink.


I love the sparkle from the Iridescent Shimmer embossing powder, it really looks like the belly of a trout as it flashes in the sun!

To add a bit more interest to the stamped photograph of the young man holding his prize catch, I mounted the stamped fish on some tiny pieces of black fun foam and adhered it overtop of the fish in the photo.


Both the stamped photograph and the die cut sentiment were mounted onto some thin chipboard packaging to give them stability before adhering them to the frame of the reverse canvas.

The fishing lure and ruler were given a bit more presence on the edges of the reverse canvas by elevating them slightly with pieces of black fun foam.


And that completes my reverse canvas, I had a lot of fun making this and hope that you have enjoyed this quick little tutorial.


Although I’ve made this for our Anything Masculine challenge, I think any fisher person would enjoy receiving it as a gift and you could substitute a real photograph of your fisherman or fisherwoman in place of the stamped photo that I used.

Southern Ridge Trading Company Chipboard Used:


Other Supplies Used:

- 6" x 8" Artist's Canvas
- Gesso 
- Acrylic Paint
- Paint Brush
- Ranger Ink/ Dylusions: Dylusions White Paint Pen
- Ranger Ink: Clear Embossing Pen & Glue 'n Seal
- Ranger Ink/ Tim Holtz: Distress Crayons, Distress Ink, Distress Markers, Distress Paint & Distress Collage Medium
- Provo Craft: Fish All Day Scrap Pad
- Emerald Creek Craft Supplies: Iridescent Shimmer Embossing Powder
- Heat gun
- Water brush
- Artistic Outpost: Keeper stamp set
- Crafty Secrets: Wildflowers stamp set
- Sizzix: Ornate Label #3 die & Big Shot
- Scissors
- White Cardstock
- Chipboard packaging
- Black fun foam
- E6000 glue

Thanks so much for stopping by today and I hope that you have been inspired to join in our Anything Masculine challenge.  You have a chance to win 4 designs from the online store - chipboard.ca - a $20.00 (before tax) retail value OF YOUR OWN CHOOSING!  Have fun, I can’t wait to see what you create!

Deb xo


Wednesday, June 15, 2016

Playing with Foil and Chipboard with Karen Bearse

First of all in the wake of the horrendous, shooting tragedy in Orlando, FL I would just like to say my heart goes out to the victims and family members whose lives are forever changed. May you find strength and peace in the days to come.

Karen Bearse here with a tutorial on how to play with foil on chipboard. I am working on an art journal project and wanted a page in my book about my love of all things coffee. One of the things I like to do when art journaling is add in current favourites like food, entertainment, travel. It is a different way to highlight my current life and likes. Here is what I ended up with.


Inspired by the awesome “every day is coffee day” chipboard piece I decided to make an art
journal page showing both my love for coffee and my like of the TV show Dr. Who. I have to say my original intent was very different but this page fought me every step of the way and the idea had to be completely reworked. Still I really like the result, however I would add the coffee bean chippies if I had them. So grabba cup of Joe and let’s go!


Here is what I pulled out to play with to start. My art journal page was done on a piece of mix media cardstock, holes punched using a cinch. This helps to remind me to keep my ephemera away from where the binding will go.


My background was spritzed with Glimmer Mist to get a nice colour down. Once the page is dry use a hard piece of foam to apply deco foil adhesive in streaks down the page. This adhesive is especially made to work with foils. I did the same application on my coffee cup, covering the entire surface area except where my photo was going to go. Set aside to dry for the recommended 1-2 hours. The glue will feel super sticky when ready to go.


Here is the fun part! Simply put a piece of decofoil down, colour side facing up & rub using your finger, a popsicle stick or the side of an old gift card depending on how smooth or sketchy you want the foil to go on. Feel free to use different colours or a multi-colour piece of foil. The great thing about this technique of foiling is you can see your results as you are creating and can add or subtract the colours. If you want a different colour simply apply more glue and redo that section. If you miss a spot just put the foil back down and re-rub.


I decided to do rainbow for the coffee cup & words “coffee day” & for “everyday” used pewter. The word “is” kind of got a bit of both. Using stamps with sticky embossing powder allowed me to foil the coffee rings. I then adhered the cool, coffee cup photo. Here is where I ran into trouble. When the chipboard piece was put on the background the words got lost. I tried multiple effects behind the words to help them pop and ended up with a big mess. My final solution was to add a pocket with coffee ring scrapbook paper. The neutral colour works great behind the words. It helped solve my problem and gave me a tuck spot for a tag to journal on. Phew. Adding sewing around the edges adds texture. To finish, the page edges were distressed and a few coffee beans were stamped in… you guessed it “ground espresso” distress ink. Sadly the other elements I wanted to add just didn’t work, again I wish I had those beans! The end result is a super shiny glimmer page that changes brilliance when the light hits it. Happy Crafting!

Southern Ridge Chippies:

- Coffee Beans  (recommended)

Other Supplies:

- Decofoil, Decofoil adhesive by Thermoweb
- Glimmer Mist by Tattered Angels
- Paper by Moxxie
- Stamps by darkroom door
- Espresso distress ink & glossy accents by Ranger

Remember to play along in the monthly challenge over on the Southern Ridge Trading Company blogEach month enter for your chance to win 4 designs from the online store - chipboard.ca -$20 (before tax) retail value of YOUR OWN CHOOSING! 

- Karen


Monday, June 13, 2016

Let the Adventure Begin Layout with Charlene Byrd

Hello Everyone!


Thank you for checking out my first design for Southern Ridge Trading Company. I’m so excited to be a part of the team! I am the mom to 2 teenage boys so I knew creating a masculine page for the challenge would be right up my alley! My oldest son Hunter aced his driver’s road test on his first try with 100%! So now he can drive the roads all by himself, which is why I titled my layout ‘Let the Adventure Begin’.


To begin creating the layout I first used a honeycomb stamp and randomly stamped around the edges of the paper.


I then added some Light Modeling paste with a gear stencil. I like to use an old gift card to apply my paste. This allows me to evenly apply the modeling paste and scrap off the excess.


Then a boy layout just wouldn’t be complete without a bit of distressing! I love Ranger’s edge distressor for this!


To create the Adventure title I simply stained the chipboard with Tim Holtz Walnut Distress Stain. I then added VersaMark and ultra thick embossing powder. I didn’t want a heavy coat of UTEE so I gently brushed off some powder with my finger before heat setting.


To create the chains and the gear I used Tim Holtz metallic paints. I simply dabbed the 3 colours onto the chipboard until I was happy with the coverage. I then rubbed Tim Holtz Walnut Distress ink over the top of the chipboard to blend it all together.

Southern Ridge Chipboard Used:


Other Products Used:

-Light Modelling Paste
-Stencil
-Tim Holtz Walnut Distress ink
-Tim Holtz Walnut Distress stain
-Tim Holtz Distress Metallic Paint
-VersaMark
-UTEE
-Basic Grey pattern paper, sticker letters and diecut pieces
-Prima Marketing metal embellishments
-Tim Holtz key
-Washi tape
-Honeycomb stamp
-Black ink
-Ranger Edge Distresser

Remember to play along in the monthly challenge over on the Southern Ridge Trading Company blogEach month enter for your chance to win 4 designs from the online store - chipboard.ca -$20 (before tax) retail value of YOUR OWN CHOOSING! 

Thanks for joining me,
Happy Creating!

Charlene