Saturday, June 29, 2019

Celebrate Mixed Media Tag with Karen Jiles

Hi there,


It’s Karen sharing a Celebrate Mixed Media Tag that I created with the Star Stencil and Corrugated Stars. I loved these products together. The Star stencil is a versatile stencil to use for various occasions and the corrugated stars added great texture. Take a look at how this tag came together in the tutorial below.


Step 1: Lay Star Stencil on top of manila tag. Transfer Star Stencil pattern onto tag using a foam tool and distress Ink.


Step 2: Using E6000, adhere ribbon to the back of each side of the manila tag.


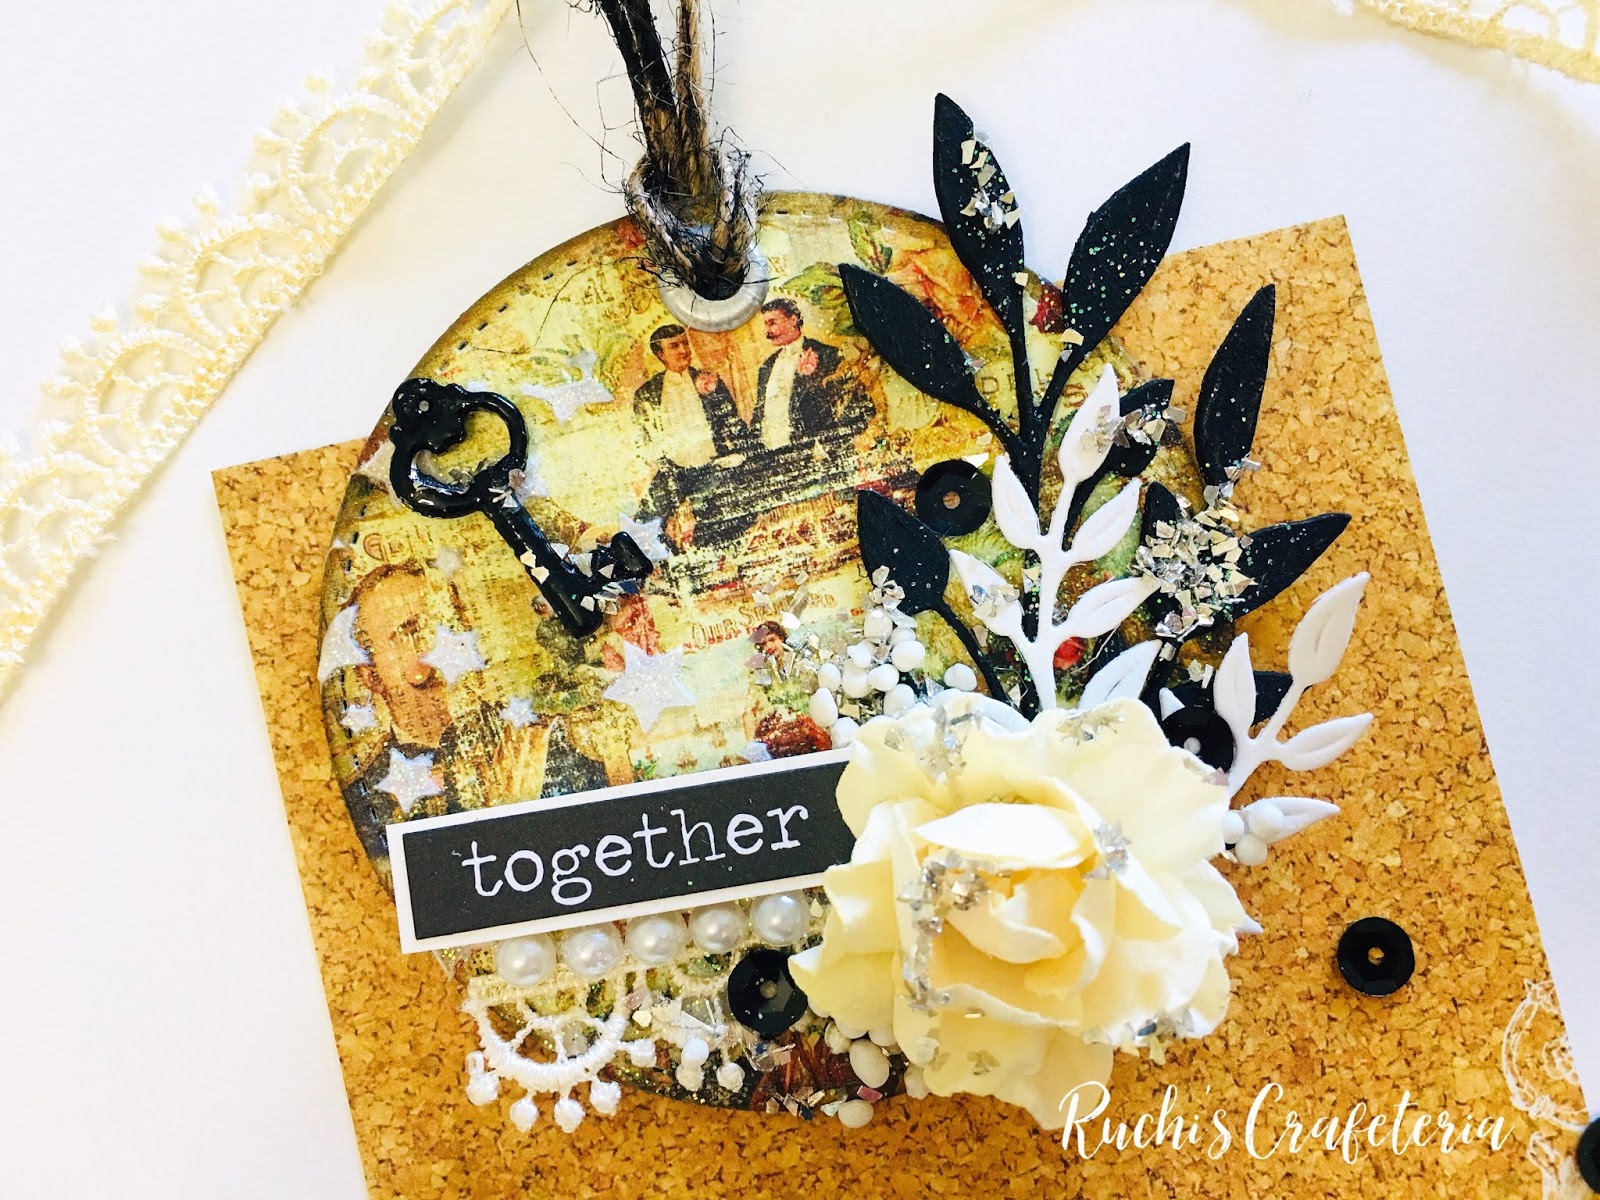
Step 3: Adhere large star charm to tag and adhere corrugated star on top of the star charm.
Step 4: Adhere flowers, leaves, additional star charms and corrugated stars.
Step 5: Add sentiment, hemp, bow, crystal gems and pin.
Step 6: Tap on gesso using paint brush to enhance the overall design.
Step 7: Continue embellishing as desired.
Southern Ridge Trading Company Supplies Used:


Other Supplies Used:

- Manila Tag
- Foam Tool
- Tim Holtz for Ranger Ink: Distress Ink - Chipped Sapphire and Festive Berries
- Hemp
- Flowers
- Crystal Gems & Pin
- Metal Charms
- Ribbon
- Celebrate Sentiment Die Cut
- Gesso (White)
- Scissors
- Paintbrush
- E6000
- Heat Tool
- Trimmer

This tag was so much fun. It gave me an opportunity to use so many fun mixed media elements. The corrugated stars provided just the right amount of texture and the star stencil tied the Celebratory theme together well. 
Thanks so much for stopping by today.
Karen

Monday, June 24, 2019

Mandala Coasters and Bookmarks with Ruchi

Hello friends!! Ruchi here from Ruchi's Crafeteria and I'm back with my inspirational project.

Today I've created some Mandala Coasters and Bookmarks. Here are they..


I chose some bright colours for my projects. Picked SRTC Mini Wood Art Canvas and Butterfly Mix chipboards and applied different metallic paints on them. 


I created some mandala using my Posca markers on these SRTC wood canvases.


Lastly added baker twine and butterfly charms to my bookmarks and doodled few more dots to complete my projects.


That’s it for today!! Hope you like my today's project. Don’t forget to check SRTC shop for these chipboards and some other awesome designs.

Southern Ridge Trading Company Supplies Used:

- Mini Wood Art Canvas

Other Supplies Used:

- Posca Markers
- Expressions Craft: Metallic Paints
- Bakers Twine and charms are from my stash.

See ya next time.
Till then happy crafting!!
Ruchi


Friday, June 21, 2019

Beach Themed Scrapbook Layout with Gloria Lee

Hello crafty friends!
Happy Friday!!!

Gloria here today and happy to share of my project.
 I made a scrapbooking layout using Ocean Mix, Chain Anchor, Word Mix #2 chipboard die cut and Fish Net Stencil from Southern Ridge Trading Company Shop.

I made a 12' x 12' layout with a photo from a beach.


First, I choose Ocean MixChain Anchor, Word Mix #2 chipboard die cut and coloured them with colourful paints. 


I blended on the base paper with Fish Net Stencil using a peacock feathers Distress Oxide ink and a mini blending tool.


I got the pieces together and adhere them all using double-sided tape and glue.   


Southern Ridge Trading Company Supplies Used:


Thank you so much for stopping by and have a wonderful weekend!
Happy crafting!

- Gloria

Wednesday, June 12, 2019

Liberty Mixed Media Canvas with Pam Bray


Hi Pam here today sharing a fun and super easy mixed media canvas using a bit of Authentique Liberty paper, DecoArt Media paint, Dynasty Brushes, a 5" x 7" canvas along with Southern Ridge Trading Company Chipboard elements. 


Begin by painting the canvas with paint; creating details with paint and brushes: dry.  Spatter with paint; dry. 


Trim a bit off of the  Southern Ridge Trading Company Spring Fresh Swirl Corners adhere to front of prepared canvas. Add stickers and enamel dots. Punch 2 holes at to of canvas. 


Adhere Southern Ridge Trading Company Star Wreath to front of prepared canvas. Add stickers to canvas.


Finish canvas with fussy cut images from the pattern paper; layer on prepared canvas with pop dots. Add gemstones to tires along with metal stars. 


Add wire hanger and bow.

Southern Ridge Trading Company Supplies Used:


Other Supplies Used:

- DecoArt Media Paints: Burnt Umber, Primary Cyan, Cerulean Blue, Cadmium Red Hue, Titan Buff and Burnt Sienna
- Authentique: Liberty Details Sheet and Libber Right Pattern Paper
- 5" x 7" Canvas
- Metal Stars and Wire
- Gold Ribbon
- Hot Glue Gun and Glue Sticks

Thank you for stopping by today! Enjoy Pam


Monday, June 10, 2019

Mixed Media ATC Coin Tags with Ruchi

Hello friends!! Ruchi here from Ruchi's Crafeteria and I'm back with my inspirational project.

Today I’ve created some Mixed Media ATC Coin Tags. Here it is.. 


I chose some vintage colours for my tags. I’ve die cut some circles using cardboards and Prima paper in different sizes and glued them together. Distressed the edges using Walnut Stain distress ink.


I've picked SRTC Tribal Feather Mix and Foliage Leaf Branch chipboards and applied Prima black gesso all over them.


I've arranged all the elements together and layered them on my coin tags. Used Tacky Glue for that.


Lastly added some black sequins and sparkly glitter powder to give my ATC Coin Tags finishing touch.


I've captured all the making process of these tags in a video. You can watch the step by step tutorial on my YouTube channel. Enjoy watching!!


That’s it for today!! Hope you like my today's project. Don’t forget to check SRTC shop for these chipboards, stencils and some other awesome designs.

Southern Ridge Trading Company Supplies Used:


Other Supplies Used:


- Prima Marketing: Heavy Gesso Black, Patterned Paper, Modeling Paste and Art Stones
- Ranger Ink: Black Embossing Powder
- Imagine Crafts: Versamark Ink
- Tim Holtz Ideaology: Big Chat Stickers
- Finnabair glass glitter
- Tim Holtz for Ranger Ink: Walnut Stain Distress Ink
- WRMK Crop-A-Dile tool
- Expressions Craft Sprinkle Glitz
- Lace, pearls, sequins, metal charms, button, leaves die cuts, twine are from my stash.


See ya next time.

Till then happy crafting!!

Ruchi


Friday, June 7, 2019

Love Layout with Gloria Lee

Hello crafty friends!
Happy Friday!!!

Gloria here today and happy to share of my project.
 I made a scrapbooking layout using Swirl Corners #2 , Sm. Primitive Stars and Love word chipboard die cut from Southern Ridge Trading Company Shop.

I made a 12' x 12' layout with a photo of my first son.


I choose a designer paper from Painted Fancy by Recollections.
I die cut a green, yellow, light pink and a designer paper using Die-namics hexagon die from My Favorite Things.
And I adhere the die cut on the base paper using double-sided tape.


I choose Swirl Corners #2 and  Sm. Primitive Stars  chipboard and coloured them each with white and green colour paints.


Here are a few step outs showing how I got my pieces together and adhere them all using double-sided tape and glue.   


I added the green stars and a red flower. 
I used a crystal sparklet by Kaiser craft on the red flower.


Southern Ridge Trading Company Supplies Used:


Thank you so much for stopping by and have a wonderful weekend!
Happy crafting!

- Gloria

Monday, June 3, 2019

Father's Day Gift Idea with Karla Yungwirth

Hello friends! It’s Karla here today with a Father’s Day gift idea for you using the Southern Ridge Trading Company Vintage Truck and Nuts and Bolts Chipboard along with the Medium size Multi Gear Stencil. My husband recently found this photo of his grandpa and shared it with me. I thought it would be a great photo to print off and present to him for Father’s Day! His grandpa was an awesome man, and even though I didn’t get to meet him until he was much older, I knew that he was a very important person in my husband’s life. He worked for many years as a mechanic, so as soon as I saw the truck and nuts & bolts chipboard pieces and the gear stencil I knew they would work perfectly all together.


I started off by staining a wooden frame from Michaels with Ranger Distress Stains by Tim Holtz. I have to admit, I haven’t used these for a while, and I was even thinking about giving them away, but I really love how they covered the wood! I added the Tea Dye first and then used some of the Vintage Photo to darken spots to give a weathered look.


I then took some Walnut Stain Distress Ink and the Multi Gear Stencil and sponged the top left and bottom right areas lightly. I have used this stencil so many times – it’s definitely one of my favourites!


Next I used various mists and stains to paint in the Nuts and Bolts and Vintage Truck Chipboard pieces. I found that by dipping a thin paintbrush into the bottles I could control the mist and add the details. The truck is so intricately cut – it’s amazing!


I stamped a sentiment from one of the Kelly Creates traceable stamp sets using Black Archival Ink across the top of the frame.


A bit of hot glue attached all the chipboard pieces to the frame.


I love how this turned out, and I know my husband will be surprised on Father’s Day and love it too!


Southern Ridge Trading Company Supplies Used:


Other Supplies Used:

- Wooden Frame from Michaels
- Tim Holtz for Ranger Ink: Distress Stains, Spray Stains and Ink 
- Dyan Reavley for Ranger Ink: Dylusions Ink Spray
- Tattered Angels Mists
- Kelly Creates: Traceable Stamp Set

Thanks so much for stopping by! Be sure to head over to the Southern Ridge Trading Company Shop to pick up supplies to create a Father’s Day project – or grab a little something for yourself! Have an awesome week my friends!

Hugs,
Karla