Showing posts with label Karen Jiles. Show all posts

Monday, March 23, 2020

Beautiful Day Altered Spool with Karen Jiles


Hi there, 

It’s Karen sharing a “Beautiful Day” Altered Spool that I created with the Retro Bike and Birds and Branches Chipboard sets.  The chipboard sets were so easy to coordinate with this altered spool. This altered project is a great keepsake. The patterned paper and embellishments used were perfect. Take a peek at my tutorial below.


Step 1: Trim patterned paper down to the width of the core of the ribbon spool. I trimmed my paper down to 3x12.


Step 2: Reinforce edges of the patterned paper with coordinated stickers and distress edges with coordinated distress ink.


Step 3: Add 2 eyelets to each reinforced edge using a Cropadile.


Step 4: Attach patterned paper to spool using ribbon. Add metal Pull to patterned paper to securely wrap the patterned paper around the base of the spool.


Step 5: Adhere Vignette Finial pieces together and then adhere onto spool. Adhere flowers and leaves to the vignette finial pieces.


Step 6: Cut a bird from the Birds and Branches Chipboard set. Cut swirly pieces from the Border chipboard.


Step 7: Adhere the Retro Bike, Bird and Swirly chipboard to the spool using E6000.


Step 8: Add sentiment stickers to each wheel of the Retro Bike using 3D Tape.


Step 9: Tap on some gesso using a paintbrush and continue embellishing as desired.

Southern Ridge Trading Company Supplies Used:


- Chipboard Border

Other Supplies Used:

- Vintage Ribbon Spool
- Patterned Paper & Coordinating Stickers
- Eyelets
- Vignette Finial Pieces
- Flowers and Leaves
- Dyed Ribbon
- Time Holtz for Ranger Ink: Distress Ink
- Foambrush
- Paintbrush
- Scissors
- Gesso (White)
- Paintbrush
- E6000
- 3D Tape
- Hot Glue
- Heat Gun
- Cropadile

Thanks so much for visiting today!


Wednesday, February 19, 2020

XOXO Altered Brush with Karen Jiles


Hi there, 

It’s Karen sharing an XOXO Altered Brush that I created with the Infinity Love Mix and Oval Arrow Frame Chipboard sets.  The chipboard sets were so easy to coordinate with this mixed media project. The colour choices and mediums used were perfect. Take a peek at my tutorial below.


Step 1: Apply 2 coats of white gesso to the 4in. paintbrush and XOXO word and heart arrow chipboard.


Step 2: Tap on some shimmer powders (Green Parade and Volet Brocade) and spray water onto the brush and chipboard. Set the brush and chipboard aside to dry.


Step 3: Adhere flowers, dyed ribbon and chipboard to the brush. Note: I dyed the ribbon using the same shimmer powders to coordinate with the project.


Step 4: Add beaded pins, highlight flowers and tap on some gesso to enhance the overall design.


Step 5: Continue embellishing as desired.

Southern Ridge Trading Company Supplies Used:


Other Supplies Used:

- 4in Paintbrush (Base)
- Nuvo Shimmer Powders (Green Parade, Volet Brocade)
- Flowers
- Beaded Pins
- Dyed Ribbon
- Paintbrush
- Scissors
- Gesso (White)
- Paintbrush
- E6000
- Hot Glue
- Heat Gun

Thanks so much for visiting today!


Monday, January 20, 2020

Love Mini Keepsake with Karen Jiles


Hi there, 

It’s Karen sharing a Love Mini Keepsake that I created with the Infinity Love Mix and Garden Sign Combo Chipboard sets.  This is the most perfect time of year to prepare for Valentine’s Day and creating and giving a mini keepsake as a gift can be quick and so much fun.  This Love Mini Keepsake measures approximately 3 x3, perfectly sized for that special someone and super easy to create. Take a peek at my tutorial below.


Step 1: Apply embellishment mousse and expanding mousse to the wooden heart using a craft knife. Heat set to dry between applications.


Step 2: Adhere flowers and leaves to wooden frame using E6000.


Step 3: Cut chipboard pieces from Infinity Love Mix and Garden Sign Combo sets and adhere chipboard to the wooden heart.


Step 4: Enhance the flowers and leaves with gesso and tap on gesso using a paintbrush.


Step 5: Continue embellishing as desired.

Southern Ridge Trading Company Supplies Used:


Other Supplies Used:

- Wooden Heart
- Embellishment Mousse: Pink Flambé and Poppy Pink
- Expanding Mousse: Worn Linen
- Foam Tool
- Craft Spatula
- Scissors
- Gesso (White)
- Paintbrush
- E6000
- Hot Glue
- Heat Gun

Thanks so much for stopping by today.
Karen

Wednesday, December 18, 2019

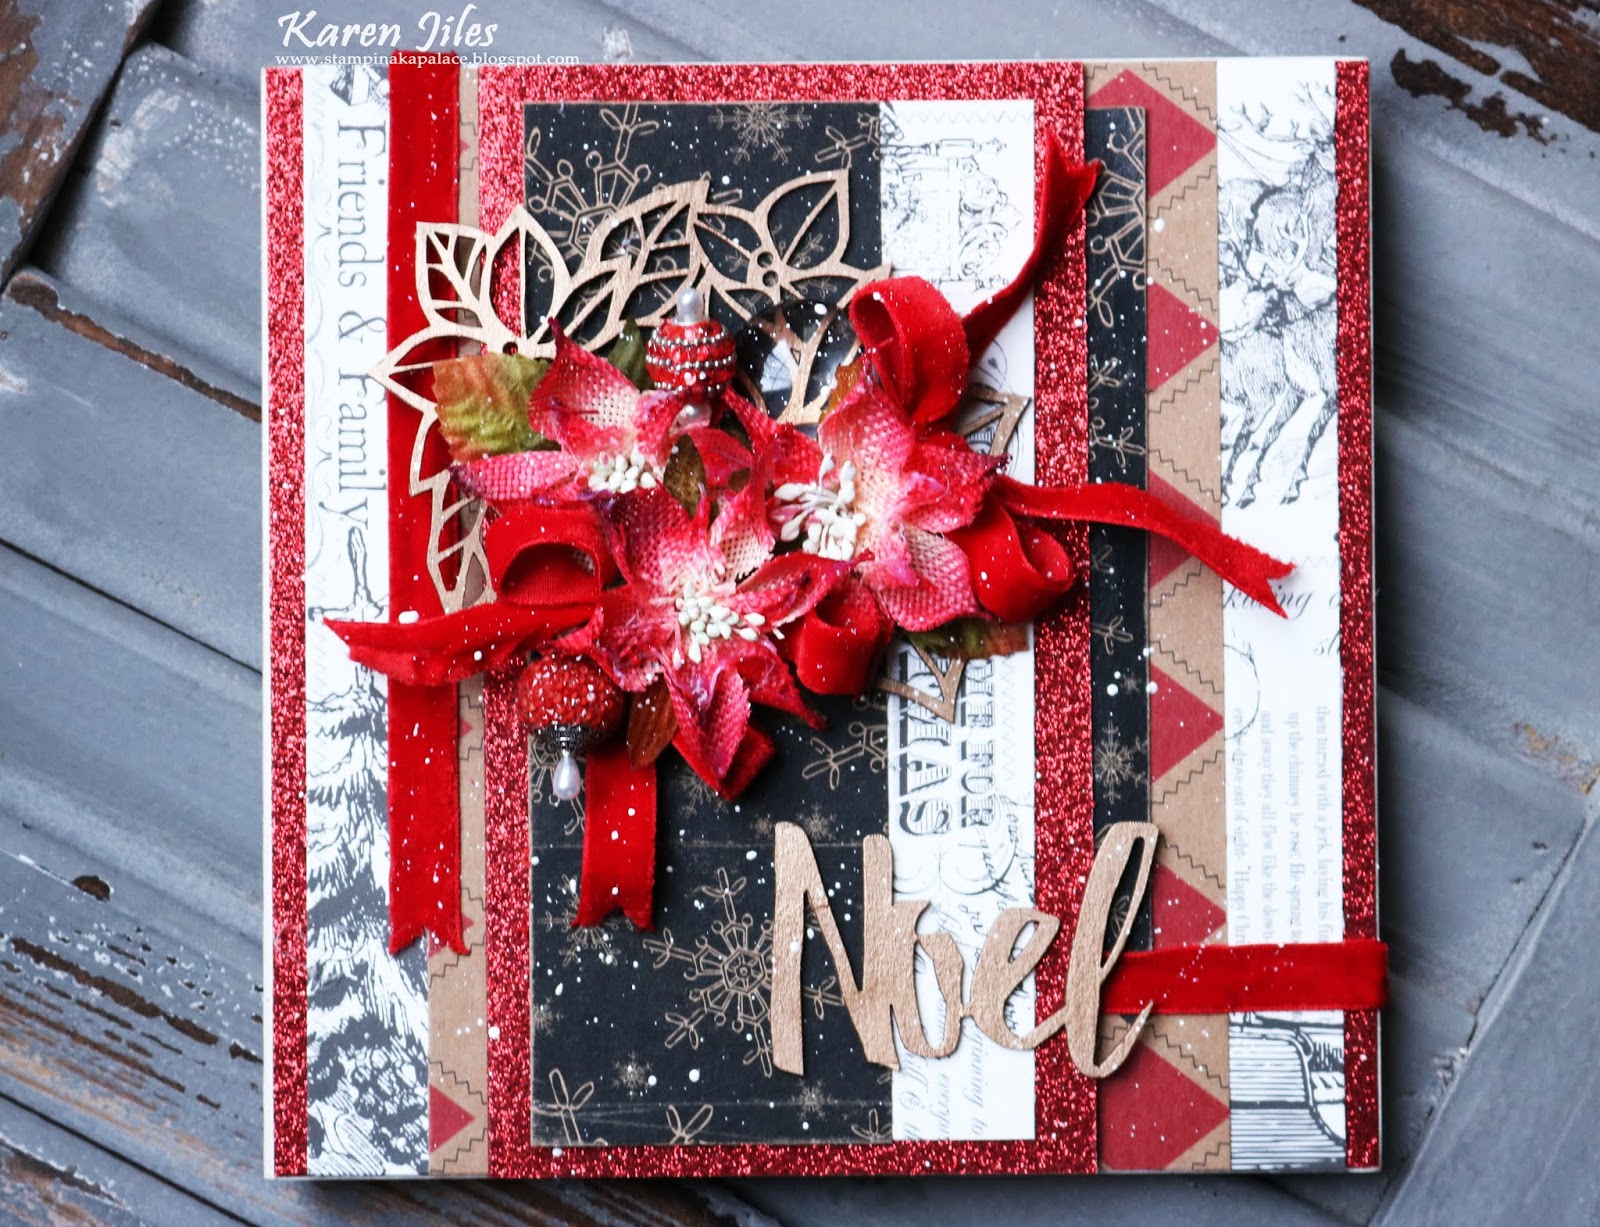
Christmas Keepsake with Karen Jiles


Hi there, 

It’s Karen sharing a Christmas Keepsake that I created with the Skeleton Poinsettia and Words of Christmas Chipboard sets.  The chipboard sets were absolutely perfect for this Keepsake. I coupled them with some embellishment mousse and Christmas themed patterned papers. I loved the end result. Take a peek at my tutorial below.


Step 1: Adhere coordinating layers of patterned paper together using adhesive. 


Step 2: Add additional patterned paper layers and adhere to wooden frame using E6000. Set aside.


Step 3: Apply Cosmic Brown Embellishment Mousse to the Skeleton Poinsettia and 
Words of Christmas chipboard using a foam tool. Heat set the chipboard to dry. Note: To give the poinsettia some dimension, I reformed the chipboard with my finger.


Step 4: Adhere the mousse covered chipboard to the layered papers using E6000. Add a clear pebble, flowers and velvet ribbon.


Step 5: Add beaded pins and tap on gesso using a paintbrush.


Step 6: Continue embellishing as desired.

Southern Ridge Trading Company Supplies Used:


Other Supplies Used:

- Wooden Frame
- Patterned Paper
- Embellishment Mousse (Cosmic Brown)
- Foam Tool
- Scissors
- Beaded Pins
- Clear Pebble
- Velvet Ribbon
- Gesso (White)
- Paintbrush
- E6000
- Hot Glue
- Heat Gun

Thanks so much for stopping by today.
Karen