Showing posts with label Stampers Anonymous. Show all posts

Monday, November 5, 2018

Christmas Greetings Tags with Karla Yungwirth

Hello friends! It’s Karla back today with a pretty set of Christmas tags using the lovely Chipboard Snowflakes #712 and Soda Fizz Stencil from the Southern Ridge Trading Company Shop. There are 12 - 1” snowflakes included in the pack, with 3 each of 4 different varieties! These are going to be a must-have for your Christmas and winter crafting!


Here are the steps I used to create these tags:


1) First, I used a Tim Holtz striped stencil to create a candy cane effect with Festive Berries Distress Oxide Ink. 


2) I used the STAMPtember Tim Holtz stamp set for most of the stamping. I heat embossed the Christmas Greetings sentiment using Emerald Creek Black Cherry Embossing Powder. 


3) Next I used the fabulous Southern Ridge Soda Fizz Stencil and some shimmery paste to add a textured, shiny detail to the upper part of the tag, above the sentiment. I think this stencil is one of my favs!! You can use it for snow, stars, bubbles, texture... so awesome!


4) I stamped the floral stamp on a white doily using black Archival Ink and then coloured in the outer leaves and flowers with Tombow and Distress Markers. I sponged Scattered Straw Distress Oxide around the edge of the doily and then misted it with Tattered Angels Iridescent Gold Glimmer Mist to add shine and blend the colours. 
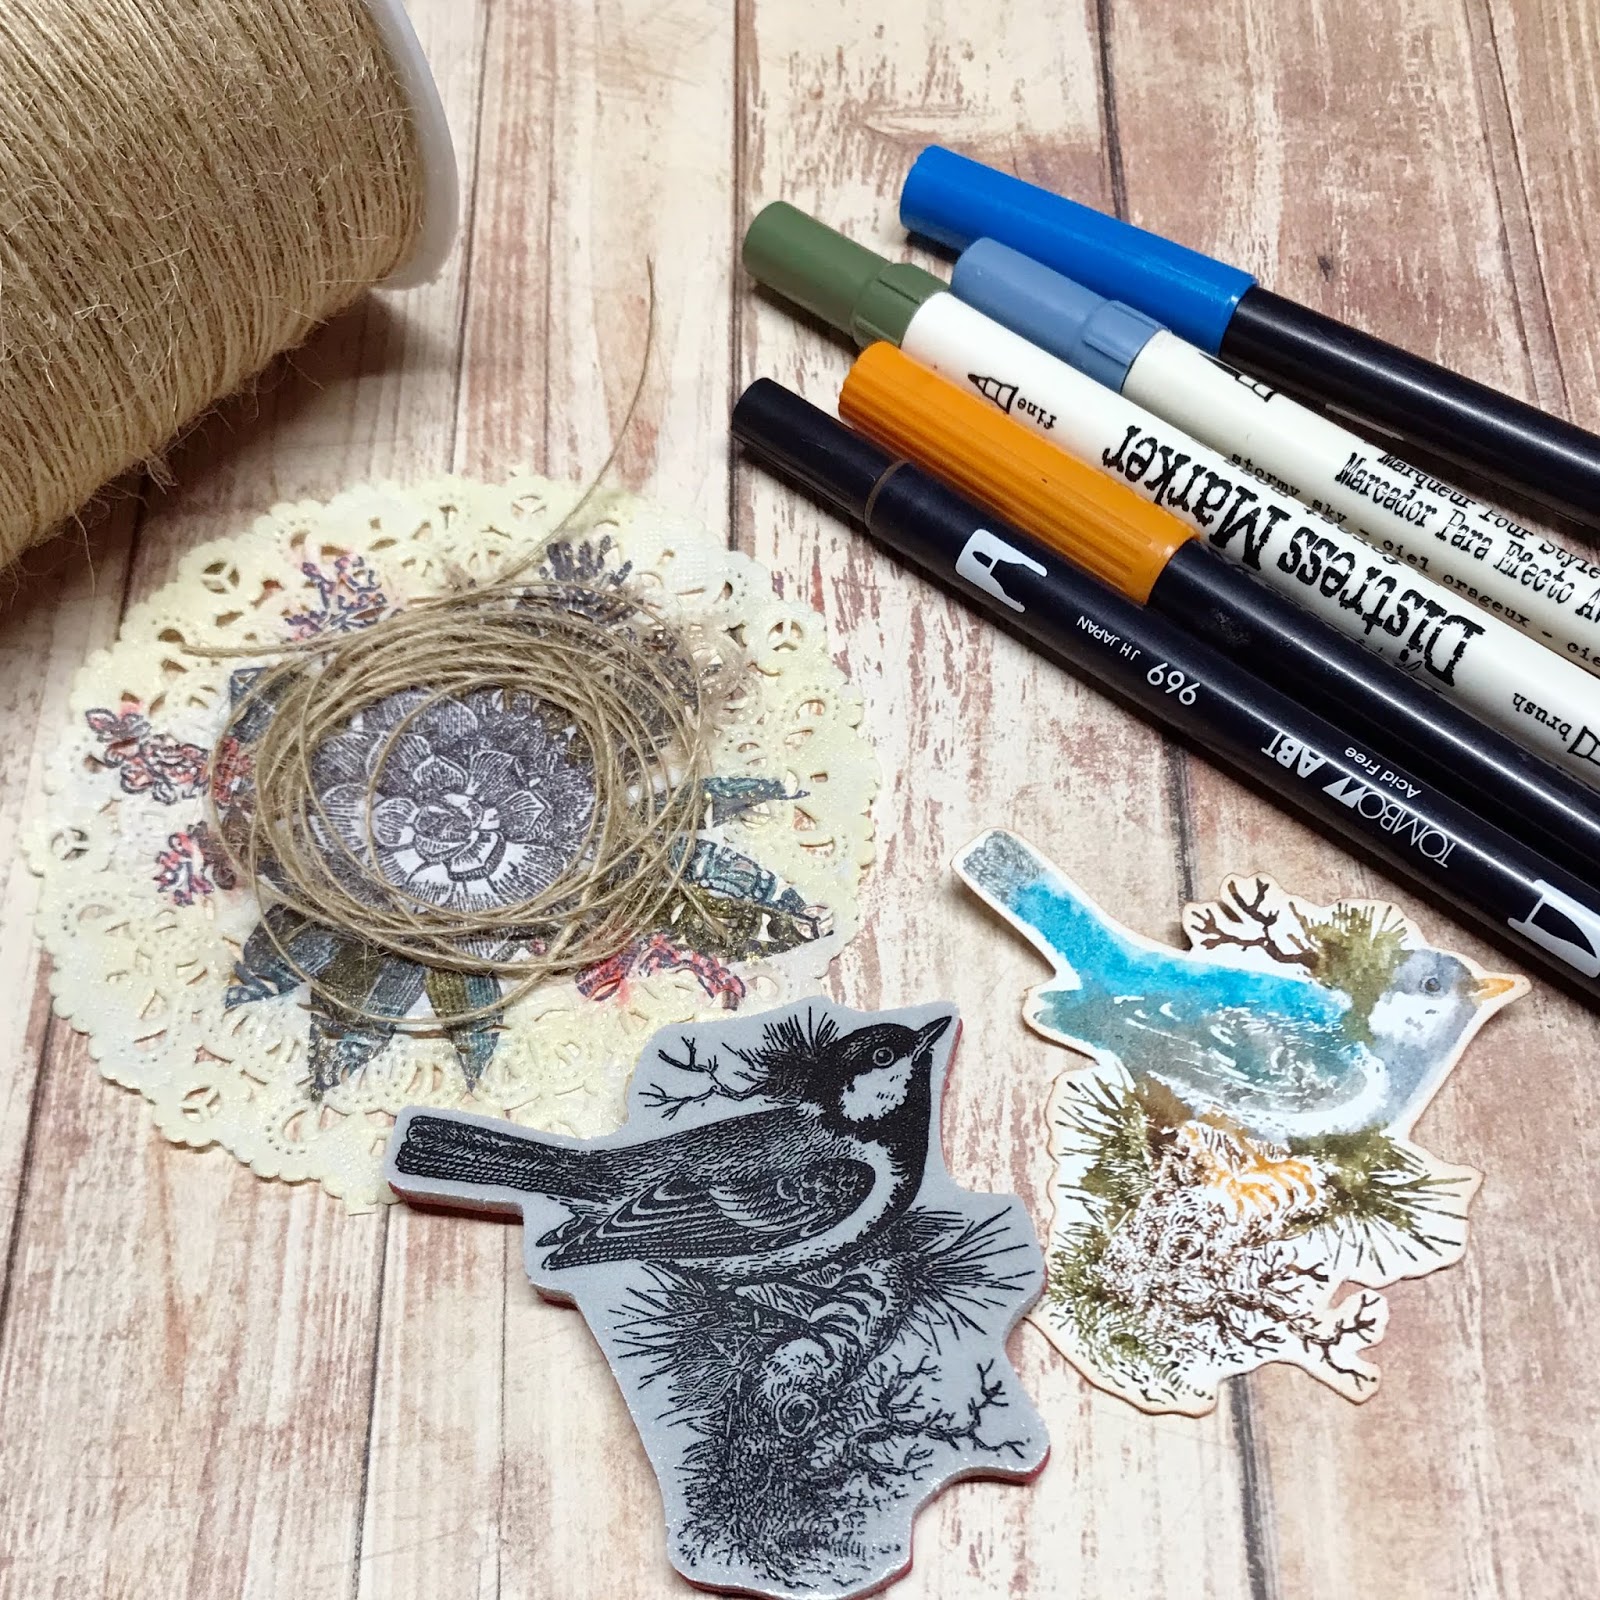

5) I coloured directly on the bird stamp using Distress and Tombow Markers and then misted it lightly to create a watercolour effect when stamped. I then looped some twine and glued it to the center of the doily to create a nest. 


6)I used BoBunny stitching stamps to stamp directly on the red rick-rack and then again on the bottom of the tag. Then I stamped two buttons with Distress Oxide Ink and used foam tape to attach the bird to the doily, which I glued down with Tacky Glue. 


7) I used Archival Ink to stamp the music notes on seam binding ribbon before misting with red and blue Glimmer Mist. After misting, I crinkled it up and let it dry before tying it in a bow at the top of the tag. 
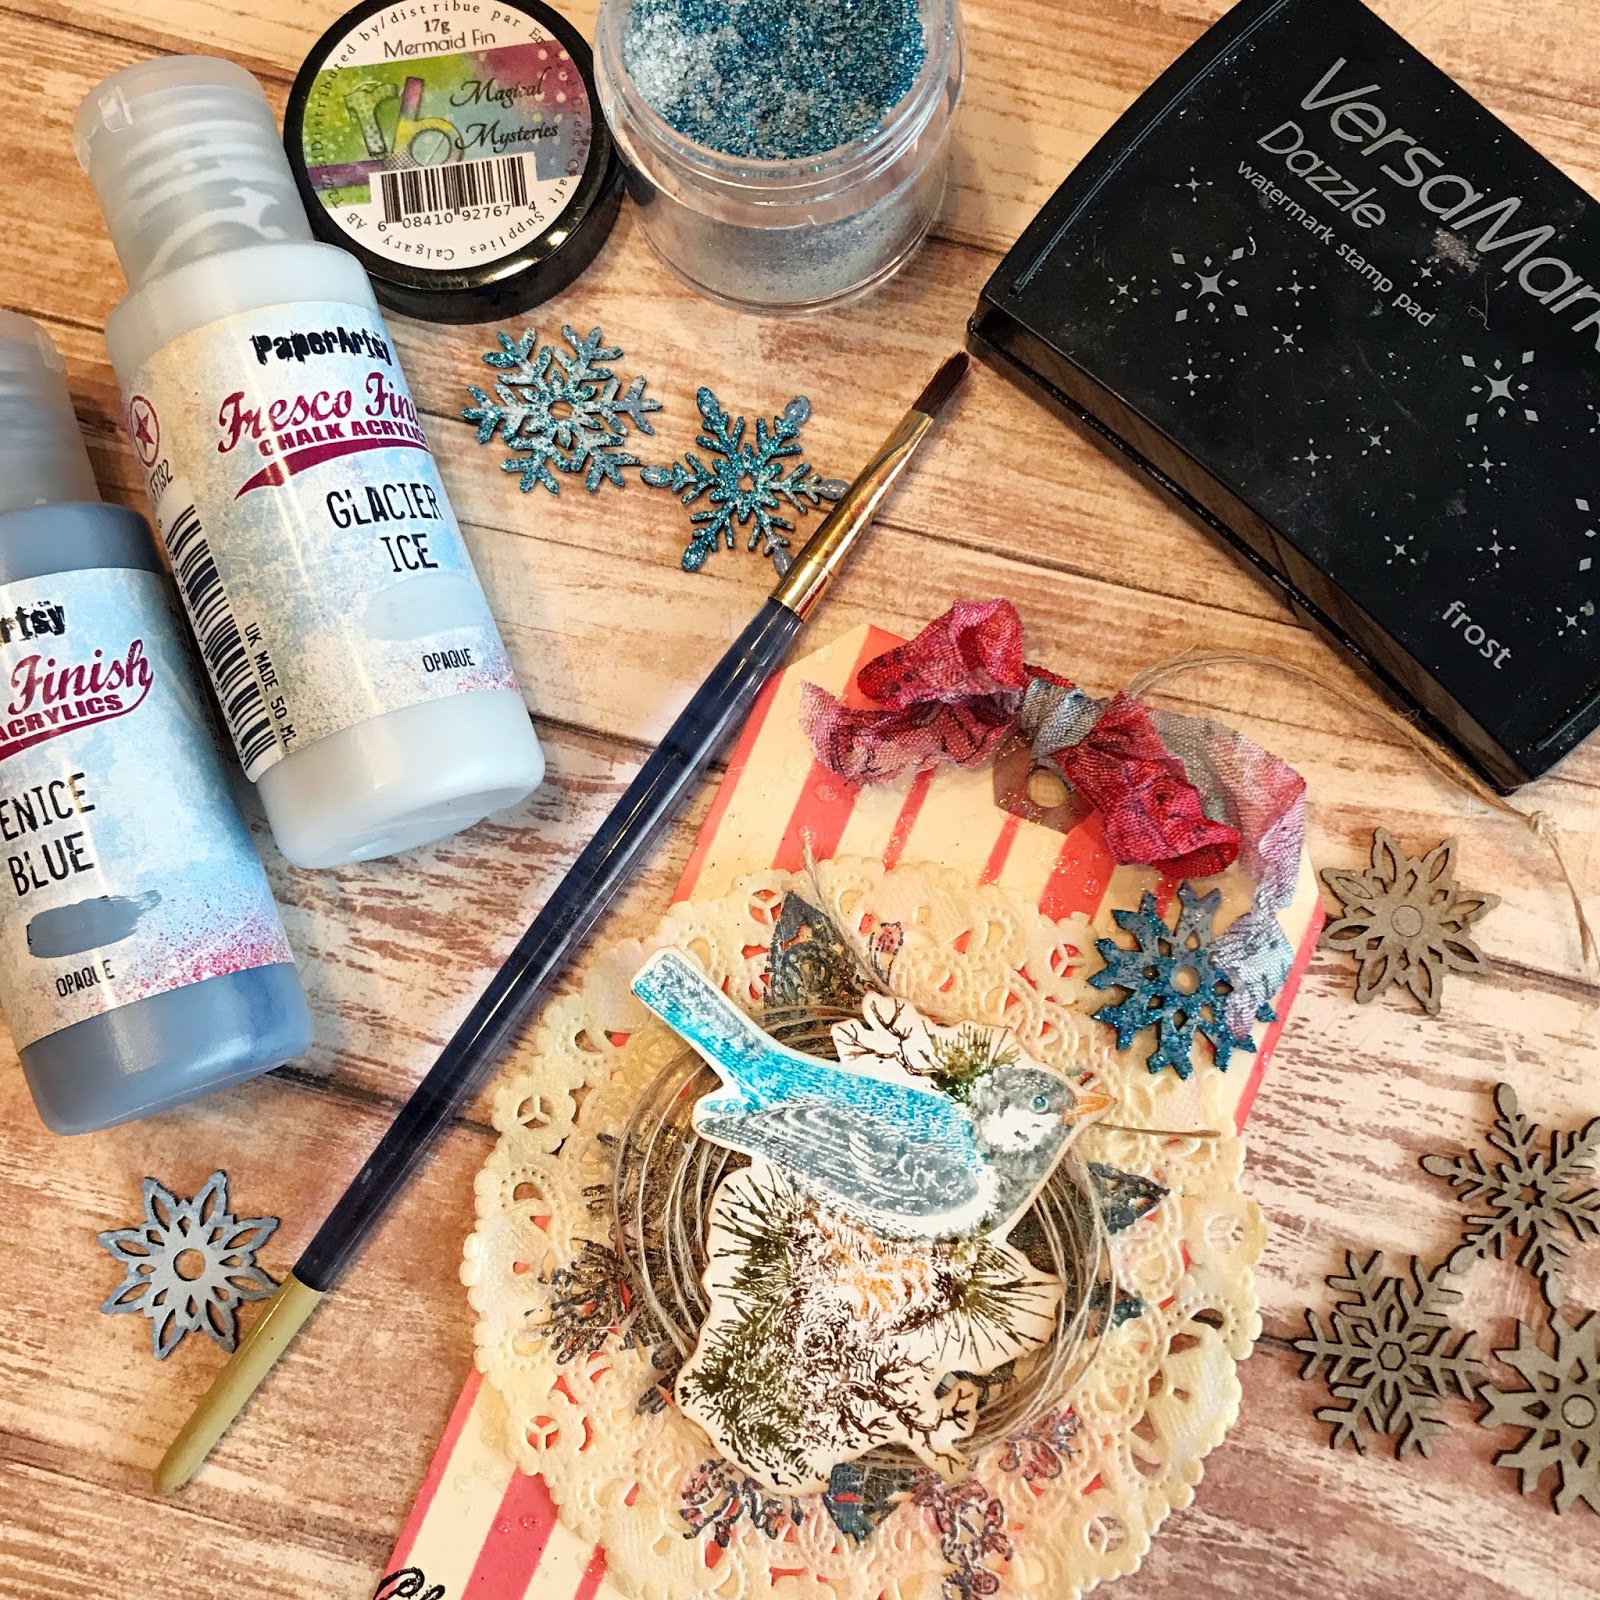

8) I painted the chipboard snowflakes with Paper Artsy paints and then heat embossed them with Emerald Creek Mermaid Fin Embossing Powder. I used some Ranger Matte Medium to glue the snowflake to the top of the tag. 


9) I finally added some SpiegelMom Scraps sequins and some Stickles for glimmer. My tags are now ready to send off for a fun little Christmas tag swap!

Here are some closeups for you. The glittery paste through the Soda Fizz stencil looks like icy drops on the background - so pretty!
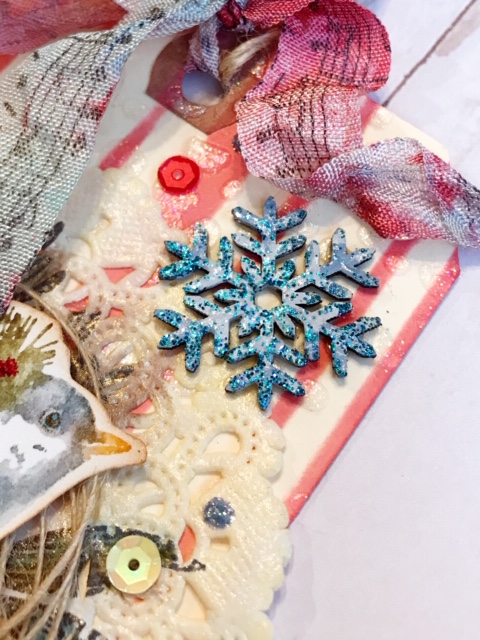


I just love the detail on these snowflakes, and that you can easy customize them however you like. The blues i used in the paints and embossing powder coordinate with the ribbon, the stamped buttons and the bird. 


I really love the layered details of the stencils, stamps and embellishments. Don’t be afraid to alter, embellish and have fun!


Southern Ridge Trading Company Supplies Used:


Other Supplies Used:

- Tim Holtz for Ranger Ink: Distress Oxide Ink - Festive Berries & Scattered Straw, Blending Tool with Foam and Distress Markers
- Ranger Ink: Jet Black Archival Ink, Matte Medium and Stickles
- Imagine Crafts: VersaMark Ink
- Tim Holtz for Stampers Anonymous: Stamptember Stamp Set and Shifter Mint Layering Stencil
- Emerald Creek Craft Supplies: Black Cherry Embossing Powder and Magical Mysteries - Mermaid Fin Embossing Powder
- PaperArtsy: Fresco Finish Acrylic Paint - Venice Blue and Glacier Ice
- Tombow: Markers
- Bo Bunny: Stitching Stamps
- Tattered Angels: Glimmer Mist
- SpiegelMom Scraps - Sequins
- Misc: Shimmery Paste, Doily, Twine, Crinkle Ribbon and Red Rick-Rack

Thanks so much for stopping by today! Hope you have an awesome and super crafty week ahead! 

Hugs,
Karla


Friday, March 23, 2018

Dream Chipboard Art Journal with Deb Riddell

Before Deb shares her project, Karen and I would like to thank Deb for all of her beautiful work over the last two years, it has been wonderful to have you on the team. We wish you continued success and we will definitely make sure to keep up with what you are doing in blog land. 
Now let's let Deb take over and share with you her project.

********************

Hello and thank you for stopping by, it’s Deb Riddell here with you today to share a tutorial on how to make my Dream chipboard art journal.


I used a couple of the inner ‘pages’ from the Sprocket Album, Fence Pattern chipboard, Wild Flower Bouquet, Dandelion Seed Stems and Dream Fun Word.  Read on for the how to!

I started by applying DecoArt Media Gesso and Crackle Paste randomly to the fronts and backs of two Sprocket Album pages.  The front of the front journal cover only had the white gesso applied to it but all other surfaces got some of the crackle paste applied here and there as well.


On the front cover, washes of DecoArt Media fluid acrylics in shades of green and blue were applied over the gesso with some spritzes and runs of water.  Diluted Titanium White Media fluid acrylic paint was spattered overtop and then the cover was randomly stamped with the Ledger Script stamp and Vintage Photo Distress Archival ink.

The back cover was finger painted with Distress Crayons in shades of green and blue and then stenciled through the Bubble layering stencil with a darker shade of blue Distress Crayon.  Diluted Titanium White Media fluid acrylic paint was then flicked and spattered onto the cover.


Inner pages for the art journal were folded and torn to size from watercolour paper and mixed media paper.

The Fence Pattern chipboard piece was sponged with Paynes Grey Media fluid acrylic and while the paint was still wet, Hammered Metal embossing powder from Emerald Creek Craft Supplies was sprinkled over top.  The chipboard was heated from below to activate the embossing powder once the paint had dried (to prevent the larger ‘chunks’ of the embossing powder from blowing off).


The Dream Fun Word was covered with Rebekah Meier Designs Mixed Media Medium and once it had dried clear and tacky, Vintage Tin Mixed Media Transfer Foil was burnished overtop.

Both the Wild Flower Bouquet and Dandelion Seed Stem were painted with Titanium White Media fluid acrylic and then a wash of Interference Gold was added over top.  Once the paint had dried, some Platinum Stickles Glitter glue was finger painted overtop the chipboard pieces for a bit more sparkle.


The Fence Pattern chipboard was then glued onto the front cover and once it had dried thoroughly, the edges of the Fence Pattern piece that were overhanging the edges of the cover were trimmed off with an exacto knife.

And then the art journal was assembled, the Dream Fun Word was adhered to the top left corner of the front cover on top of the Fence Pattern.


The Wild Flower Bouquet was added below and to the right of the Dream Fun Word;


And the Dandelion Seed Stem added at the bottom left.


The stems of the florals that were extending beyond the edges of the album cover were trimmed off with the exacto knife once they were glued securely in place.

The inner pages were then sandwiched between the two covers and tied into place with some lengths of Linen Ribbon so that they could be removed or added as needed.

Here’s a look at the back cover.


And here’s the first page of my art journal, I’m all ready for some fun mixed media experimentation!


Hope that you’ve enjoyed seeing how it came together and that you’ve been inspired to make one of your own, it’s easy and fun with Southern Ridge Trading Company chipboard.


Southern Ridge Trading Company Supplies Used:


Other Supplies Used:

- DecoArt Media: Fluid Acrylic Paint, Gesso and Crackle Paste
- Therm O Web: Rebekah Meier Designs Mixed Media Medium and Rebekah Meier Designs Mixed Media Transfer Foil
- Ranger Ink: Distress Crayons and Stickles Glitter Glue
- Stampers Anonymous: Ledger Script Stamp and Bubble Layering Stencil
- Advantus: Linen Ribbon
- Emerald Creek Craft Supplies: Hammered Metal Embossing powder
- Miscellaneous: Watercolour Paper, Mixed Media Paper, Liquid Adhesive, Palette Knife, Exacto Knife, Paint Brush and Makeup Sponge

This will be my last post as a member of Southern Ridge Trading Company’s Design Team and I just wanted to take this opportunity to thank Karen Beaupre, the lovely owner of Southern Ridge, for the opportunity to be on her team and to design with her fabulous chipboard.  I’d also like to thank Katelyn Grosart, our fearless design team leader, for her support and encouragement over the last couple of years. It’s been so much fun and a great honour to be part of this fabulous team and I wish you all much continued success!

Thanks as always for stopping by today and happy creating,


Friday, February 9, 2018

Adore Valentine's Day Card with Deb Riddell

Hello everyone and thank you for stopping by, it’s Deb Riddell here with you today to share a quick and easy Valentine’s Day card created with Southern Ridge Trading Company’s Heart stencil, Taneesha Heart and Love and Hearts Banner chipboard and Wood Adore Tags.


I was inspired by Julia Chupik of Paradise Lost who made a beautiful card with water based pigment ink (click here to see her process video).  I admired her use of white space on her card which I always struggle with so decided to give it a go myself.

I started with a piece of plain old white copy paper, spritzed some Frankly Scarlet and Raspberry Infusions with water  and dipped and dragged the copy paper through it.  Once dried, I randomly stamped the paper with the Ledger Script stamp and Vintage Photo Distress Archival ink and then stenciled hearts onto the background with Southern Ridge’s Heart stencil and Ranger Transparent Gloss Texture Paste.


The Taneesha Heart chipboard was covered with white gesso and then dipped repeatedly into diluted Worn Lipstick and Picked Raspberry Distress inks on my craft mat.  The edges were inked with Ground Espresso Distress ink and then some Indian Gold Nuvo Mousse was diluted with more water and randomly applied to the heart with my finger.


I forgot to take a picture of the Hearts Banner before I put it onto the card, sorry about that!  The Hearts Banner chipboard was also covered with white gesso and this time I coloured it with Worn Lipstick and Picked Raspberry Distress Oxide inks and more diluted Indian Gold Nuvo Mousse.  As you can see, the stenciled Heart background was adhered to a kraft cardstock card blank.


The Wood Adore Tag was first coloured with Vintage Photo Distress Stain and once it had dried, Tarnished Brass Distress Crayon was rubbed over the surface and then quickly removed to only leave it in the recessed ‘adore’ word.


And then the card was assembled, the Hearts Banner was adhered along the top edge.


And the Taneesha Heart nestled on an angle below the banner with the Wood Adore Tag added to the center of the heart with a brad coloured with Gold Mixative.


You can see the texture and shine from the stenciled hearts and the Nuvo Mousse in the picture below.


I hope that you’ve enjoyed seeing how my Adore Valentine’s Day card came together, I haven’t quite mastered the use of white space as expertly as Julia but I do like the way it turned out.


Southern Ridge Trading Company Supplies Used:


Other Supplies Used:

- Paper Artsy: Infusions Coloured Stains
- Ranger Ink: Distress Oxide Ink, Distress Ink, Distress Stain, Distress Crayon, Gold Mixative, Distress Archival Ink and Transparent Gloss Texture Paste
- Stampers Anonymous: Ledger Script stamp
- Tonic Studios: Nuvo Mousse
- Miscellaneous: Copy Paper, Kraft Cardstock, Brad and White Gesso

Thanks as always for stopping by today and hope that you’ve been inspired to make a Valentine’s Day card for your sweetie too, happy creating!


Friday, January 26, 2018

Journey Travel Journal with Deb Riddell

Hello and thank you for stopping by, it’s Deb Riddell here with you today to share a travel diary that I made with Southern Ridge Trading Company’s Vintage Car, Gear Clock, Journey Fun Word and Nuts and Bolts chipboard.


I’ve lots of step out photos on how I constructed my Journey Travel Diary so grab a glass of your favourite beverage and read on.

I started with a recycled hanging file folder from my stash (think you can probably get these at an office supply store).  It is made of nice heavy duty paper and I kind of like the green colour!


Next I die cut Eileen Hull’s new Stamp and Photo Storage box from some old Tim Holtz Traveler scrapbook paper I had in my stash and roughly put it together to get an idea of what size to make my folio.  The size of the Vintage Car chipboard piece was also a deciding factor on the size of my folio as I wanted it on the front cover.

With measurements in hand I cut the file folder to size, adding a strip of scrapbook paper to the already scored mid line to reinforce it and folding up a section at the bottom of the left hand cover to act as a pocket.


I then die cut a finger pull from the front of the Stamp and Photo Storage box with a circular die before adhering the box together with Supertape.

I needed some patterned papers to cover the folio and came across a 7Gypsies ‘Global’ 8x8 paper pad I had forgotten I had.  The map motif was perfect for the travel diary so I cut the folio down to 8 ¼” in height so I could use the 8x8 paper.


The front of the folio was covered with the Global paper as was the inside and the Stamp and Photo Storage box die cut was adhered inside the back cover.


I wanted the Gear Clock to be slightly offset on the front cover so I cut a small section off of the one side before giving it a ‘rusty’ appearance with some Americana acrylic paints (Heritage Brick, Dark Chocolate and Hauser Medium Green).  A few of the Nuts and Bolts chipboard hardware findings were also coloured in the same manner.

That wonderful Vintage Car was coloured with Black Soot Distress Stain and then the grill, bumper and a few other ‘chrome’ areas were highlighted with Brushed Pewter acrylic paint.  The car was given a coat of gloss varnish to finish it off.


The Journey Fun Word was then painted with the same Brushed Pewter acrylic paint.

A few embellishments were added to the inside of the folio: the words ‘Destination Adventure’ were die cut from black cardstock with Tim Holtz’s Adventure Words: Block dies; the Old Jalopy die cut from Deco Foil Toner Sheet covered with Patina Mixed Media Transfer Foil as was the ‘explore’ word with Tim’s Handwritten Journey dies; and some eyelets were added to the spine of the folio and strung with some elastic cording for a Midori-style insert.  One of Tim’s Elastic Loops was added to the flap on the front cover to keep the folio closed.


To make the Midori-style insert for the center of the folio, some vintage map images courtesy of Far Far Hill were printed out on copy paper.  The map images were made semi-transparent with a photo editing program.

The map pages were cut down to size, sewn together with a pamphlet stitch and inserted into the elastic cording in the center of the folio.


I wanted some journaling tags for the front pocket so several were die cut with Tim Holtz’s Tag Collection die from a selection of his scrapbook papers.

I then broke out my Shadow Press station and debossing folders that I hadn’t used in years and made some journaling cards (I used the Expedition and Documented Shadow Press sets).


A couple of Hinge Clips were embellished with a scrap of tea dyed lace and a tag made with Tim Holtz’s Tag Press.  The Tag Press ring was coloured with Pitch Black and Mushroom alcohol inks.

The Gear Clock, Vintage Car, Journey Fun Word and Nuts and Bolts chipboard pieces were layered onto the front cover.  A line of Pumice Stone Stickles Glitter glue was added along the edge of the spine on both the front and back covers.  An envelope was made for the back cover with We R Memory Keepers Envelope Punch Board and a tie closure added to keep all the bits and bobs we collect in our travels safe inside.


Here are a few close ups of the inside of the folio, I added a stamped envelope and some ephemera to the inside of the front cover for a bit more interest.


I hope that you’ve enjoyed seeing how my Journey travel diary came together, I can’t wait to start filling it with mementos and memories from our travels this year!


Southern Ridge Trading Company Supplies Used:


Other Supplies Used:

- Sizzix: Stamp and Photo Storage Box, Adventure Words: Block, Handwritten Journey, Old Jalopy, Tag Press, Shadow Press Station, Expedition and Documented Shadow Press folders and  ¾” Round Punch
- Tim Holtz/Advantus: Emporium Ephemera, Hinge Clips, Elastic Loops, Paper Stash Scrapbook Papers, Clippings Stickers, Tag Press and Rings
- Ranger Ink: Distress Ink, Distress Stain, Stickles Glitter Glue and Alcohol Ink
- Therm O Web: Deco Foil Toner Sheets, Rebekah Meier Designs Mixed Media Transfer Foil and iCraft Supertape
- We R Memory Keepers: Envelope Punch Board
- Stampers Anonymous: The Journey Clear Stamps
- Deco Art: Americana Acrylic Paint

Thanks as always for stopping by today and happy creating!
Deb Riddell ~ Paxton Valley Folk Art