Showing posts with label Tombow. Show all posts

Monday, November 5, 2018

Christmas Greetings Tags with Karla Yungwirth

Hello friends! It’s Karla back today with a pretty set of Christmas tags using the lovely Chipboard Snowflakes #712 and Soda Fizz Stencil from the Southern Ridge Trading Company Shop. There are 12 - 1” snowflakes included in the pack, with 3 each of 4 different varieties! These are going to be a must-have for your Christmas and winter crafting!


Here are the steps I used to create these tags:


1) First, I used a Tim Holtz striped stencil to create a candy cane effect with Festive Berries Distress Oxide Ink. 


2) I used the STAMPtember Tim Holtz stamp set for most of the stamping. I heat embossed the Christmas Greetings sentiment using Emerald Creek Black Cherry Embossing Powder. 


3) Next I used the fabulous Southern Ridge Soda Fizz Stencil and some shimmery paste to add a textured, shiny detail to the upper part of the tag, above the sentiment. I think this stencil is one of my favs!! You can use it for snow, stars, bubbles, texture... so awesome!


4) I stamped the floral stamp on a white doily using black Archival Ink and then coloured in the outer leaves and flowers with Tombow and Distress Markers. I sponged Scattered Straw Distress Oxide around the edge of the doily and then misted it with Tattered Angels Iridescent Gold Glimmer Mist to add shine and blend the colours. 
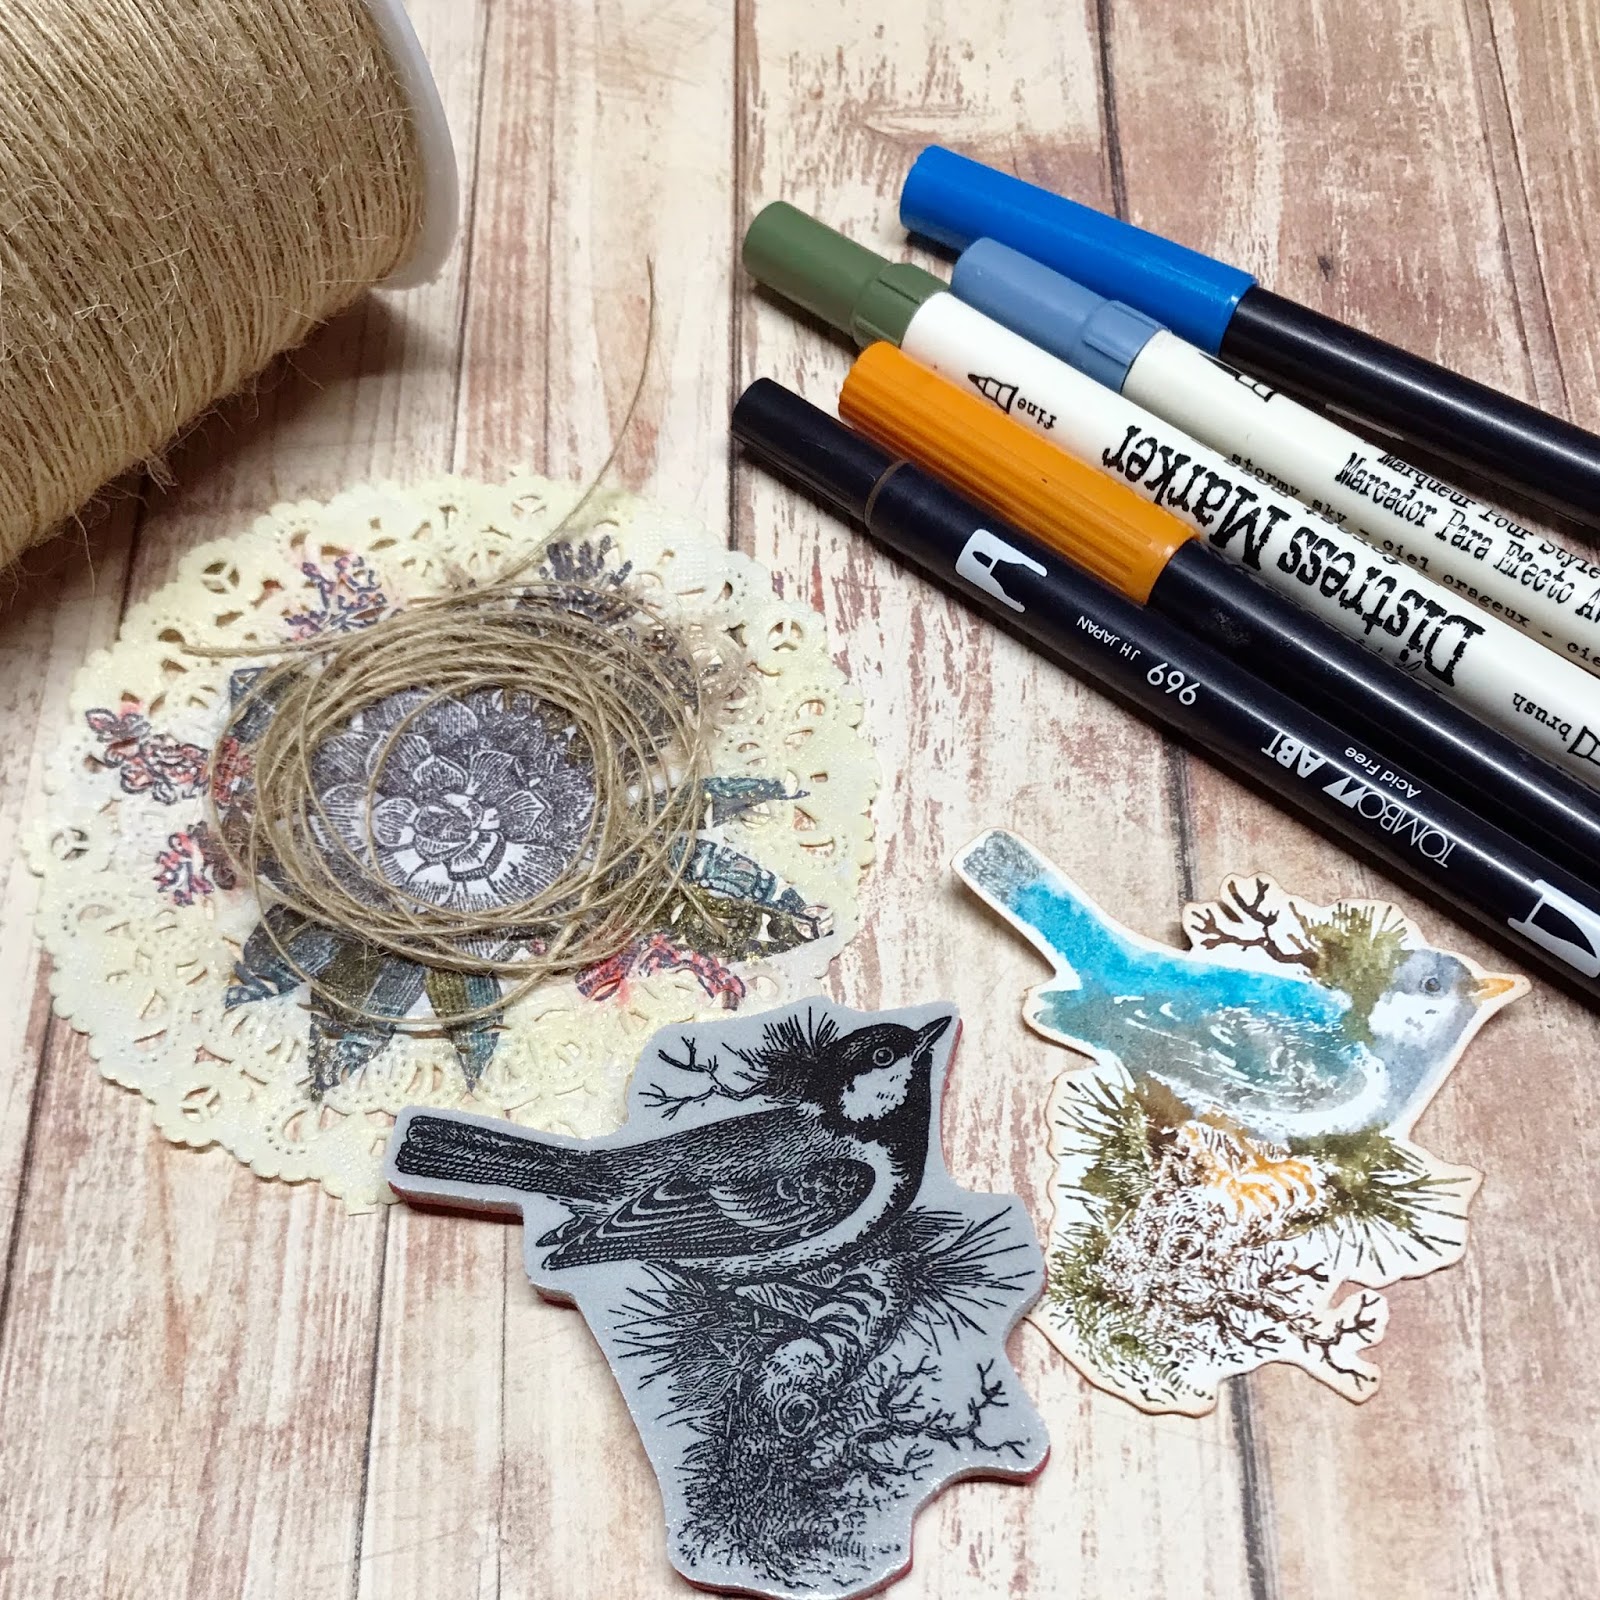

5) I coloured directly on the bird stamp using Distress and Tombow Markers and then misted it lightly to create a watercolour effect when stamped. I then looped some twine and glued it to the center of the doily to create a nest. 


6)I used BoBunny stitching stamps to stamp directly on the red rick-rack and then again on the bottom of the tag. Then I stamped two buttons with Distress Oxide Ink and used foam tape to attach the bird to the doily, which I glued down with Tacky Glue. 


7) I used Archival Ink to stamp the music notes on seam binding ribbon before misting with red and blue Glimmer Mist. After misting, I crinkled it up and let it dry before tying it in a bow at the top of the tag. 
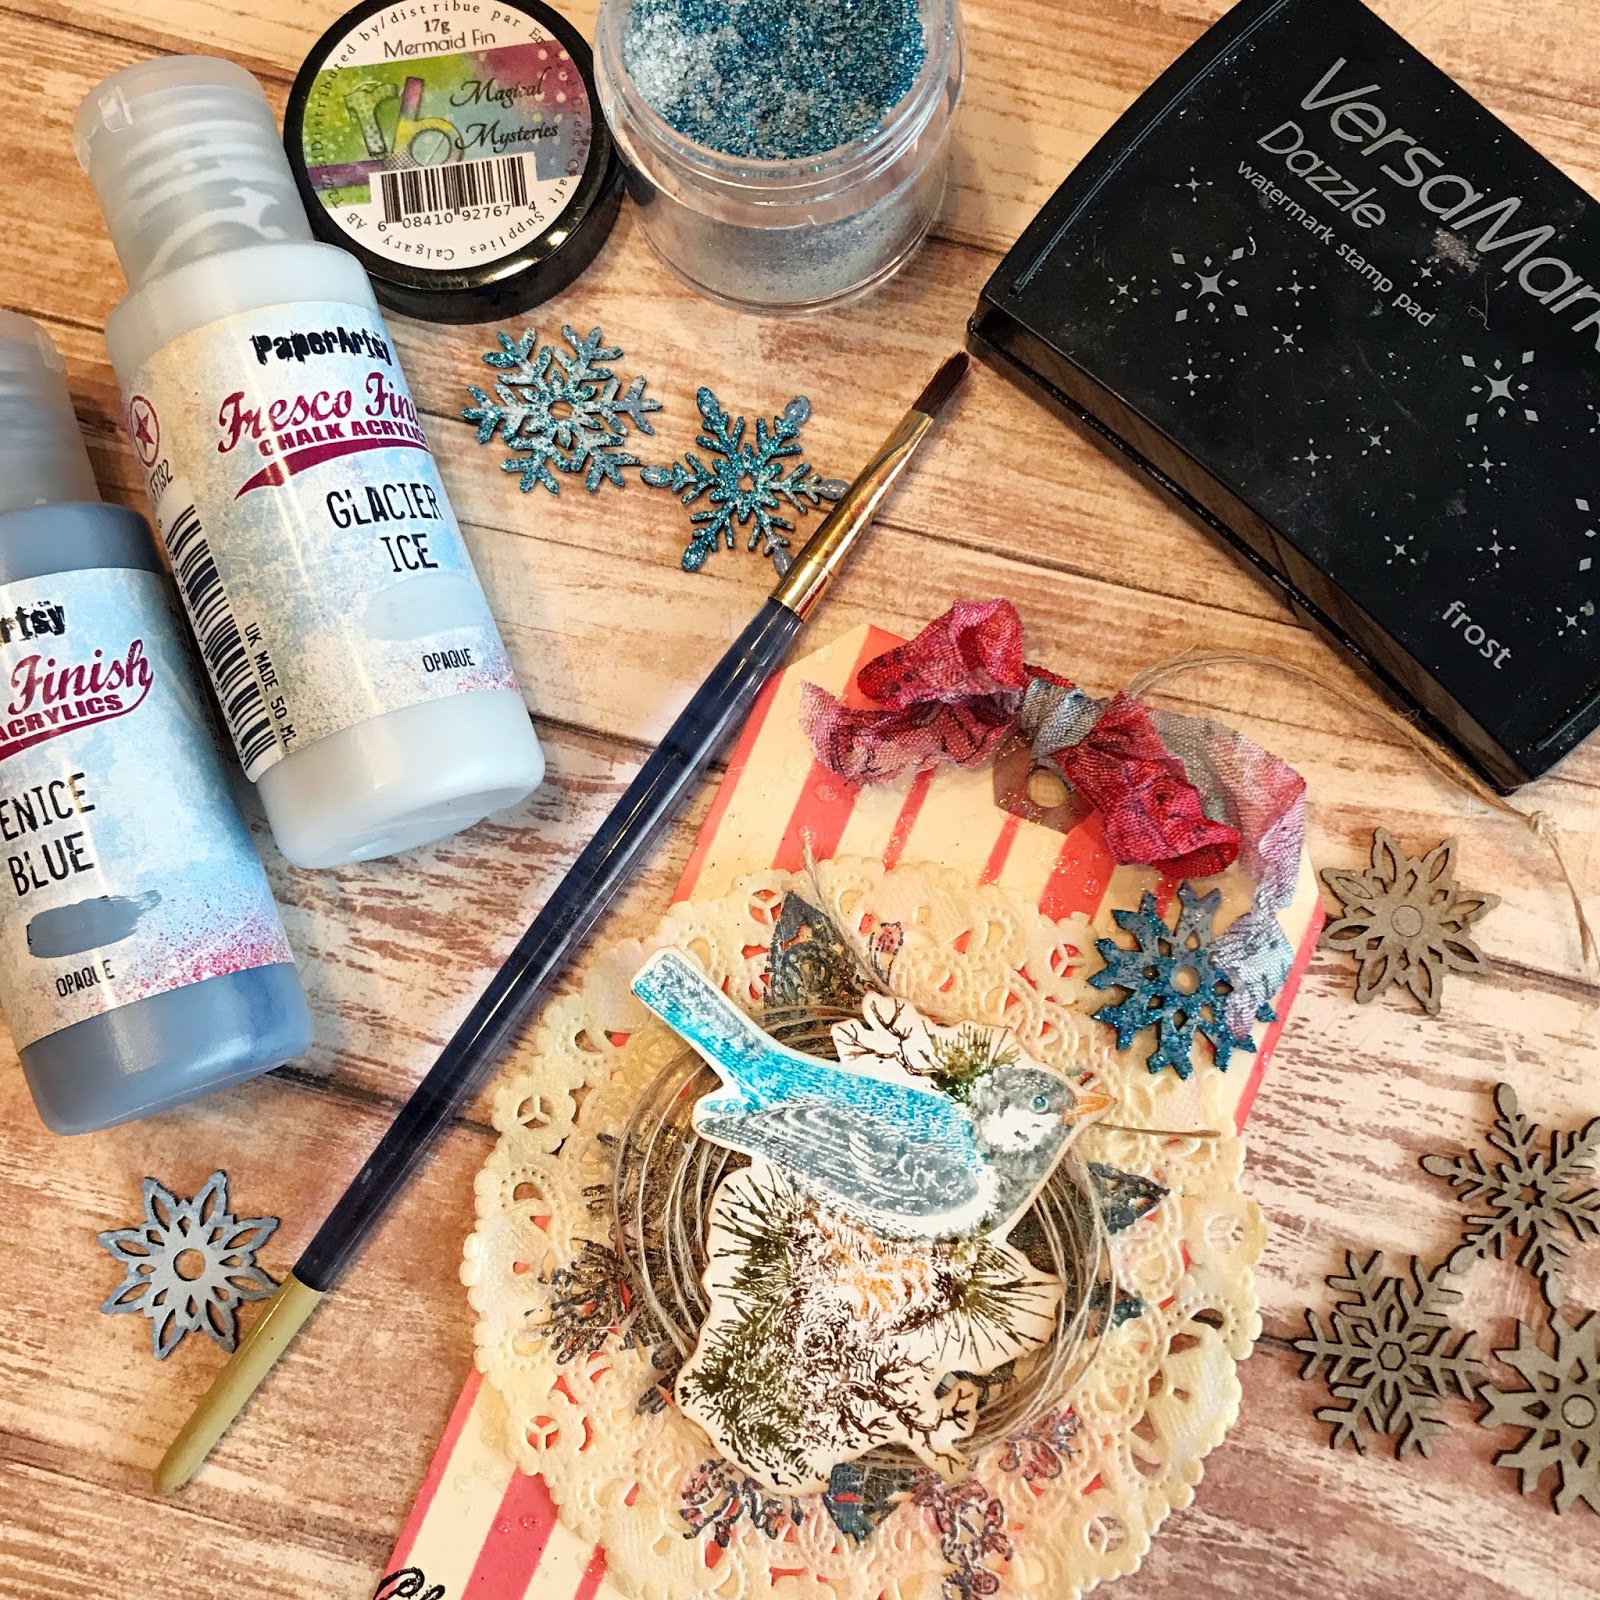

8) I painted the chipboard snowflakes with Paper Artsy paints and then heat embossed them with Emerald Creek Mermaid Fin Embossing Powder. I used some Ranger Matte Medium to glue the snowflake to the top of the tag. 


9) I finally added some SpiegelMom Scraps sequins and some Stickles for glimmer. My tags are now ready to send off for a fun little Christmas tag swap!

Here are some closeups for you. The glittery paste through the Soda Fizz stencil looks like icy drops on the background - so pretty!
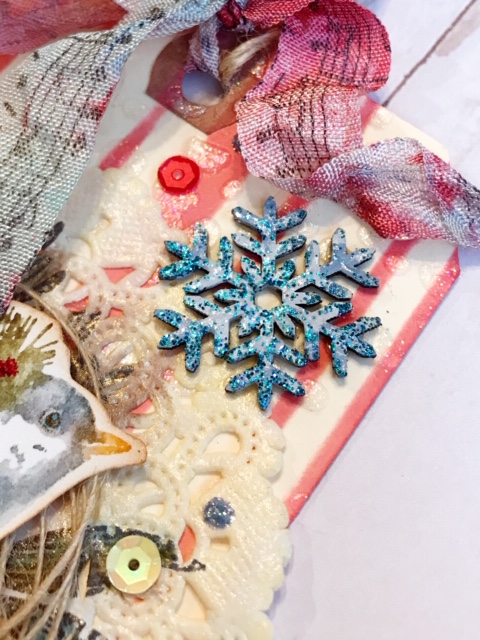


I just love the detail on these snowflakes, and that you can easy customize them however you like. The blues i used in the paints and embossing powder coordinate with the ribbon, the stamped buttons and the bird. 


I really love the layered details of the stencils, stamps and embellishments. Don’t be afraid to alter, embellish and have fun!


Southern Ridge Trading Company Supplies Used:


Other Supplies Used:

- Tim Holtz for Ranger Ink: Distress Oxide Ink - Festive Berries & Scattered Straw, Blending Tool with Foam and Distress Markers
- Ranger Ink: Jet Black Archival Ink, Matte Medium and Stickles
- Imagine Crafts: VersaMark Ink
- Tim Holtz for Stampers Anonymous: Stamptember Stamp Set and Shifter Mint Layering Stencil
- Emerald Creek Craft Supplies: Black Cherry Embossing Powder and Magical Mysteries - Mermaid Fin Embossing Powder
- PaperArtsy: Fresco Finish Acrylic Paint - Venice Blue and Glacier Ice
- Tombow: Markers
- Bo Bunny: Stitching Stamps
- Tattered Angels: Glimmer Mist
- SpiegelMom Scraps - Sequins
- Misc: Shimmery Paste, Doily, Twine, Crinkle Ribbon and Red Rick-Rack

Thanks so much for stopping by today! Hope you have an awesome and super crafty week ahead! 

Hugs,
Karla


Friday, October 5, 2018

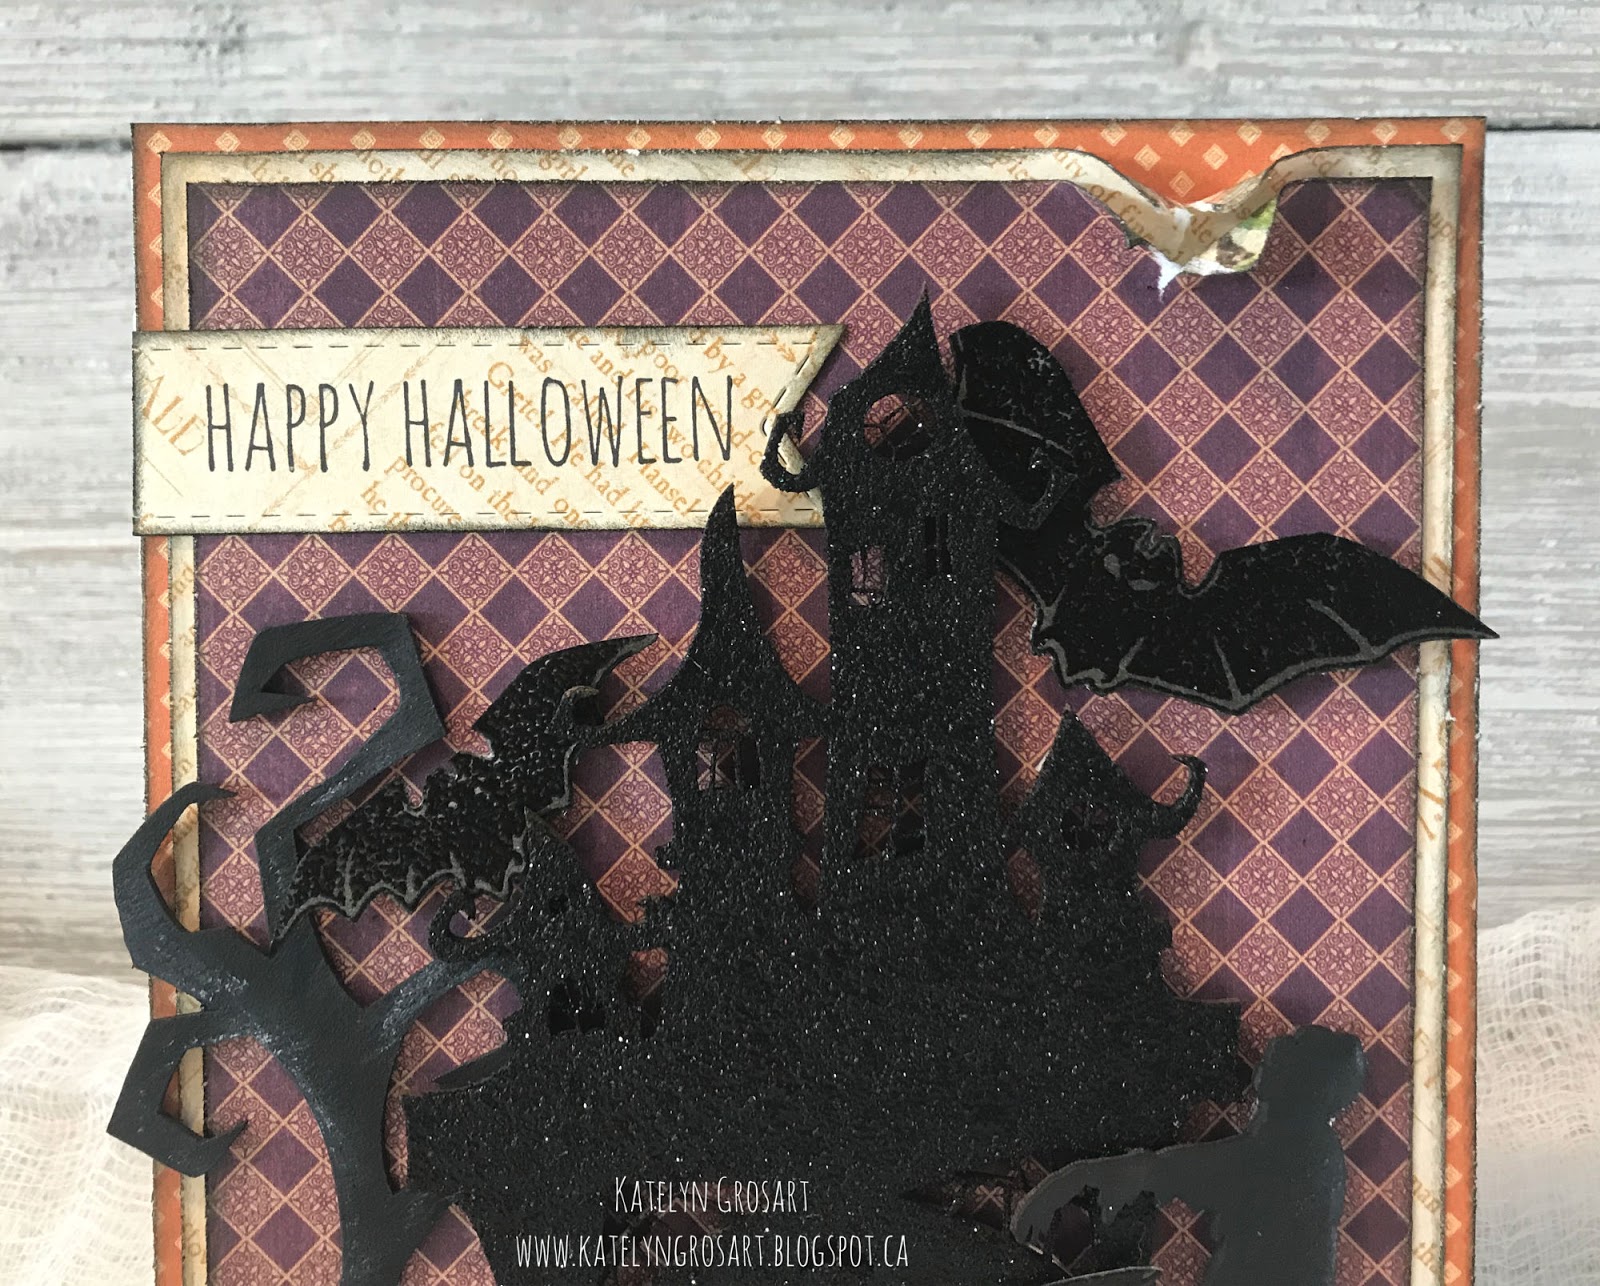
Happy Halloween Card with Katelyn Grosart

Hey Southern Ridge Trading Company fans, Katelyn here. October is here and that means that Halloween will be right around the corner. For today's post, I created this Happy Halloween Card which features a variety of our Halloween chipboard pieces. You'll want to read below as I share with you how to recreate my card at home.


To start, take out the Haunted House from the package. Apply a coat of Emboss It Ink to the house. Sprinkle Onyx Frost Embossing Powder overtop of the house. Tap off the excess powder and emboss with a heat tool. If there are areas that are missing embossing powder, repeat the previous steps.


Take out three Mini Wood Pumpkins out of the package. Apply two coats of Carved Pumpkin Distress Stain on the bottom portion of the pumpkins. Apply two coats of Pine Needles Distress Stain to the top portion of the pumpkins. Set the pumpkins aside to dry.


Take the tree out of the package. Apply two coats of Black Gesso to the tree. Once the black gesso has dried, rub Picket Fence Distress Crayon along the edges of the tree to make it look like the moon is hitting it.


The last chipboard piece you need is to choose a zombie out of the Zombie Gang package. Apply two coats of Black Gesso to the zombie. Once the black gesso has dried, rub Picket Fence Distress Crayon along the backside of the zombie to make it look like the moon is hitting the back.


From the Eerie Tale patterned paper pack, choose three pieces of patterned paper. Cut one patterned paper to 5 1/4" x 6 1/2". Cut the second patterned paper piece to 5" x 6 1/4".  At the top of the second patterned paper, tear a bit of the paper down. Cut the third patterned paper piece to 4 3/4" x 6". At the top of the third patterned paper, tear a bit of the paper down. Distress the edges of all three patterned paper pieces. Ink the edges of all three patterned paper pieces using Black Soot Distress Oxide Ink and a blending tool with foam.


Cut out the 3/4" Stitched Fishtail Banner out of the leftover pieces from the second patterned paper. Apply Jet Black Archival Ink to the Happy Halloween stamp and stamp onto the banner. Trim the banner down to 2 3/4". Distress the edges of the banner. Ink the edges of the banner using Black Soot Distress Oxide Ink and a blending tool with foam.


Apply Emboss It Ink to the bat stamp and stamp onto a piece of white cardstock. Sprinkle Midnight Black Embossing Powder over the stamped bats. Tap off the excess powder and emboss with a heat tool. Fussy cut the three bats out. Using a blending tool with foam and Black Soot Distress Oxide Ink, blend over the white areas of each bat. Ink the edges of the bats using Black Soot Distress Oxide Ink and a blending tool with foam.


Adhere the 5" patterned paper piece to the 5 1/4" patterned paper piece. Adhere the 4 3/4" patterned paper piece to the 5" patterned paper piece. Adhere the Happy Halloween banner 3/4" from the top of and right to the left hand side of the 5 1/4" patterned paper piece.


Adhere the tree 1/8" from the bottom and right to the left hand side of the 5 1/4" patterned paper piece. Foam square the haunted house 1/8" from the bottom and 1 1/8" from the left of the 5 1/4" patterned paper piece.


Use adhesive and foam squares to adhere the zombie to the right hand side of the haunted house. Adhere two of the pumpkins on the left hand side of the tree and haunted house. Adhere the other pumpkin beside the zombie.


Foam square the small bat to the top left side of the haunted house and tree. Adhere the medium sized bat to the left of the zombie. Foam square the large sized bat to the top right side of the haunted house.

To finish the card, cut a cardbase out of white cardstock that measures 10 1/2" x 6 1/2", score at 5 1/4". Adhere the cardfront to the cardbase.


Here are a few close up photos of the card.


And here's the finished Happy Halloween Card.


Southern Ridge Trading Company Supplies Used:

- Halloween Tree
- Mini Wood Pumpkins
- Haunted House

Other Supplies Used:

- Emerald Creek Craft Supplies: Onyx Frost Embossing Powder, Midnight Black Embossing Powder and Vambatia 
- Tim Holtz for Ranger Ink: Distress Oxide Ink - Black Soot, Distress Crayon - Picket Fence, Distress Stain - Carved Pumpkin & Pine Needles and Blending Tool with Foam
- Ranger Ink: Emboss It Ink Dabber and Jet Black Archival Ink
- Graphic 45: An Eerie Tale - Wicked Whimsey, Captivating Characters and You Bewitch Me
- Elizabeth Craft Designs: Stitched Fishtail Banners
- Tim Holtz for Stampers Anonymous: Crazy Talk Stamp Set
- Tombow: Aqua Mono Liquid Glue
- Misc: White Cardstock and Heat Tool

Until Next Time!

- Katelyn


Friday, September 28, 2018

Happy Fall Card with Katelyn Grosart

Hey Southern Ridge Trading Company fans, Katelyn here. For today's post, I'm excited to share with you this Happy Fall Card. To embellish my card, I featured one of our popular frames as well as our fall chipboard pieces. You'll want to read below as I share with you how I embellished the chipboard pieces for my card.


To start, take out two of the Wood Mini Maple Leaves from the package. Apply two coats of Candied Apple Distress Stain to one of the leaves. Apply two coats of Carved Pumpkin Distress Stain to the other leaf. Once the stain has dried on both leaves, rub Walnut Stain Distress Crayon along the edges of the leaves.


Take two Mini Wood Pumpkins out of the package. Apply two coats of Carved Pumpkin Distress Stain to the bottom portion of both pumpkins. Apply two coats of Pine Needles Distress Stain to the top portion of both pumpkins.


You'll need to take one Skeleton Leaf out of the package. Apply a coat of Emboss It Ink to the leaf. Sprinkle Burnt Copper Leaves Embossing Powder over top of the leaf. Tap off the excess powder and emboss with your heat tool.


Take two Pumpkin Leaves out of the package. Apply a coat of Emboss It Ink to each pumpkin leaf. Sprinkle Forest Foliage Embossing Powder over each pumpkin leaf. Tap off the excess powder and emboss with your heat tool. You may need to reapply emboss it ink to the leaves and sprinkle Forest Foliage Embossing Powder over top. Tap off the excess powder and re-emboss with a heat tool.


The last piece of chipboard you need to embellish is the Tribal Feather Frame. Using a blending tool with foam, blend Ground Espresso Distress Ink over the entire surface of the frame.


Once all the patterned papers have been layered together and the oval has been foam squared to the middle of the 4 1/4" piece of patterned paper, adhere the frame over top of the patterned paper oval. Adhere the two pumpkin leaves in the bottom left hand side of the frame. Adhere the skeleton leaf over top of the pumpkin leaves. To finish off the corner, adhere the two pumpkins at the bottom of the skeleton leaf. 


At the top of the frame, foam square the two maple leaves as desired.


To finish off the cardfront, use foam squares to adhere the fall saying. To finish off the card, cut a cardbase that measures 6" x 9", score at 4 1/2". Adhere the cardfront to the cardbase.


Here's the finished Happy Fall Card.


Southern Ridge Trading Company Supplies Used:

- Mini Wood Pumpkins

Other Supplies Used:

- Emerald Creek Craft Supplies: Burnt Copper Leaves Embossing Powder and Forest Foliage Embossing Powder
- Tim Holtz for Ranger Ink: Distress Ink - Ground Espresso, Distress Crayon - Walnut Stain, Distress Stain - Candied Apple, Carved Pumpkin & Pine Needles and Blending Tool with Foam
- Ranger Ink: Emboss It Ink Dabber
- Carta Bella: Fall Break - Pumpkin Plaid, Brisk Leaves, Border Strips and Gord Variety
- Elizabeth Craft Designs: Stitched Ovals
- Tombow: Mono Multi Liquid Glue
- Creative Scrapbooker Magazine/Cathie Allan: Superstock Cardstock
- Misc: Heat Tool

Until Next Time!

- Katelyn


Monday, August 13, 2018

Amazing Scrapbook Layout with Katelyn Grosart

Hey Southern Ridge Trading Company fans, Katelyn here. For today's post, I'm excited to share with you my Amazing Scrapbook Layout. This layout is special to me as they are photos of Butchart Gardens where my now fiance proposed to me. The pictures are of the beautiful rose garden.  So to embellish my layout, I featured a variety of our popular and frames and words. You'll want to read below as I share with you how I embellished the chipboard pieces for my layout.


To start, I applied two coats of Spun Sugar Distress Paint to the Oval Arrow Frame. Once the paint had dried, I applied Walnut Stain Distress Crayon to the frame and rubbed it in with my finger.


For the Rod Iron Circle Frame, I applied a coat of Emboss It Ink to the frame. Sprinkle Glacier White Embossing Powder over top of the frame. Tap off the excess powder and emboss with a heat tool.


Choose and cut out two butterflies from the Small Butterfly Mix. Apply a coat of Emboss It Ink to both butterflies. Sprinkle Light Pink Embossing Powder over each butterfly. Tap off the excess powder and emboss with a heat tool. 


The last chipboard element I embellished was the Amazing Fun Word. Using a blending tool with foam, blend Ground Espresso Distress Ink over the entire surface of the word. 


After all of my fussy cut flowers have been adhered, I adhered one of the embossed butterflies in the top right side of the flowers. Once the top right butterfly is adhered, adhere the other butterfly in the bottom left side of the flowers.


Adhere one of the photos to the Oval Arrow Frame and then foam square the frame on the top left side of the flowers. Adhere the other photo to the rod iron circle frame and then adhere the frame to the right of the oval arrow frame.


With the frames adhered, adhere the amazing word over top of each frame. 


To finish off around the frames and word, I adhered a variety of pink and white roses.


 Southern Ridge Trading Company Supplies Used:

- Roses: 15mm - White
- Roses: 10mm - White, Light Pink and Pink

Other Supplies Used:

- Emerald Creek Craft Supplies: Glacier White Embossing Powder and Light Pink Embossing Powder
- Tim Holtz for Ranger Ink: Distress Ink - Ground Espresso, Distress Paint - Spun Sugar, Distress Crayon - Walnut Stain and Blending Tool with Foam
- Ranger Ink: Emboss It Ink Dabber
- Graphic 45: Floral Shoppe - Indigo Lilies, Verdant Blossoms, Midnight Medley, Scarlet Serenity and Sunlit Medley
- Tombow: Mono Multi Liquid Glue
- Misc: Flowers - White, Lace and Heat Tool

Until Next Time!

- Katelyn


Wednesday, July 4, 2018

Sweet Ballerina Mini Layout with Erin Quiding-Sampson


Hello today I’m sharing a card that could also be used as a mini layout. It would look great on the wall, in a frame or sitting on a mini easel as shown in the photos.


To create this card, I used one chipboard ballerina from Lil Ballerinas and the word Sweet from Word Mix 2. I prepped them with a thin coat of Gesso.

While those were drying, I cut the card pieces out of 110lb card stock and some co-ordinating papers from Lawn Fawn.

The sizes are as follows:

Pink - 5 by 5 inch
White - 4 ½ by 4 ½
Decorative paper - 4 ¼ by 4 ¼
Pink - 4 by 4
White - 3 ½ by 3 ½

I also used my silhouette machine to cut out the word Ballerina with the decorative paper x2 so that I could stack them and add some dimension and sturdiness to the letters.


I painted the word Sweet and the Ballerina with a mix of 1 part white and 2 parts pink. I then used the same paint mix to colour some flower petals to create a tutu for the lil ballerina.
I allowed the pieces to dry, then cut the flower petal to fit around the waist and stacked the pieces to create a puffy tutu.


I stacked the first 3 layers centered, then the next 2 on an angle.


I glued down the Ballerina and the words’ Sweet Ballerina.


To finish it all off I added some iridescent glitter glue to the ballerina’s waist, star, tiara, slippers and both words.

I plan to add a photo of the recipient before the card is gifted.

Southern Ridge Trading Company Products Used:


Other Products Used:
- Tombow Multi Glue
- DecoArt Acrylic Paint: White and Pink
- Studio G: Iridescent Glitter Glue
- White Gesso
- Flower Petals
- Lawn Fawn: 6" x 6" paper
- Recollections: 110 lb Cardstock

Thanks for stopping in,
Erin