
Hey Southern Ridge Trading Company fans, Katelyn here. October is here and that means that Halloween will be right around the corner. For today's post, I created this Happy Halloween Card which features a variety of our Halloween chipboard pieces. You'll want to read below as I share with you how to recreate my card at home.

To start, take out the Haunted House from the package. Apply a coat of Emboss It Ink to the house. Sprinkle Onyx Frost Embossing Powder overtop of the house. Tap off the excess powder and emboss with a heat tool. If there are areas that are missing embossing powder, repeat the previous steps.

Take out three Mini Wood Pumpkins out of the package. Apply two coats of Carved Pumpkin Distress Stain on the bottom portion of the pumpkins. Apply two coats of Pine Needles Distress Stain to the top portion of the pumpkins. Set the pumpkins aside to dry.

Take the tree out of the package. Apply two coats of Black Gesso to the tree. Once the black gesso has dried, rub Picket Fence Distress Crayon along the edges of the tree to make it look like the moon is hitting it.

The last chipboard piece you need is to choose a zombie out of the Zombie Gang package. Apply two coats of Black Gesso to the zombie. Once the black gesso has dried, rub Picket Fence Distress Crayon along the backside of the zombie to make it look like the moon is hitting the back.

From the Eerie Tale patterned paper pack, choose three pieces of patterned paper. Cut one patterned paper to 5 1/4" x 6 1/2". Cut the second patterned paper piece to 5" x 6 1/4". At the top of the second patterned paper, tear a bit of the paper down. Cut the third patterned paper piece to 4 3/4" x 6". At the top of the third patterned paper, tear a bit of the paper down. Distress the edges of all three patterned paper pieces. Ink the edges of all three patterned paper pieces using Black Soot Distress Oxide Ink and a blending tool with foam.

Cut out the 3/4" Stitched Fishtail Banner out of the leftover pieces from the second patterned paper. Apply Jet Black Archival Ink to the Happy Halloween stamp and stamp onto the banner. Trim the banner down to 2 3/4". Distress the edges of the banner. Ink the edges of the banner using Black Soot Distress Oxide Ink and a blending tool with foam.

Apply Emboss It Ink to the bat stamp and stamp onto a piece of white cardstock. Sprinkle Midnight Black Embossing Powder over the stamped bats. Tap off the excess powder and emboss with a heat tool. Fussy cut the three bats out. Using a blending tool with foam and Black Soot Distress Oxide Ink, blend over the white areas of each bat. Ink the edges of the bats using Black Soot Distress Oxide Ink and a blending tool with foam.

Adhere the 5" patterned paper piece to the 5 1/4" patterned paper piece. Adhere the 4 3/4" patterned paper piece to the 5" patterned paper piece. Adhere the Happy Halloween banner 3/4" from the top of and right to the left hand side of the 5 1/4" patterned paper piece.

Adhere the tree 1/8" from the bottom and right to the left hand side of the 5 1/4" patterned paper piece. Foam square the haunted house 1/8" from the bottom and 1 1/8" from the left of the 5 1/4" patterned paper piece.

Use adhesive and foam squares to adhere the zombie to the right hand side of the haunted house. Adhere two of the pumpkins on the left hand side of the tree and haunted house. Adhere the other pumpkin beside the zombie.

Foam square the small bat to the top left side of the haunted house and tree. Adhere the medium sized bat to the left of the zombie. Foam square the large sized bat to the top right side of the haunted house.
To finish the card, cut a cardbase out of white cardstock that measures 10 1/2" x 6 1/2", score at 5 1/4". Adhere the cardfront to the cardbase.

Here are a few close up photos of the card.


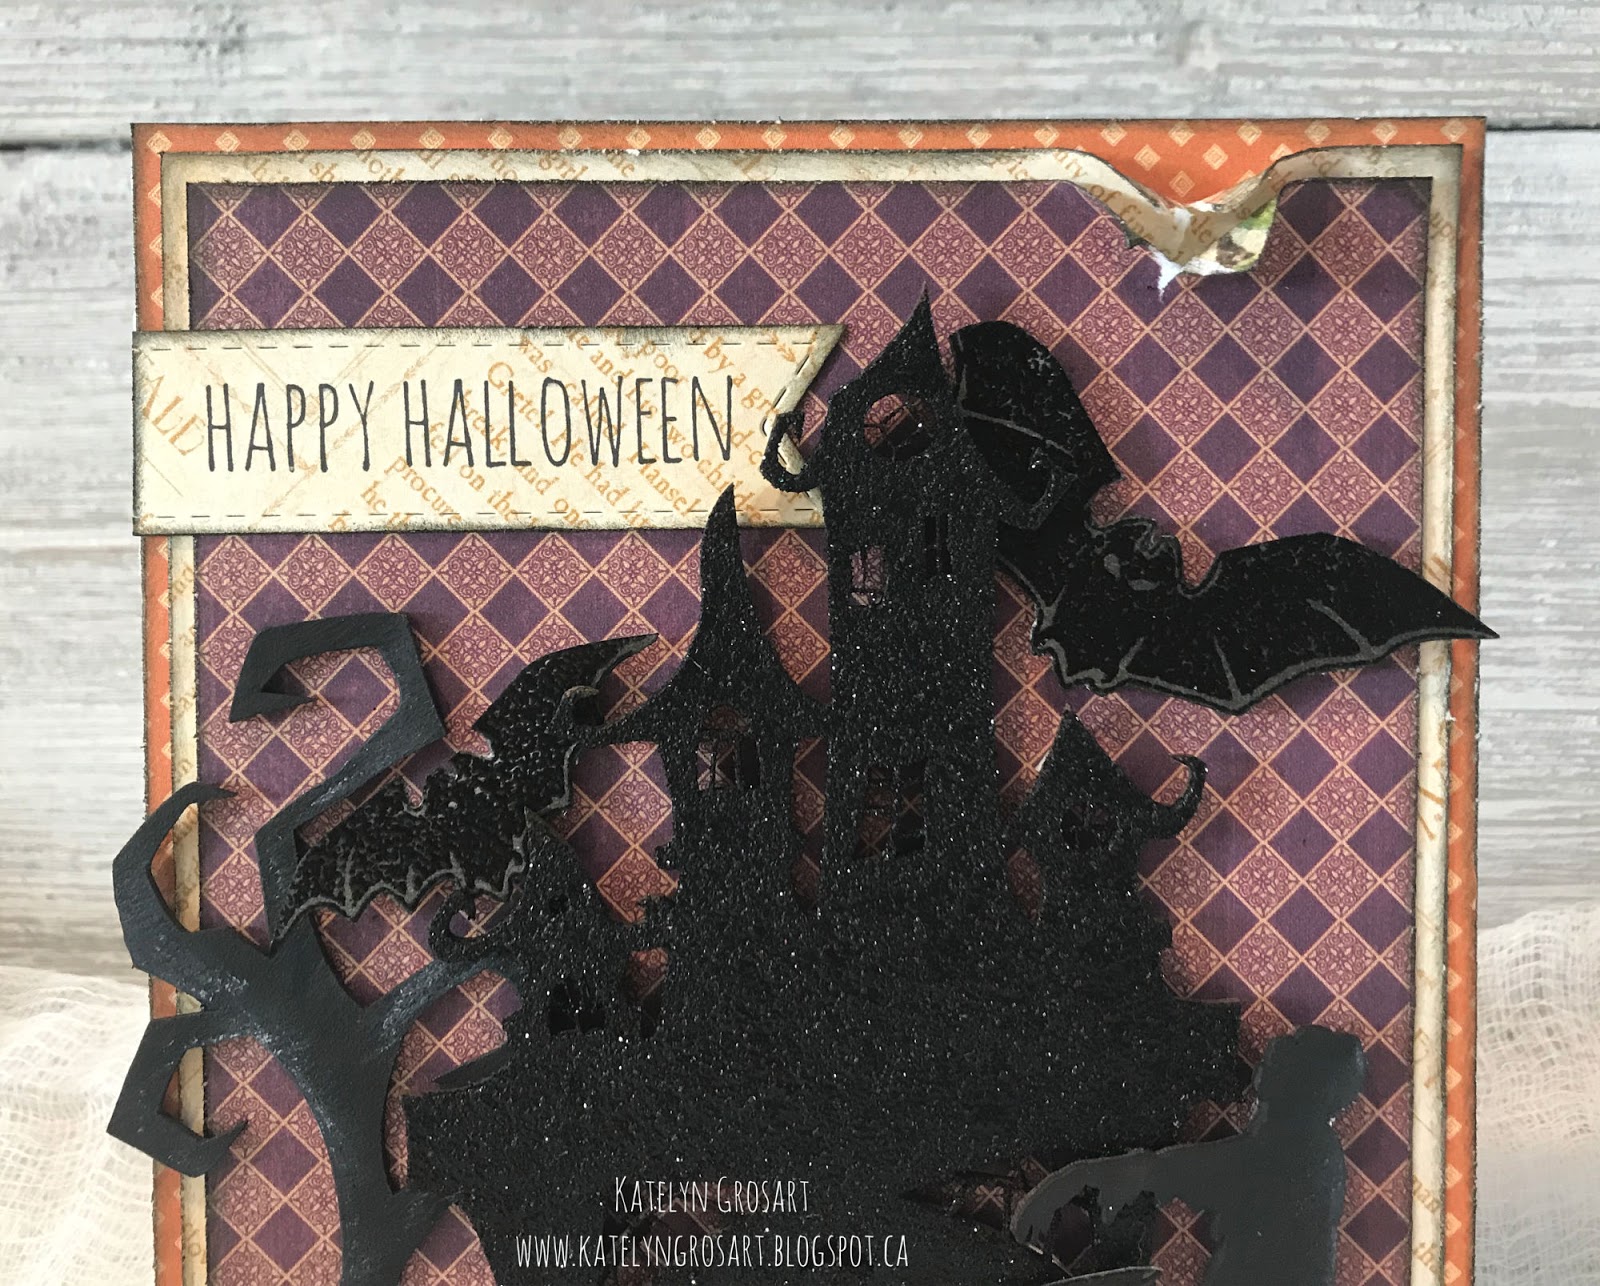
And here's the finished Happy Halloween Card.

Southern Ridge Trading Company Supplies Used:
- Halloween Tree
- Mini Wood Pumpkins
- Haunted House
Other Supplies Used:
- Emerald Creek Craft Supplies: Onyx Frost Embossing Powder, Midnight Black Embossing Powder and Vambatia
- Tim Holtz for Ranger Ink: Distress Oxide Ink - Black Soot, Distress Crayon - Picket Fence, Distress Stain - Carved Pumpkin & Pine Needles and Blending Tool with Foam
- Ranger Ink: Emboss It Ink Dabber and Jet Black Archival Ink
- Graphic 45: An Eerie Tale - Wicked Whimsey, Captivating Characters and You Bewitch Me
- Elizabeth Craft Designs: Stitched Fishtail Banners
- Tim Holtz for Stampers Anonymous: Crazy Talk Stamp Set
- Tombow: Aqua Mono Liquid Glue
- Misc: White Cardstock and Heat Tool
Until Next Time!
- Katelyn


