Showing posts with label Barbed Wire Heart Frames. Show all posts

Monday, September 3, 2018

Traveler's Journal with Cathy Potosky

Happy September everyone! I'm not saying fall yet, a few more days of summer is okay with me now that it's not 35 degrees here.

My project is a travelers journal, using the Eileen Hull die. This one is going to a friend with some inserts I created.

I started by spraying my cover (and my desk, phone etc) with Dylusions sprays and a Prima Bloom colour for the shimmer. When that was dry I stenciled in white and hickory smoke using a couple of TH stencils. I found a piece of canvas in my stash, stenciled that in Dylusions paint to add a pocket on the inside of my cover. I moved all those aside to dry.


I pulled out my SRTC chipboard pieces and got them ready for the cover. I used the small and medium size from the  Dandelion Seed Stems set. I embossed the flower part with Emerald Creek Soft Fallen Snow and did the stems with Finnabair Wax in Emerald.


Using the Dylusions Calypso Teal I painted my Barbed Wire Heart Frame and prepped my butterfly from the Butterfly Swirl Combo and covered it with mixed media medium, waited for it to be tacky then foiled it in blue.

Now that all my pieces were ready and dry, I could put all my items on my journal.


I attached my dandelion pieces first because I wanted them to be my focal point. I then added a few rub ons, a couple of stamped images and I set a little brad into melted embossing powder.


I love the dandelions. And the sparkle from the Soft Fallen Snow was just the right touch. On my inside pocket I attached my barbed wire heart with Glossy Accents so it would hold well on the fabric.


On the back cover I attached a glassine envelope to hold little bits in. I wanted the tab to stay "closed" so I attached my foiled butterfly to it. Pretty touch and just enough to keep the flap down.


And one last close up, my dandelions! 


Southern Ridge Trading Company Supplies Used:


Other Supplies Used:

- Emerald Creek Embossing Powder: Soft Fallen Snow Embossing Powder, Baked Texture - Patina Oxide Embossing Powder and Brads
- Dylusions: Dylusions Spray - Lemon Zest, Pure Sunshine, Squeezed Orange, Vibrant Turquoise & Fresh Lime and Dylusions Paint - Calypso Teal
- Rebekah Meier Mixed Media Medium and Three Tags Stencil
- Artful Maven November Stamp Set
- Tim Holtz for Ranger Ink: Distress Paint - Hickory Smoke and Picket Fence
- Tim Holtz Ideaology: Glassine Envelopes, Canvas Substrate, Quote Chips, Mini Motivational Stamp Set and Rub Ons
- Tim Holtz for Stampers Anonymous: Wildflowers Layering Stencil and Swirls Layering Stencil
- Ranger Ink: Foil - Vintage

Thank you all for stopping by and make sure you head over to get your chipboard pieces for your next project!

- Cathy


Saturday, January 27, 2018

Love Tag with Katelyn Grosart

Hey Southern Ridge Trading Company fans, Katelyn here. Today, I've created for you a shabby chic Love Tag, that's perfect for Valentine's Day as it's only a few weeks away. You'll want to read below as I share with you how I created my Love Tag so that you can recreate it at home.


To start, trace the Chipboard Tag around a piece of book page. Use Distress Collage Medium - Matte to decoupage the book page onto the chipboard tag. Set aside to dry.


Once the book page has dried, place the Heart Stencil overtop of the bookpage. Using a palette knife, spread Embossing Paste over top of the stencil. Set the tag aside to dry.


With the embossing paste dry, apply a coat of Vintage Lace and Blush Paint to the entire surface of the tag.


Once the paint has dried on the tag, rub Walnut Stain and Vintage Photo Distress Crayon on the edges of the tag.


Take the Love Word out of the package. Apply a coat of Emboss It Ink to the word. Sprinkle Burnt Copper Leaves embossing powder over the entire surface of the word. Tap off the excess powder and emboss with your heat tool. 


Take one Vintage Scroll Key out of the package. Apply Vintage Photo Distress Ink to the entire surface of the key using a blending tool with foam.


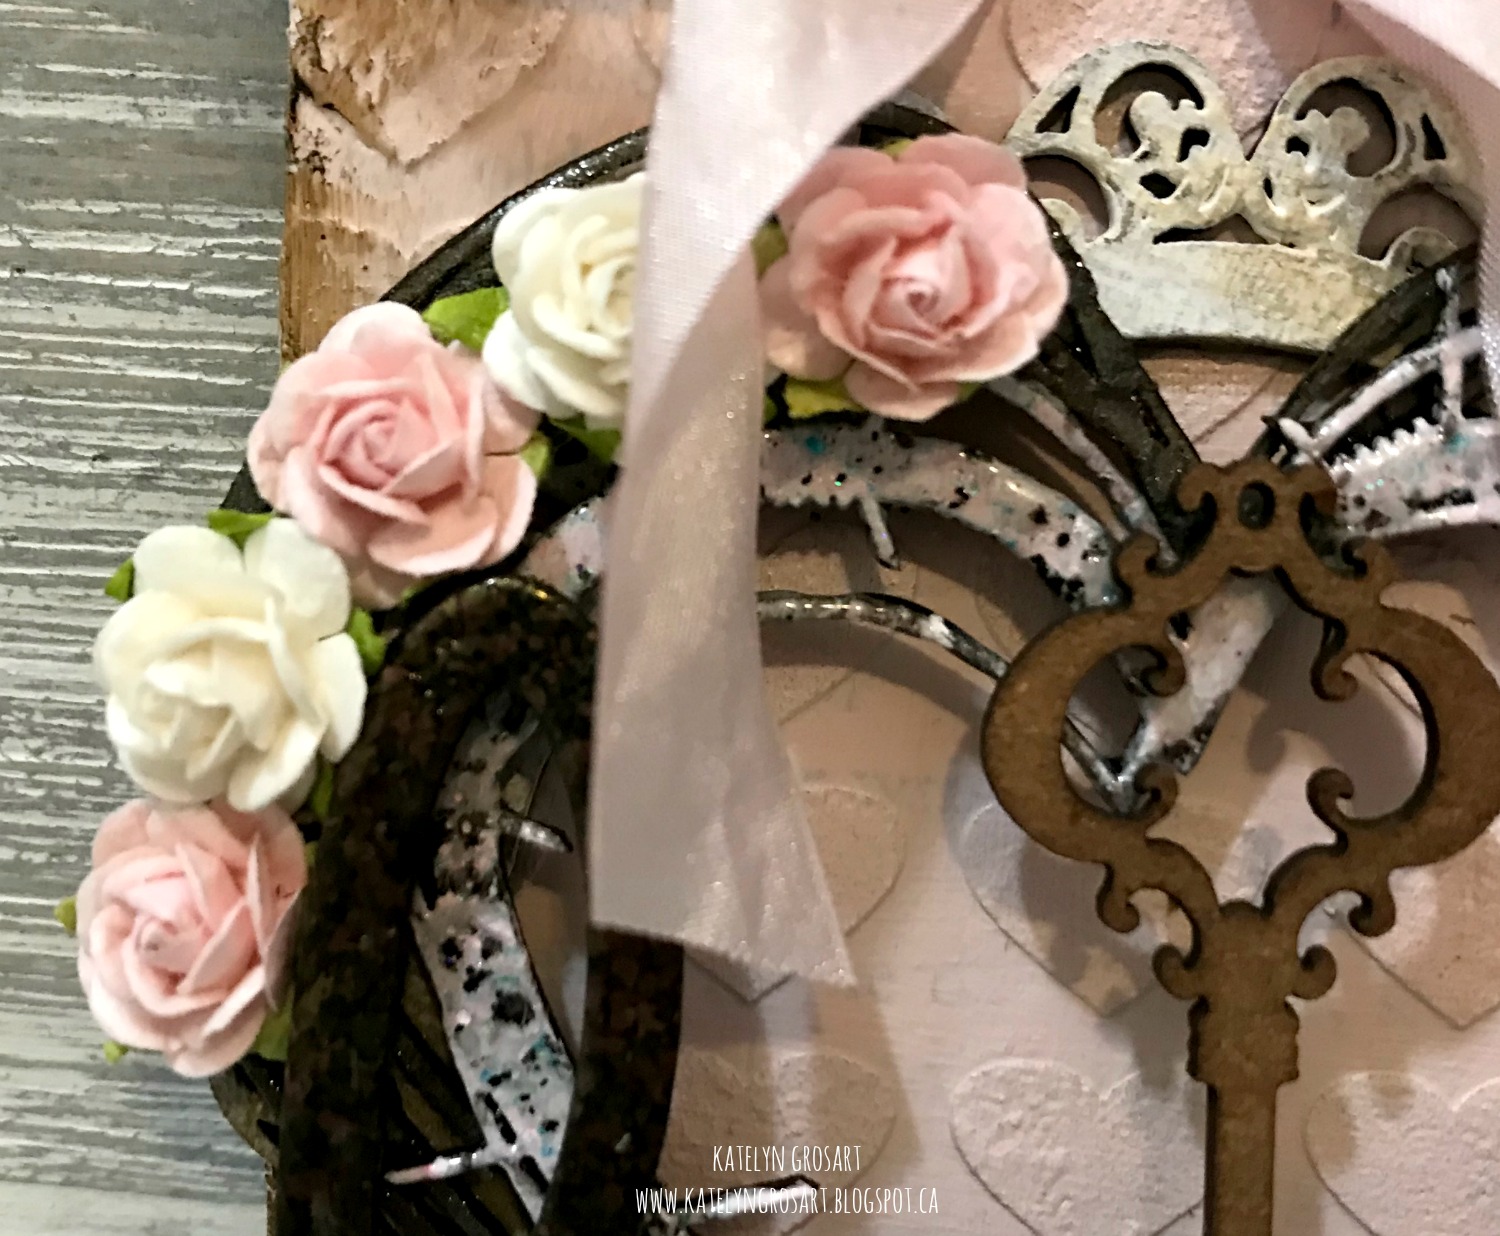
Next, you'll need the Barbed Wire Heart Frame. Apply a coat of Emboss It Ink to the heart. Sprinkle Pastel Pink embossing powder over the entire surface of the heart. Tap off the excess powder and emboss with your heat tool. Once the Pastel Pink embossing powder has dried, apply a coat of Emboss It Ink to the now pink heart. Sprinkle Fractured Ice embossing powder over the entire surface of the pink heart. Tap off the excess powder and emboss with your heat tool.     


Take the small heart out of the Abstract Heart Frames package. Apply a coat of Mixed Media Medium to the heart. Quickly place the Mixed Media Transfer Foil in Patina overtop of the heart and rub the foil onto the heart. In the areas that didn't get foil, apply Black Soot Distress Ink using a blending tool and foam. 


Take out the small Doily Frame and apply two coats of Snowflake paint to the frame. Once the paint has dried, lightly rub Vintage Photo Distress Crayon randomly onto the frame.


Adhere a piece of lace to the bottom of the tag.


Adhere the doily frame to the middle of the tag. Adhere the abstract heart to the middle of the doily frame.


Adhere the barbed wire heart to the middle of the abstract heart. Adhere the key to the middle of the barbed wire heart.


Adhere the love word to the bottom of the hearts. To add some extra detail to the love, add three rhinestones. In the bottom right hand side of the hearts, adhere two cream roses and three pink roses. In the top left hand side of the hearts, adhere two cream roses and three pink roses.


To finish the Love Tag, tie a pink bow at the top of the tag.


Here are a few close up shots of my tag.


Here's the finished tag.


Southern Ridge Trading Company Supplies Used:

- Doily Circle Frame
- 10mm Roses: Cream and Pink

Other Supplies Used:

- Emerald Creek Craft Supplies: Burnt Copper Leaves Embossing Powder, Fractured Ice Embossing Powder and Pastel Pink Embossing Powder
- Paper Artsy: Fresco Finish Chalk Acrylics - Snowflake Vintage Lace and Blush 
- Ranger Ink: Emboss It Ink Dabber
- Tim Holtz for Ranger Ink: Distress Ink - Vintage Photo & Black Soot, Distress Crayon - Vintage Photo & Walnut Stain, Distress Collage Medium - Matte, Distress Collage Brush and Blending Tool with Foam
- Stampendous: Dreamweaver Stencil - Regular Embossing Paste
- Therm o web: Rebekah Meier - Mixed Media Medium and Mixed Media Transfer Foil - Patina
- Want 2 Scrap: Rhinestones
- Tombow: Mono Multi Liquid Glue
- Misc: Book Page and Light Pink Ribbon

Until Next Time!

- Katelyn


Friday, August 19, 2016

Love Mixed Media Canvas with Katelyn Grosart

Hey there Southern Ridge Trading Company fans, Katelyn here, I'm up on the blog today to share with you some more inspiration for our current monthly challenge which is "Anything Goes".  I love the anything goes challenge and I can't wait to see what you will share with us. Today I've got a love mixed media canvas for you that will be sure to inspire you. You'll want to grab a cup of coffee or tea while you learn how I transformed my chipboard pieces to create the perfect additions to my love mixed media canvas.


To start, you'll want to grab your Chicken Wire stencil. Place the chicken wire stencil in the bottom right hand corner of the canvas. Using a palette knife, apply a thin layer of texture paste over a portion of the stencil. Pick up the stencil and place it in the top left corner. Using a palette knife, apply a thin layer of texture paste over a portion of the stencil. Once your finished with your stencil, immediately clean it along with the palette knife. Note: My canvas was going to be for a different project, that's why it's blue. Let canvas dry for 20 minutes.


With the stenciled images being dry on the canvas, apply a couple of coats of white gesso to the entire canvas, including the sides. You'll want to cover the stenciled areas on your canvas with white gesso. Let the gesso dry on the canvas.


Once the gesso has dried, apply a couple of coats of Vintage Rose paint to the entire canvas including the sides. Once the two layers dry, apply a layer of Blush paint to the entire canvas including the sides. After the Blush paint has dried, lightly apply white gesso randomly over the entire canvas. Set aside the canvas to dry.


After the layers of paint have dried, apply VersaMark ink to a script stamp of your choosing. Start by stamping the script stamp in the top left corner. Continue apply VersaMark to the stamp and continue stamping on the top of the canvas, until the entire canvas is covered with the script image. Once the stamping is finished, cover the top of the canvas with Soft Fallen Snow Embossing Powder. Tap off excess and emboss with a heat tool. Don't worry if you only see parts of the script image on the canvas. As you can notice, I only had parts of the stamped script image showing on my canvas. 


With the script images now being embossed, randomly spritz Mister Huey's - First Kiss, Tattered Angels Glimmer Mist - Silver and Ranger Ink Perfect Pearls Mist - Perfect Pearls on to the top of the canvas. Add as much or as little of each colour. This part is completely up to you on which colours you want to highlight more on your canvas. Set the canvas aside to dry.


With the background on the canvas being done, it's time to move on to the chipboard pieces. To start, you'll need the Elegant Victorian Corners. Start by covering each corner in two coats of Blush Paint. Once the blush paint has dried, take a piece of paper towel and dab it into the white gesso. With white gesso on your paper towel, randomly add little streaks of gesso to each corner. You'll need to dab your paper towel into the white gesso more than once. Set chipboard pieces aside to dry.


With the corners being done, we'll now work on the Love word from the Wedding Love set. Apply two coats of Vintage Rose paint to the love word. Set the love word aside to dry.


The next piece you'll use is the Barbed Wire Heart Frame. Apply two coats of Silver Spoon paint to the heart. Once the paint has dried, cover the entire heart with a coat of VersaMark Ink. With VersaMark ink being on the heart, cover it with Ultra Thick Embossing Powder. Tap off excess and emboss the heart with a heat tool. When embossing the heart, don't let the embossing powder completely melt, this will give you the bubble effect like I got.


The last piece of chipboard you'll need is the Swirling Heart. When you purchase the swirling heart, you'll notice that there is a flourish designs underneath it, cut the heart away from the flourish design. Keep the flourish piece as you'll be able to use it on another project. Apply two coats of Silver Spoon paint to the heart. Once the paint has dried, apply a layer of VersaMark ink to the heart. Once the VersaMark ink has been applied, cover the heart with Ultra Thick Embossing Powder. Tap off excess and emboss the heart with a heat tool. When embossing the heart, don't let the embossing powder completely melt, this will give you the bubble effect like I got.


Your canvas background should be dry now, so you can adhere all of your chipboard pieces to the canvas. When you adhere your chipboard pieces, you'll want to use Glossy Accents to make sure the pieces stay in place. To finish off the bottom right and top left corners, I added an assortment of flowers and in amongst the flowers I added some keys. Add as many flowers and embellishments as desired. To adhere the flowers and keys, use Glossy Accents to make sure that they stay in place. Allow at least an hour for the Glossy Accents to dry before sitting your piece up right.


Here is my finished piece with all of the elements together.


Southern Ridge Trading Company Supplies Used:

- 10mm Pink Roses
- White Carnations
- 40mm Pink Roses and White Flowers

Other Supplies Used:

- Emerald Creek Craft Supplies: Soft Fallen Snow Embossing Powder and Metal Key Charm
- Ranger Ink: Glossy Accents, Ultra Thick Embossing Powder, Texture Paste and Perfect Pearls Mist - Perfect Pearls
- Ranger Ink/Dina Wakley: Palette Knife
- Tim Holtz/Stampers Anonymous: Random Quotes
- Prima Marketing: Heavy White Gesso and Acrylic Paint - Metallic Silver Spoon and Vintage Rose
- Tsukineko/Imagine Crafts: VersaMark
- Paper Artsy: Fresco Chalk Acrylic Paint - Blush
- Tattered Angels: Glimmer Mist - Silver
- Studio Calico: Mister Huey's - First Kiss
- Misc: Canvas & Heat Tool

Remember to play along in the monthly challenge over on the Southern Ridge Trading Company blogEach month enter for your chance to win 4 designs from the online store - chipboard.ca -$20 (before tax) retail value of YOUR OWN CHOOSING! 

Until Next Time!