Showing posts with label Wood Small Marked Reindeer. Show all posts

Monday, December 18, 2017

Seasonal Clipboard with Charlene Byrd

Hello bloggers!

Charlene here! Thanks for joining me today.


I'm sharing with you a beautiful, decorative Christmas clipboard that I created to celebrate the season. I designed it so that it can easily be interchanged with the changing seasons or occasions.


To begin I covered chipboard with a piece of burlap and trimmed around the edges.


I used gold embossing powder to create the reindeer.


I simply added Walnut Distress stain to the pine branch.


I then added Fired Brick Distress Stain to the cute, tiny sled.


I inked the paper doily. Attached it and added the pine branch. I then added the tag with the reindeer. Wrapped it all with distressed seam binding ribbon and some bakers twine and tucked in the sled. I also added the ribbon and twine with a tag to the top of the chipboard and voila.....done!

Southern Ridge Trading Company Products Used:


Other Products Used:

- Tim Holtz/Idea-ology: Clipboard
- Tim Holtz/Ranger Ink: Distress Stain - Fired Brick and Walnut Stain
- Kaisercraft paper
- Kraft tag and Chipboard
- Paper doily
- Burlap, Seam Binding Ribbon, Bakers Twine
- Gold Embossing Powder

Until next time!
Charlene Byrd


Monday, November 27, 2017

Reindeer Card with Corina Finley


Hello!

Thank you so much for joining me today! Winter has arrived where I live and the holiday season is upon us! 

I have been playing in my studio with the wonderful detailed Snowflake #3 chipboard diecuts and the Wood Small Marked Reindeer. There are a variety of different snowflake designs on the website and the Reindeer come in a pack of 4!

I only used Distress Stain in Vintage Photo to the Wood Small Marked Reindeer so that the etched design was visible - so pretty! I let it dry before adding it to the center of my card for the focal point


I used the Snowflake #3 like last week, added glitter with a Stardust pen and tucked them under the edge of the circle.

Southern Ridge Trading Company Products Used:


Remember to take a look at the Southern Ridge Trading Company website - Chipboard.ca for great Chipboard designs for your next card or project!
Thanks for joining me today!


Take care,Corina Finley


Live, Laugh & Create!

Sunday, November 19, 2017

Noel Christmas Tag with Katelyn Grosart

Hey Southern Ridge Trading Company fans, Katelyn here. Today, I've created for you a fun Noel Christmas Tag, that's perfect to use as a gift tag on a present for that special someone in your life for Christmas. You'll want to read below as I share with you how I created my Noel Christmas Tag.


To start, pull out one of the Chipboard Tags from the package. Ink the edges of the tag using Black Soot Distress Ink and a blending tool with foam.


Trace the tag around a piece of patterned paper. Cut the paper tag out. Cut a second piece of patterned paper that measures 3 1/4" x 3 3/4". Distress the edges of each piece of patterned paper. Ink the edges of each piece of patterned paper using Black Soot Distress Ink and a blending tool with foam.


Take out the small Abstract Frame from the Abstract Frame Set. Apply Emboss It Ink to the entire surface of the frame. Sprinkle Salted Raven Embossing Powder over the entire frame. Tap off the excess powder and emboss with your heat tool. Let cool for a few minutes before picking up the frame.


Pull out one Wood Small Marked Reindeer from the package. Apply two coats of Brushed Pewter Distress Stain to the reindeer. Set aside to dry.


Take the Noel word out from the Wood Words of Christmas - Noel package. Apply two coats of Candied Apple Distress Stain to the word. Set aside to dry.


From the Snowflakes 712 package, take out two snowflakes. Apply Emboss It Ink to the entire surface of the snowflakes. Sprinkle Charred Gold Embossing Powder over each snowflake. Tap off the excess powder and emboss with your heat tool. Let cool for a few minutes before picking up the frame.


From the same Snowflakes 712 package, pick out another snowflake. Apply two coats of Tarnished Brass Distress Stain to the snowflake. Set the snowflake aside to dry.


Pick one of the large snowflakes out of the Snowflakes 714 package. Apply two coats of Tarnished Brass Distress Stain to the snowflake. Set the snowflake aside to dry.


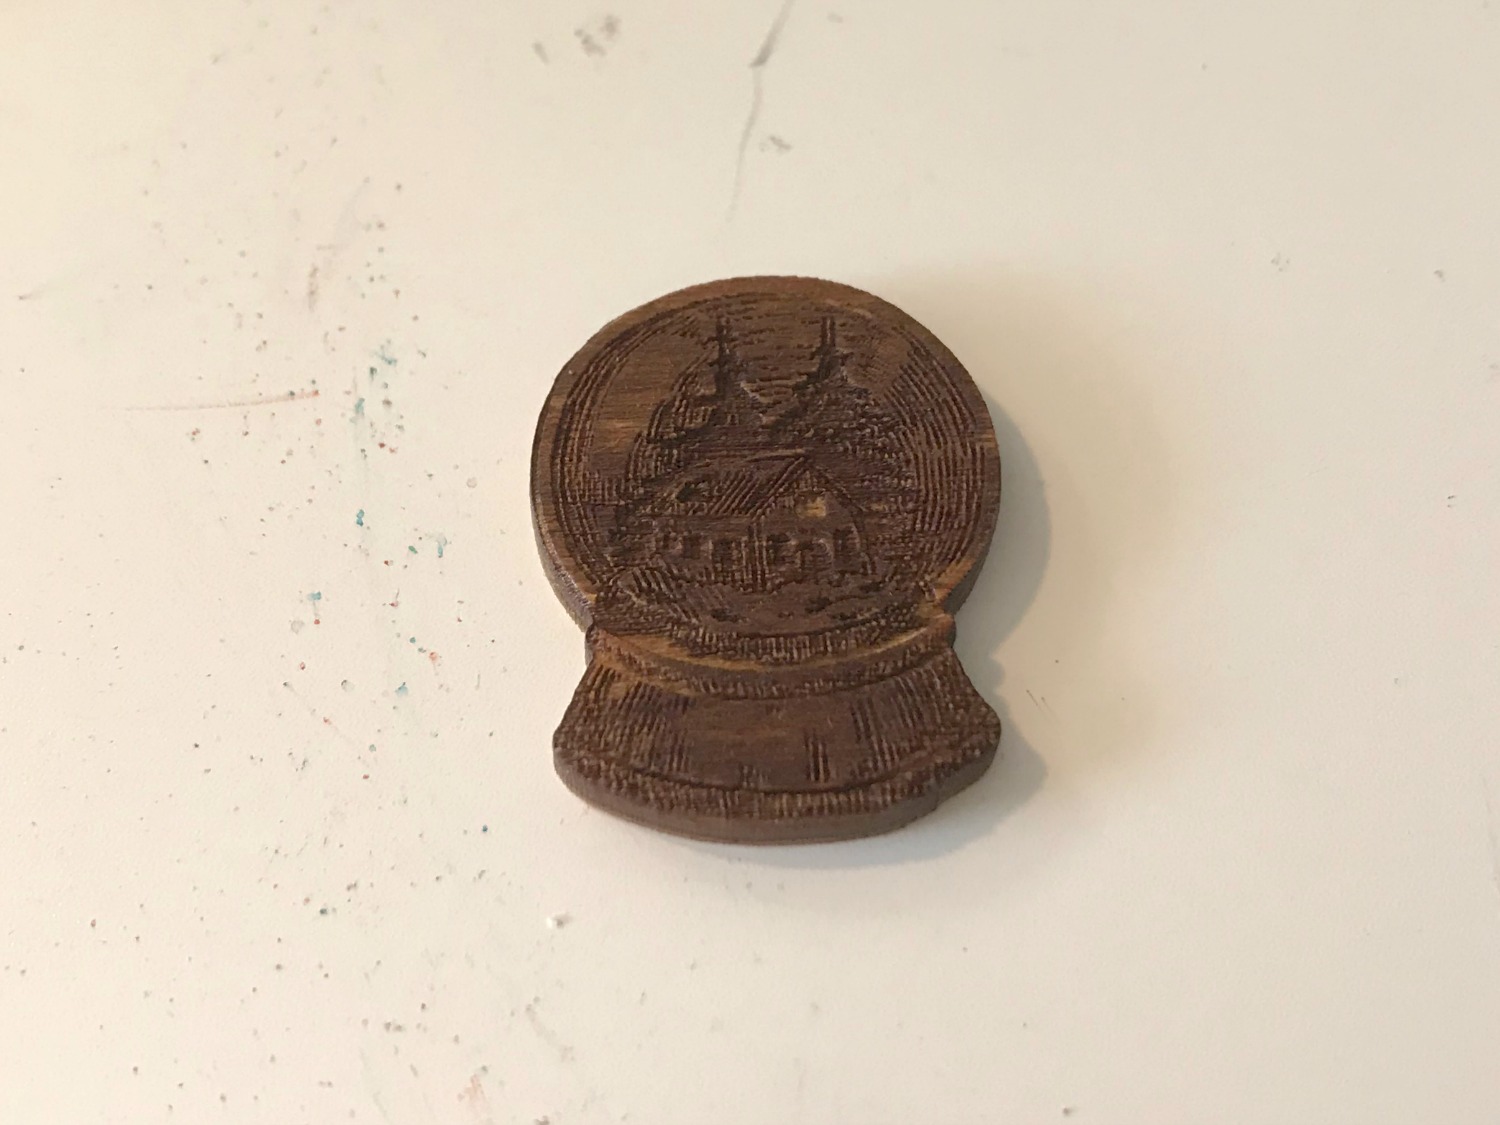
Pull out one of the snow globes from the package. Apply a coat of Gathered Twigs Distress Stain to the snow globe. Set the snow globe aside to dry.


Take out a small star from the Corrugated Stars package. Apply Emboss It Ink to the entire surface of the star. Sprinkle Charred Gold Embossing Powder over the star. Tap off the excess powder and emboss with your heat tool. Let cool for a few minutes before picking up the frame.


Cut two pine branches out of the package. Trim a bit off the branch of each pine branch. Apply two coats of Pine Needles Distress Paint to each pine branch. Set aside to dry.


Now it's time to assemble your tag. 

Adhere the patterned paper cut out tag to the chipboard tag. Adhere the smaller patterned paper piece to the tag.


Adhere one pine branch 1/2" from the top of the smaller patterned paper piece. Adhere the other pine branch 1/2" from the bottom of the smaller patterned paper piece. Adhere the abstract frame in the middle of the smaller patterned paper piece. The frame will sit on top of the pine branches.


Adhere the reindeer in the middle of the frame. In the bottom right hand corner of the frame, adhere the large snowflake, corrugated star and noel word.


In the top left hand corner of the frame, adhere the three small snowflakes and snow globe.


To finish the top of the tag, add a black ribbon bow with a few jingle bells and a pinecone hanging from the center of the bow.


Here are a few close up shots of my tag.


Here's the finished tag.


Southern Ridge Trading Company Supplies Used:

- Snow Globe (coming soon)
- Pine Branches (coming soon)

Other Supplies Used:

- Emerald Creek Craft Supplies: Charred Gold Embossing Powder, Salted Raven Embossing Powder and Pinecone Charms
- Tim Holtz/Ideaology: Tiny Bells and Paper Stash - Christmas
- Ranger Ink: Emboss It Ink Dabber
- Tim Holtz for Ranger Ink: Distress Stain - Tarnished Brass, Brushed Pewter, Gathered Twigs & Candied Apple, Distress Paint - Pine Needles, Distress Ink - Black Soot and Blending Tool with Foam
- Tombow: Mono Multi Liquid Glue and Adhesive Dots

Until Next Time!

-Katelyn 


Friday, October 27, 2017

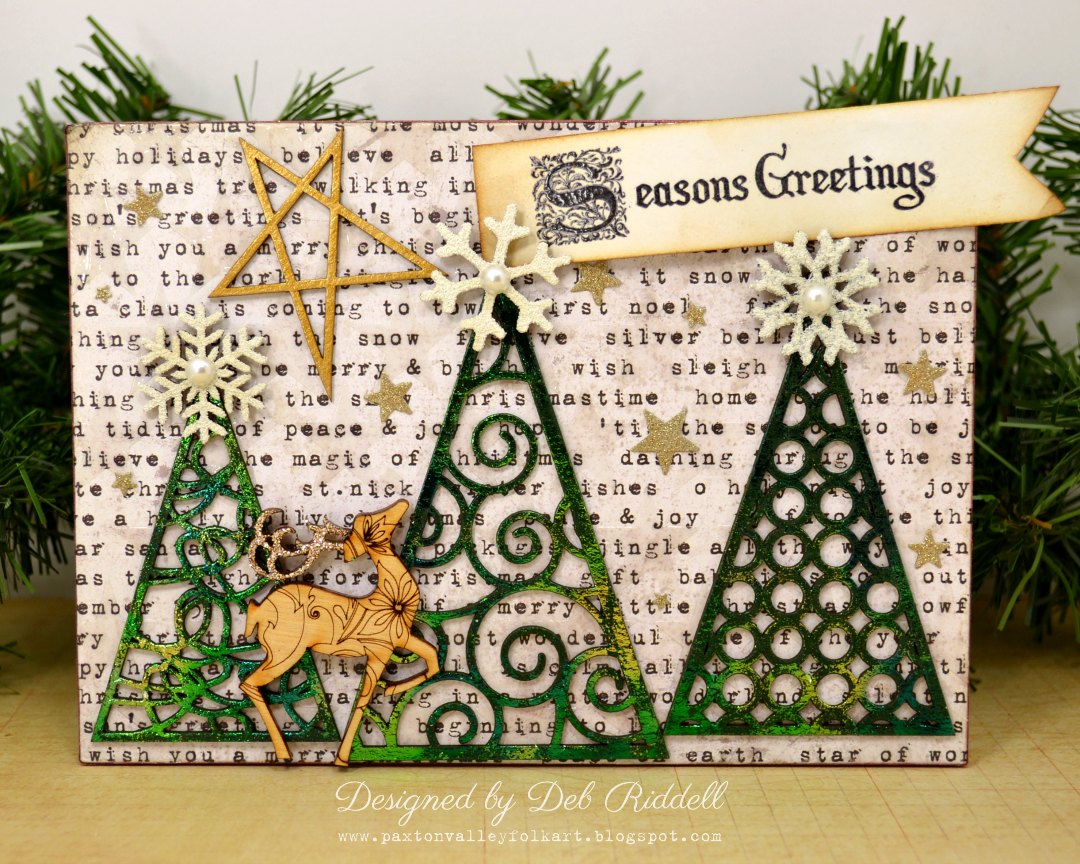
Season's Greetings Christmas Tree Trio Decoration with Deb Riddell

Hello everyone, Deb Riddell here with you today to share a Christmas decoration that I made with lots of Southern Ridge Trading Company’s wonderful Christmas chipboard and wood veneers.


I used Southern Ridge’s Scribble Triangle Tree Set, Wood Small Marked Deer (love that wee guy!), Small Primitive Stars, Snowflakes 712 and Star stencil in the making of my Season’s Greetings Christmas Tree Trio decoration.  I have a few step out photos on how I made it, hope you will enjoy seeing them.

I started out with a piece of ¼” MDF cut to about 5” x 7” (it was in my stash and I haven’t a clue where it came from but it was the perfect size so I decided to use it.  You could also use a flat artist’s canvas or even just cover a piece of chipboard with scrapbook paper to make yours).  I covered the MDF front and back with paper from Tim Holtz’s Tidings Paper Stash and wrapped the edges with some red glitter tape from his Tidings Design Tape set.


I then stenciled Ranger Clear Gloss Texture Paste through Southern Ridge’s Star stencil, repeating the pattern as necessary to cover the entire front side of the panel, and set it aside to dry.

The three Christmas trees from the Scribble Triangle Tree Set were painted with Hauser Dark Green Americana acrylic paint and once the paint had dried, Deco Foil Adhesive was applied over all of the trees with the Deco Foil Adhesive pen.  Once the adhesive had dried clear and tacky, Emerald Watercolour Deco Foil was burnished over top.  I love the variegation of colour you achieve with the watercolour Deco Foils!


The Wood Small Marked Deer is so beautiful all on it’s own that you don’t have to much to enhance it. I just gave him a coat of DecoArt Gloss Varnish and once it had dried, added more Gloss Varnish to his antlers and sprinkled them with Distress Vintage Platinum Glitter Dust, perfection!

One of the Small Primitive Stars was painted with DecoArt Emperor’s Gold Dazzling Metallics paint and once dry, the Deco Foil Adhesive pen was used to apply adhesive before applying Rebekah Meier Design Mixed Media Transfer Foil in Old Gold over top.


Three of the snowflakes from the Snowflakes 712 set were painted with Americana Titanium White acrylic paint and once it had dried, Emerald Creek Craft Supplies Soft Fallen Snow embossing powder was applied to all of them.

A flat back pearl was adhered onto the centers of all of the embossed snowflakes.  Some of Tim Holtz’s gold Deco Sheet was adhered onto white cardstock and tiny stars were die cut with Simon Says Stamp’s Large Holiday Shapes and Holiday Shapes Hearts Stars Craft dies.


The Season’s Greetings sentiment was stamped onto white cardstock with a Crafty Secrets Vintage Christmas stamp with Black Soot Distress Archival ink, clear embossed and then cut into a banner shape.  The whole banner was lightly inked with Old Paper Distress Ink and the edges inked with Vintage Photo Distress Ink.


Here are a few close ups, the foiled Scribble Triangle Trees were added along the bottom edge of the prepared MDF plaque and one of the embossed snowflakes was added to the top of each tree.  That wonderful deer was adhered overtop of the trees on the left hand side of the panel.


The gold Deco Sheet stars were added here and there to the panel and you can see the shine from the Gloss Texture Paste stenciled stars in the background, another layer of shine to glow in the light of the Christmas candles!


I hope that you’ve enjoyed seeing how my Season’s Greetings Christmas Tree Trio decoration came together and that you’ve been inspired to make one of your own!


Southern Ridge Trading Company Supplies Used:


Other Supplies Used:

- Therm O Web: Deco Foil, Deco Foil Adhesive Pen and Rebekah Meier Designs Mixed Media Transfer Foil
- DecoArt: Americana Acrylic Paint, Dazzling Metallics Paint and Gloss Varnish
- Emerald Creek Craft Supplies: Soft Fallen Snow Embossing Powder
- Tim Holtz / Advantus: Tidings Paper Stash, Tidings Design Tape and Deco Sheets
- Tim Holtz / Ranger Ink: Clear Gloss Texture Paste, Distress Vintage Platinum Glitter Dust, Distress Ink and Distress Archival Ink
- Simon Says Stamp: Large Holiday Shapes Craft Dies and Holiday Shapes Hearts Stars Craft Dies
- Miscellaneous: MDF 5” x7” panel, white cardstock, clear embossing powder, flat back pearls, scissors, adhesive and Christmas sentiment stamp

Thanks again for stopping by today and as always, happy creating!


Wednesday, September 20, 2017

Happy Holidays Wall Hanging with Katelyn Grosart

Hey there Southern Ridge Trading Company fans, Katelyn here. Fall feels like it has officially arrived here on the west coast of Canada. With the cool weather, I have definitely been in the mood to start creating Christmas projects. So today, I've created for you a beautiful Happy Holidays Wall Hanging, that's perfect to hang on your Christmas tree or give it as a gift to someone this holiday season. You'll want to read below as I share with you how I embellished the chipboard elements on my Happy Holidays Wall Hanging.


To start, pull out one Wood Small Marked Reindeer and one Sm. Wood Sleigh. Apply a coat of Candied Apple Distress Stain to the Sleigh. Once the stain has dried, apply a layer of Brushed Pewter Distress Stain overtop of the sleigh. Apply a coat of Ground Espresso Distress Stain to the Reindeer. After the stain has dried, apply a layer of Brushed Pewter Distress Stain overtop of the reindeer.


Take five snowflakes out of the Snowflakes 712 package. Apply two coats of Titanium White Paint on each snowflake. Once the paint has dried, apply a coat of Raw Umber Antiquing Cream to each snowflake. After the cream looks like it has dried, rub off excess cream. 


Next, you'll need one Lg. Wood Snowflake. Apply two coats of Titanium White Paint to the snowflake. Once the paint has dried, apply a coat of Raw Umber Antiquing Cream to the snowflake. After the cream looks like it has dried, rub off excess cream. 


Take the small Scribble Triangle Tree out of the package. Blend Fired Brick Distress Oxide Ink over the entire surface of the Christmas tree. With the ink dry, lightly rub White Gold Art Alchemy Metallique Wax over the edges and the middle of the tree. 


Pull the Happy Holidays Sentiment from the Wood Words of Christmas - Joy package. Apply a coat of Tarnished Brass Distress Stain to each word.


The last chipboard piece you need is the Star Wreath. Apply Emboss It Ink to the star wreath. With the ink on the wreath, sprinkle Charred Gold Embossing Powder over the entire star wreath. Tap off the excess powder and emboss with your heat tool. Let the wreath cool.  


To assemble the wall hanging, adhere an image to the middle of the wreath. In the top left hand corner, adhere two small snowflakes, the large snowflake the "Happy" word. To finish off the corner, adhere two cream roses and two brown roses.


In the bottom right hand corner, adhere the Christmas Tree, the sleigh, three snowflakes and the reindeer. To embellish the rest of the corner, adhere three cream roses and six brown roses.


To the left of the embellishments in the bottom right hand corner, adhere the "Holidays" word.


To finish your wall hanging, add a piece of ribbon to the top of the star wreath.


Southern Ridge Trading Company Supplies Used:

- 10mm Roses: Brown
- 15mm Roses: Cream


Other Supplies Used:

- Emerald Creek Craft Supplies: Charred Gold Embossing Powder
- Tim Holtz for Ranger Ink: Distress Ink - Walnut Stain, Distress Oxide Ink - Fired Brick and Distress Stain -  Brushed Pewter, Tarnished Brass, Candied Apple & Ground Espresso
- Ranger Ink: Emboss It Ink - Dabber
- DecoArt: DecoArt Fluid Acrylics - Titanium White and DecoArt Media - Antiquing Cream: Raw Umber
- Prima Marketing: Art Alchemy Metallique Wax -White Gold
- Tombow: Aqua Mono Liquid Glue
- Graphic 45: Winter Wonderland - Woodland Whimsy & Rustic Holiday
- Misc: Heat Tool

Until Next Time!

-Katelyn