Showing posts with label Decorative Painting. Show all posts

Friday, July 6, 2018

Sunflowers Seed 2 with Tracy Moreau

Late summer brings us  those big beautiful sunny faced flowers , as a reminder that fall is not far away.  this lovely Gear Clock Wood Piece , just called out for a Rusty distressed metal effect, and some lovely country colours to keep it “on Trend” with the Farm House/Country Look.  It’s an easy one to create and could as easily be done using decoupage paper, dinner napkins or a printed label. If you are Not artistically inclined. The RUSTY finish is an easy to do effect and works well with all kinds of things.

Heres how it’s done!

First  you have to choose your surface.. this one is wonderful.. ( would make an awesome card!)
I base coated it first with Lamp Black to give me a nice uniform surface to work on. Then I began layer colour over top of the black, starting with a Gold metallic. This is just dry brushed on and leaves a fair amount of the black showing through.


Once the gold is completely dry, I dry brushed again.. this time using Burnt Sienna, I let it dry well then dry brushes once more using Quinacridone Gold. I then layered these colour two more times alternating them.

The final dry brush is a small amount of the Lamp Black, paying a bit more attention to the corners and edges, top and bottom.
You can continue to layer until you like what you see.. I prefer it to be a little lighter.


I taped off the top and bottom of the panel and then applied a base coat of Country Red.


Once it was dry I traced my own design using white graphite. I shaded around the design and the lettering with a float of thinned Lamp Black. ( this just lots the design off the background a little.

Once everything was dry. I based coated the Flower and The Lettering with Summer Squash. (this is a NEW DecoArt Colour) the leaves with Antique Green, and the centre with Asphaltum.


The Flowers are shaded with floats of thinned Scarlet and the leaves with Plantation Pine. The leaves are highlighted with floats of Margarita and the flowers with Thinned Warm White.  


The lettering is shaded with a float of thinned Scarlet along the bottom of each letter. And a highlight is added in a thin line on the left side of each letter. Once all those are complete, A few scribbly details are added around the leaves, dip dots to texture the centre of the flower and a few fine scrolls for vines and stems are added  as filler. Once Sparingly spattered with first white and then a touch of Black, it is ready to hang and enjoy!!


Southern Ridge Trading Company Supplies Used:


Other Supplies Used:

- DecoArt Americana: Lamp Black, Asphaltum, Country Red, Summer Squash, Warm White, Margarita, Antique Green, Scarlet, Burnt Sienna & Gold Matte Mettalic and DecoArt Media Fluid Acrylic: Quinacridone Gold
- Dynasty Brushes: Faux Squirrel 1/4 Angled Shader, 1/2 Angled Shader, #2 Rigger, 3/4 Fat Wash, 3/4 Oval Encaustic and Black Gold 10/ Liner

Designed By Tracy Moreau


Wednesday, September 6, 2017

Joy to the World Wall Hanging with Sandy McTier


How about some Christmas in September?!! You can never start painting too early for the holidays, and I hope this inspires to you create something “Christmasy” today!

Absolutely love this Holly Berry Branch (coming to the SRTC website soon) and thought it was perfect to adorn an ornament or accompany a bow on a present.
I love the IPC Foam Brushes by Dynasty for painting on the chipboard pieces! I loaded the dry brush with some gesso, working it into the sponge to get rid of the excess sitting on top. Next, I gently brushed it back and forth to cover the piece. A tooth pick works great to get any excess gesso or paint out of the cutout sections.   


Once the gesso was completely dry, I painted in the holly leaves with DecoArt Americana Irish Moss and shaded them with Plantation Pine. I painted in the berries with a mixture of Alizarin Crimson and a touch of Titanium White and then added some shading to them with Alizarin Crimson.


It was time to leave the leaves alone for a while and let them dry, so I painted the bow Lamp Black and let it completely dry. Next, I painted it with DecoArt Media Metallic Silver. 


While the bow was drying, I painted the ornament with a mixture of Cobalt Turquoise Hue and Titanium White. Then, of course, it needed some splatter,  so I splattered on some Titanium White. After sitting for a couple of minutes, I placed a soft paper towel on top of the ornament and lightly pressed. I love the way this softens the splatter! 


I thought this Stampendous stamp was perfect for my ornament! Inked it up with some Staz-on black ink, covered the words to the right to keep them from transferring and stamped the word ‘Joy’. (Tip: Once you ink up the stamp, stamp it onto a piece of scrap paper. Re-ink the stamp and then go to the piece. The ink sticks better to the ink already on the stamp and your image will almost always come out just right!) Then I removed the tape from the smaller words and inked them up, covered the word ‘Joy’ with tape and added the smaller words to the ornament.


I added some more highlights and shading to the leaves, stem, bow and berries and then glued it onto my ornament. I sealed everything with DecoArt Media Soft-Touch Varnish. I plan on hanging the ornament with either a ribbon or thin wire.


I hope this inspires you to create something “Christmasy” today!!

Southern Ridge Trading Company Supplies Used:

 - Holly Berry Branch - 3.3x5.0 (coming soon)

Other Supplies Used:

 - Square Bracket Ornament #31-L237 – www.cdwood.com
- Stampendous: Stamp – Joy Has Come #RS-M334
- DecoArt Media Fluid Acrylics: Titanium White, Cobalt Turquoise Hue, Sap Green & Green Gold
- DecoArt Americana Acrylics: Irish Moss, Plantation Pine, and Alizarin Crimson
- DecoArt Media: White Gesso & Soft-Touch Varnish
- Dynasty Brushes: 3/4" Wash, 1/4" & 3/8" Angle and Mezzaluna (Sm)
- Other Supplies: E6000, Wire or Ribbon of choice to hang


©2018 Joy to the World Ornament, Sandy McTier Designs ~ All Rights Reserved

Y’all have a GREAT day; Happy Creating!! Sandy


Friday, September 1, 2017

An Elegant Fall with Tracy Moreau

My favourite season, I love the crisp clear mornings, the cool air and most especially ... the colours! Vibrant oranges, rust tones and lovely yellows ... all of these blended with the sparkle of a bit of Metallic, lend a little elegance to the season. Thats what I tried to bring a little of to this piece. It's simple and depends entirely on bold colour, a little metallic and shadows.  


I used a single Skeleton Maple Leaf and the Victorian Circle Square Die. I added a few 1/4" cuttings of dowel and a 6x6 artists panel. Some pretty metallics and a minimal palette of Black, Burnt Sienna, Spiced Pumpkin, and Mustard Seed.


I applied a slip slap base coat and blended Spiced Pumpkin, Burnt Sienna and a touch of Mustard Seed. Then base coated the Victorian Circle Square die, with a generous coat of Lamp Black. I let it dry then traced the word "Fall" onto the upper right side of the Victorian Circle Square. I then used a #2 Rigger to paint the lettering with Spiced Pumpkin.

The Skeleton Maple Leaf is sponged with 24kt Gold, Bronze, Copper and a bit of Olive Green and Sapphire Metallic. ( I couldn't resist ... I added a touch of the Bronze and Copper to a few spots on the Circle Square).


I painted all of the 1/4" pieces of dowel with Lamp Black, then glued one to the back of the Skeleton Maple Leaf and 4 to the back of the Victorian Circle Square Frame. I let them dry and then glued the Circle Square to the Art Panel, then I glued the Maple Leaf to the Square. A light spritz with some Matte Spray and a light sprinkle of Glitter just for some added sparkle!


You will Need:

Southern Ridge Trading Company Products Used:


Other Supplies Used:

DecoArt Americana: Americana Acrylics - Burnt Sienna, Spiced Pumpkin, Mustard Seed and Lamp Black, DecoArt Metallics - 24 kt Gold, Copper, Bronze, Olive Green and Sapphire and DecoArt Glamour Dust - Matt Spray
- Desserre: 6x6 Wooden Art Panel
- Gorilla Glue

Designed By: Tracy Moreau


Tuesday, August 29, 2017

Trick or Treat with Deb Antonick

I love this simple technique for creating “junk” collages. It gives me a chance to use up odds and ends and leftovers from other packages.


Instructions:

- Base coat the canvas and the Graveyard scene with Black Gesso.
- Apply Black modelling paste to the canvas and place in the gears, branch, fence and stars while still wet.
- Let dry.
- Glue on the Graveyard.


Glue on some more stuff!


- Let dry.
- Dry brush over everything with Metallic Lustre Iced Espresso.
- Dry brush again with Metallic Lustre Orange Flicker.


Dry brush with Cosmic Blue.


 Dry brush with Fab Fuchsia and then a little Silver Spark.


Adhere a sticker for the sign.

Southern Ridge Trading Company Supplies Used:

- 8 x 1o Canvas Board (coming soon)
- 9.6"x5.5” Large Graveyard Scene (coming soon)

Other Supplies Used:

- Assorted Halloweenie bits
- Jolee’s Halloween banner sticker
- Aleene’s Tacky Glue

Paints and Mediums Used:
- DecoArt Media Black Gesso
- DecoArt Media Black Modeling Paste

- DecoArt Metallic Lustre’s: Iced Espresso, Orange Flicker, Cosmic Blue, Fab Fuchsia, Silver Spark

Brushes Used:
¾” flat, Soft stipple brush, stiff brushes for Dry Brushing.

Enjoy!

By Deb Antonick


Wednesday, August 23, 2017

Happy Fall Y'all Wall Hanging with Sandy McTier


The colour of leaves will soon be changing and pumpkin spice everything (my favourite) will be available! I love the colours of autumn, and two of my favourite colours together are aqua and orange! And, if you haven't guessed, I'm from the south and say "y'all" on a daily basis.

I hope you enjoy creating this little sign to decorate during the fall season!

I loved all the pieces that come in the SRTC Canada 150 set and couldn’t wait to incorporate some of them into a painted project. 


Using a Dynasty Palmer brush, I base coated a thin layer of watered down Gesso over the wooden plaque and let it dry. Then I painted it with a coat of DecoArt Vintage Effects Turquoise.


Next, I stenciled on some beautiful scroll work using an M2 Stencil I created with fellow SRTC Design Team Member Tracy Moreau. I used DecoArt’s Chalky Finish Paint Revive and applied it with a Tracy Moreau Stencil brush. 


Once dry, I drew the basic shape of a pumpkin using a white chalk pencil from General Pencil Company. Next, I base coated the pumpkin with watered down Gesso and let it dry. Then I floated in some shading between the sections with DecoArt Premium Raw Umber. I used Matte Medium on the brush to help the colour float a bit better. 


I picked up Cadmium Orange Hue and Vermillion Hue on the Angle brush and painted in each section. I was pleased with the shading that came through the paint so didn’t add any other shading. 


I loaded the Angle brush with some Sap Green and Raw Umber and painted the stem. Once dry, I floated on some Raw Umber around the base of the stem where it meets the pumpkin. I dry brushed some highlights using a small Dynasty Mezzaluna brush loaded with Green Gold. TIP: Load brush with paint and then wipe off almost all of it onto a paper towel; dry brush in a small area. It’s easier to build up the highlights with additional layers. I finished by dry brushing a mixture of Primary Yellow and White on some of the sections around the front and on the right as well as on the top of the stem.

I dry brushed highlights on the pumpkin sections using a medium Mezzaluna brush loaded with the same Primary Yellow and White mixture. Then I dry brushed some Quinacridrone Gold along the bottom of the sections to make them appear a little bit darker. 


I printed out a cute little saying on my computer, transferred it on using graphite paper and then painted the letters with DecoArt Media Fluid Acrylics Titanium White. I finished them by coming back with my Dynasty Round brush and shadowed the letters with Sap Green. You could use the Premium Titanium White if you don’t have the DecoArt Fluid Acrylics Titanium White. 


Now for the stars of the show! I wanted the wooden leaves to be all sorts of autumn colours! I added some paint to DecoArt’s Metallic Lustre White Frost and randomly brushed them on the leaves here and there – exactly what I was looking for! I loved the way they sparkle and added a bit of shine to the piece. TIP: Load damp medium Mezzaluna brush with some Lustre; mix with just a touch of the paint and it will make it metallic; brush here and there on the leaves. Repeat with different colours. Once dry, you can buff to a desired shine using a soft cloth!


To finish, I glued the wooden leaves to the piece using E6000 glue. I let everything dry completely and then sealed the piece with Soft-Touch Varnish using the Palmer brush. 


I hope this inspires you to create some Happy Fall Art today!!

Southern Ridge Trading Company Supplies Used:

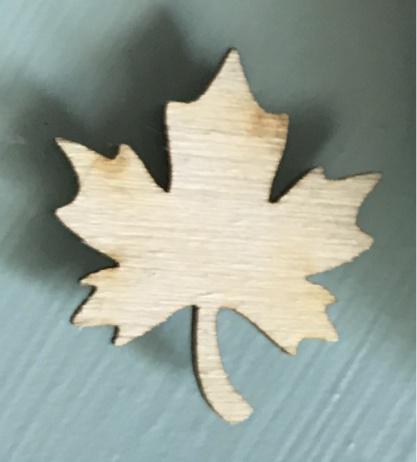
- Maple Leaves from the Canada 150 Set

Other Supplies Used:

- Surface: Wooden Plaque #3132 - www.bearwithus.com
- M2 Stencil: M2-2L (Available from www.SandyMcTierDesigns.com)
- DecoArts Vintage Effects: Turquoise
- DecoArt Chalk Finish Paints: Revive
- DecoArt Media Fluid Acrylics: Titanium White
- DecoArt Premium Acrylics: Raw Umber, Cadmium Orange Hue, Vermillion Hue, Sap Green, Green Gold, Quinacridone Gold, Primary Yellow and Matte Medium
- DecoArt Media White Gesso & Soft-Touch Varnish
- DecoArt Metallic Lustre: White Frost
- Dynasty Brushes: 2" Palmer, 3/8 Angle, Mezzaluna (Sm. & Med.)
- Tracy Moreau Stencil Brush (Med.) (Available from TheBrushGuys.com - use promo code: sandymc for additional discount)
- Other Supplies: E6000, White Chalk Pencil (by General Pencil Company) and wired ribbon of choice to hang piece


©2018 Happy Fall Y’all, Sandy McTier Designs ~ All Rights Reserved

Y’all have a GREAT day; Happy Creating!! Sandy