

The colour of leaves
will soon be changing and pumpkin spice everything (my favourite) will
be available! I love the colours of autumn, and two of my favourite
colours together are aqua and orange! And, if you haven't guessed, I'm from the south and say "y'all" on a daily basis.
I
hope you enjoy creating this little sign to decorate during the fall
season!
I
loved all the pieces that come in the SRTC Canada
150 set
and
couldn’t wait to incorporate some of them into a painted project.
Using
a Dynasty Palmer brush, I base coated a thin layer of watered down
Gesso over the wooden plaque and let it dry. Then I painted it with a
coat of DecoArt Vintage Effects Turquoise.


Next,
I stenciled on some beautiful scroll work using an M2 Stencil I
created with fellow SRTC Design Team Member Tracy Moreau. I used
DecoArt’s Chalky Finish Paint Revive and applied it with a Tracy
Moreau Stencil brush.

Once
dry, I drew the basic shape of a pumpkin using a white chalk pencil
from General Pencil Company. Next, I base coated the pumpkin with
watered down Gesso and let it dry. Then I floated in some shading
between the sections with DecoArt Premium Raw Umber. I used Matte
Medium on the brush to help the colour float a bit better.


I
picked up Cadmium Orange Hue and Vermillion Hue on the Angle brush
and painted in each section. I was pleased with the shading that came
through the paint so didn’t add any other shading.

I
loaded the Angle brush with some Sap Green and Raw Umber and painted
the stem. Once dry, I floated on some Raw Umber around the base of
the stem where it meets the pumpkin. I dry brushed some highlights
using a small Dynasty Mezzaluna brush loaded with Green Gold. TIP:
Load brush with paint and then wipe off almost all of it onto a paper
towel; dry brush in a small area. It’s easier to build up the
highlights with additional layers. I finished by dry brushing a
mixture of Primary Yellow and White on some of the sections around
the front and on the right as well as on the top of the stem.
I
dry brushed highlights on the pumpkin sections using a medium
Mezzaluna brush loaded with the same Primary Yellow and White
mixture. Then I dry brushed some Quinacridrone Gold along the bottom
of the sections to make them appear a little bit darker.

I
printed out a cute little saying on my computer, transferred it on
using graphite paper and then painted the letters with DecoArt Media
Fluid Acrylics Titanium White. I finished them by coming back with my
Dynasty Round brush and shadowed the letters with Sap Green. You
could use the Premium Titanium White if you don’t have the DecoArt
Fluid Acrylics Titanium White.

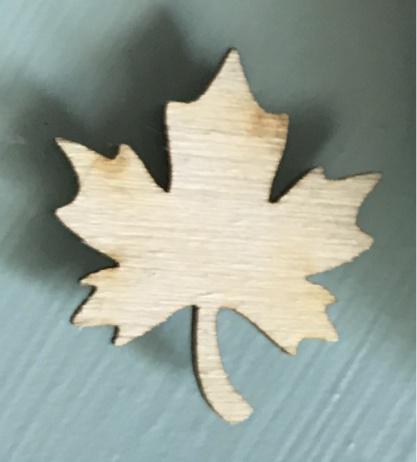
Now
for the stars of the show! I wanted the wooden leaves to be all sorts
of autumn colours! I added some paint to DecoArt’s Metallic Lustre
White Frost and randomly brushed them on the leaves here and there –
exactly what I was looking for! I loved the way they sparkle and
added a bit of shine to the piece. TIP: Load damp medium Mezzaluna
brush with some Lustre; mix with just a touch of the paint and it
will make it metallic; brush here and there on the leaves. Repeat
with different colours. Once dry, you can buff to a desired shine
using a soft cloth!


To
finish, I glued the wooden leaves to the piece using E6000 glue. I
let everything dry completely and then sealed the piece with
Soft-Touch Varnish using the Palmer brush.

I
hope this inspires you to create some Happy Fall Art today!!
Southern Ridge Trading Company Supplies Used:
- Maple Leaves from the Canada 150 Set
Other Supplies Used:
- Surface: Wooden Plaque #3132 - www.bearwithus.com
- M2 Stencil: M2-2L (Available from www.SandyMcTierDesigns.com)
- DecoArts Vintage Effects: Turquoise
- DecoArt Chalk Finish Paints: Revive
- DecoArt Media Fluid Acrylics: Titanium White
- DecoArt Premium Acrylics: Raw Umber, Cadmium Orange Hue, Vermillion Hue, Sap Green, Green Gold, Quinacridone Gold, Primary Yellow and Matte Medium
- DecoArt Media White Gesso & Soft-Touch Varnish
- DecoArt Metallic Lustre: White Frost
- Dynasty Brushes: 2" Palmer, 3/8 Angle, Mezzaluna (Sm. & Med.)
- Tracy Moreau Stencil Brush (Med.) (Available from TheBrushGuys.com - use promo code: sandymc for additional discount)
- Other Supplies: E6000, White Chalk Pencil (by General Pencil Company) and wired ribbon of choice to hang piece
©2018
Happy Fall Y’all, Sandy McTier Designs ~ All Rights Reserved
Y’all
have a GREAT day; Happy Creating!! Sandy


