Friday, March 10, 2017

Dream of Sunny Days Tag with Deb Riddell

Hello and thank you for stopping by, it’s Deb here today to share with you a tag I made using Southern Ridge’s Delicate Lace Doily, Cedar Trees, Ferns and Foliage Sprigs chipboard pieces and the Brick stencil.


Spring is being very elusive here in British Columbia so dreams of sunny days and gardens are about all we have right now!  I’ve a few step out photos on how I made my tag, so read on for the how to.

I started out with a #8 manila mop up tag (it looked like it was used to mop up several shades of blue Distress inks) and I stenciled through the Brick stencil with some Martha Stewart Texture Effect paste.  Any sandy texture paste or grout would work just as well, you just want to get some ‘brick’ texture onto your tag.  Once the texture paste had dried, the hole tag was sprayed with Aged Mahogany Distress Spray stain.


The entire tag was sealed with a coat of Liquitex Matte Fluid Medium and then the ‘bricks’ were coloured with Distress Crayons (I used Gathered Twigs, Rusty Hinge and Antique Linen).  Sealing the tag allowed me to add and subtract the crayon colours by rubbing them with my fingers, using a waterbrush and a damp baby wipe until I was happy with the colour of the bricks.

The ‘grout’ between the bricks was shaded with a Derwent Medium Wash 4B sketching pencil and a waterbrush.


A Fern spray, some leaves and branches from the Foliage Sprigs set and the largest Cedar tree were then coloured with multiple shades of Distress crayons after being sealed with the matte fluid medium.  Think I used most every colour of green Distress crayon I had, adding and subtracting the colours until I was happy.

The Delicate Lace Doily was cut in half with scissors and one half set aside for a future project.


The other half of the doily was coloured with Black Soot Distress Spray stain and when dry covered with Mercury Rising embossing powder from Emerald Creek Craft Supplies.  Love the texture of this embossing powder and it created a real wrought iron look on that lovely Delicate Lace Doily, don’t you think?

I needed some flowers for my garden tag so I broke out a hoarded stash of Graphic 45 Botanical Tea scrapbook paper and die cut some flowers with the Tiny Tattered Florals die.


And finally, I chose two sentiments for the tag from a couple of Tim Holtz sentiment sticker sets.  The ‘we dream of sunny days’ phrase was from the Occasions Small Talk stickers pad and the ‘in the garden’ phrase was from his new Clipping Stickers.  Both stickers were edged with a bit of Frayed Burlap Distress ink before adhering them to the tag.

And then the components were assembled onto the tag.  The sentiment stickers were adhered to the top and a star brad from my stash, coloured with Pitch Black and Mushroom alcohol inks, was inserted through the hole at the top of the tag along with a snippet of Crinkle Ribbon coloured with multiple shades of green Distress crayons.


The ‘wrought iron gate’ Delicate Lace Doily was adhered to the right side of the tag and the Cedar tree on the left.


All of the Fern and Foliage Sprigs were arranged along the bottom, overlapping each other for some dimension, and the flowers scattered about among the greenery.


And with that the tag was complete, think this will be as close as I get to any flowers or greenery around here for a while!


Southern Ridge Trading Company Supplies Used:

- Ferns (coming soon)
- Foliage Sprigs (coming soon)
- Brick stencil (coming soon)

Other Supplies Used:

- Tim Holtz for Ranger Ink: Distress Spray stain, Distress Crayons, Distress Ink and Alcohol Ink
- Tim Holtz for Sizzix: Tiny Tattered Florals Die
- Advantus / Tim Holtz: Crinkle Ribbon, Occasions Small Talk Stickers and Clipping Stickers
- Emerald Creek Craft Supplies: Mercury Rising Embossing Powder
- Graphic 45: Botanical Tea Patterned Paper
- Martha Stewart: White Texture Effect paste
- Liquitex: Matte Fluid Medium
- Tombow: Tombow Adhesive
- Miscellaneous: #8 manila tag

Although I have used these components to make a tag, this layout could easily be adapted for a card, home decor piece or scrapbook layout so hope I’ve given you some ideas and inspiration.  Thanks again for stopping by and as always, happy creating!

Deb xo


Wednesday, March 8, 2017

Mixed Media Canvas with Karen Bearse

I am here today to share my mix media canvas that I made for Creativation 2017. Every member was asked to design a canvas with their photo for the booth. It was great to see all of us together on the wall!


Here is my canvas, very grungy and inky and way over done! I had so much fun making this. I will give you a bit of a tour of this technique layered project. Starting with a canvas with multiple layers of heavy gesso, lots of stenciling with molding, Grit, and Crackle Paste and a little glass bed gel thrown in for fun. Pretty much hit it with everything but the kitchen sink!


This took some pre-planning as some of my chippies were cut & embedded in the molding paste- like the Brick Pattern, while the paste was wet. Then removed, painted and put back in one the paste was dry & the background was painted. This way the pieces were part of the canvas and easier to adhere. Once that was all dry the squares were coloured with Stained Glass and seed beads were dropped in. I repeated this on one of the sides of the canvas as well.


I used Glimmer Mist for the first layer and added Glimmer Glam in places to get that glitter look. The high points were hit with High Impact paint in copper- I am just stuck on copper for this look, just adds such lusciousness!


The chip doily was covered with emboss powder, and topped with a painted gear and jeweled brad. I cut my doily and adhered the other piece on the side of the canvas so it looks like it wraps around.


As this canvas was supposed to represent me I had to use a couple of my favourites- the birds. This one was painted with the copper paint & once very dry (otherwise the emboss powder will adhere everywhere) I heat embossed a stamped image in white. The word Life was highlighted with a black pen to make it stand out.


I totally love this new chippie- one of the Retro light bulbs. This was gessoed first so the yellow would show up & again painted using Glam. The base of the bulb also has a sprinkle of Hammered Metal emboss powder- yes a little detailed but adds to the overall look. The bird was also painted with glam. As a final touch for my canvas I needed some metal so the feather charm dangles cause I love feathers!!! I hope you enjoyed this tour and it inspires you to make a canvas or 2! I think I may make one for each member of my family and hang them together, brilliant! Have a wonderful inky day & I hope that you check out our new releases they are very awesome!

Southern Ridge Trading Co. Supplies:
- Swirl Doily (currently unavailable) but can be made with any of the doily’s available
Other Supplies Used:

- Tattered Angels: Glimmer Glam, Glimmer Mist, High Impact Paint and Stained Glass
- Emerald Creek Craft Supplies: Charms and Hammered Metal Embossing Powder
- Tombow: Mono Aqua Glue
- DecoArt: Crackle Paste
- Ranger Ink: Grit Paste and Glossy Accents
- Golden: Light Modeling Paste
- Liquitex: Super Heavy Gesso and Glass Bead Gel
- Prima Marketing: Micro Beads

Happy crafting!

- Karen


Monday, March 6, 2017

Shabby Chic Mini Album with Charlene Byrd

Hello Blogger friends,

Charlene here!

So in my mind I had great plans to create a wonderful new layout to share with you today but of course life doesn’t always happen the way it’s suppose to! We’ve been building an addition onto our house that was suppose to take about 8 weeks - we’re now at 5 months! And the basement of this addition goes from my old scrapbook studio to what’s going to be my new scrapbook studio. My existing studio has been under drop cloths for about a month now so designing has been challenging to say the least. Every time I want to work I have to uncover my desk...not that bad but a bit of a pain.

Anyway, when Karen told her design team that our chipboard packages would be arriving last week somehow I just knew that everything was going to happen all at the same time. I took on extra hours at my paying job so I worked a full week until Saturday afternoon and our contractor finally finished the drywall mudding on Friday so that meant that I could finally clean up all the dust that has accumulated in my entire house and start painting my new scrapbook studio. Yay! As I was painting early yesterday morning I realized that my design blog post needed to be published on Monday. YIKES!


So today I’m sharing with you a mini album that I put together and shared at the Creativation Show. You may have seen some of the pages that I had created previously but I designed the cover and bound the pages to show off the completed album at the show. I love the colours, the grundgy’ness and especially all the Southern Ridge chipboard that I used!


Southern Ridge Trading Company Chipboard:


Thanks for stopping by.

Happy Creating!!

Charlene


Friday, March 3, 2017

Shine Wall Hanging with Katelyn Grosart

Hey there Southern Ridge Trading Company fans, Katelyn here. Some of the chipboard pieces I've had waiting to be used on a project are a little bigger than what would fit nicely on a card, so today, I've created a feminine wall hanging featuring one of the larger frames along with a variety of other chipboard pieces. Read below and learn how I transformed my chipboard pieces for my Shine Wall Hanging.


To start, you'll need to take the Circle Lace Frame. Apply two coats of Vintage Lace Paint from Paper Artsy to 3/4" around the frame. Set the frame aside to dry. Once the front side of the frame has dried, paint the entire backside of the frame with two coats of Vintage Lace Paint. Let the frame dry. Once the frame has dried, using a blending tool and Black Soot Distress Ink, ink the edges of the frame.


While you still have the Vintage Lace paint out, paint three floral banners with two coats of paint. Let the banners dry. After the banners have dried, using a blending tool and Black Soot Distress Ink, ink the edges of the banners.


Next you'll need the Shine Word. Apply two coats of Victorian Velvet Distress Paint to the word. Once the word has dried, apply a coat of Emboss It Ink to the entire word. With the word covered in ink, sprinkle Fine Clear Gloss Embossing Powder over the entire word. Tap off the excess powder and emboss with your heat tool. With a blending tool and Black Soot Distress Ink, ink the edges of the word.


While you still have the Victorian Velvet Distress Paint out, apply two coats of paint to three plain banners. Once the banners have dried, apply a coat of Emboss It Ink to the entire word. With the banners covered in ink, sprinkle Fine Clear Gloss Embossing Powder over all three banners. Tap off the excess powder and emboss with your heat tool. With a blending tool and Black Soot Distress Ink, ink the edges of the banners.


The last chipboard piece that needs to be painted is the floral frame. Apply two coats of Carbon Black paint to the frame. Set the frame aside to dry.


With all the the chipboard pieces decorated, next you'll need to take a bowl that fits the inside the Circle Lace Frame. Once you have the right size bowl, trace around the bowl onto a piece of patterned paper. Cut out your circle and then edge distress the edges. After the edges have distressed, using a blending tool and Black Soot Distress Ink, ink the edges of the circle.


Die cut a 3" circle out of patterned paper. After the circle has been die cut, use an edge distressor and distress the edges of the circle. Once the edges have been distressed, using a blending tool and Black Soot Distress Ink, ink the edges of the circle. Die cut your picture using a  2 1/2" circle. 


When starting to adhere your elements onto the Circle Lace Frame, start by adhering the large patterned paper circle to the chipboard piece. Once that patterned paper circle has been adhered, then you can adhere the black floral frame as well as the 3" circle and your 2 1/2" photo circle. After the circles have been adhered, adhere your shine word slightly overtop of your photo.


For the banners in the top right hand corner, adhere the floral banners onto the regular banners. After the banners have been adhered together, string them onto a piece of black twine and adhere them in the top right corner. To finish the banners, adhere a cream or black rose to each banner.


In both the top left and bottom right hand corner of the frame, add a variety of cream, black and pink roses in varying 10, 15 and 20mm sizes.


To finish your wall hanging, add a piece of cream ribbon to the back of the frame which will act as the hanger part at the top of the wall hanging.


Southern Ridge Trading Company Supplies Used:

- Circle Lace Frame
- Small Floral Frame
- Floral Banners
- Plain Banners
- 10mm Roses: Cream and Pink
- 15mm Roses: Black
- 20mm Roses: Cream

Other Supplies Used:

- Emerald Creek Craft Supplies: Fine Clear Gloss Embossing Powder
- Tim Holtz for Ranger Ink: Distress Ink - Black Soot and Distress Paint - Victorian Velvet
- Ranger Ink: Emboss It Ink - Clear (dabber)
- Tim Holtz Ideaology: Found Relatives
- DecoArt Media Fluid Acrylics: Carbon Black
- Paper Artsy: Fresco Finish Chalk Acrylics - Vintage Lace
- Tombow: Aqua Mono Liquid Glue
- Prima Marketing: Wild & Free - Let's Be Adventurers and Love Clippings - All of Me Loves All of You
- Elizabeth Craft Designs: Stitched Circles
- Hug N' Snug Seam Binding Ribbon: Cream
- Misc: Heat Tool and Ribbon


Until Next Time!

-Katelyn 


Wednesday, March 1, 2017

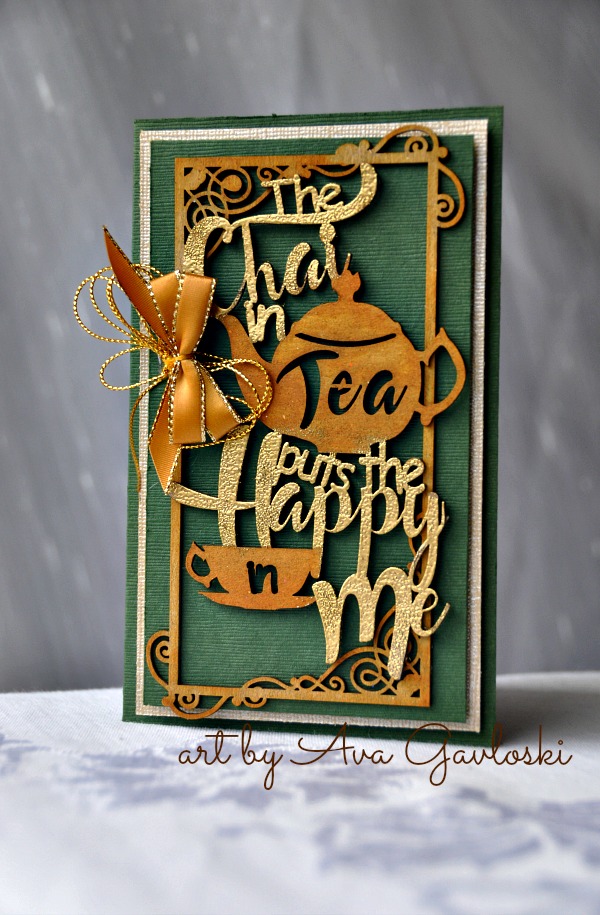
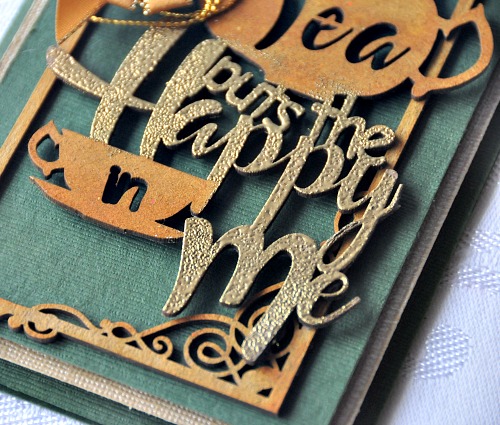
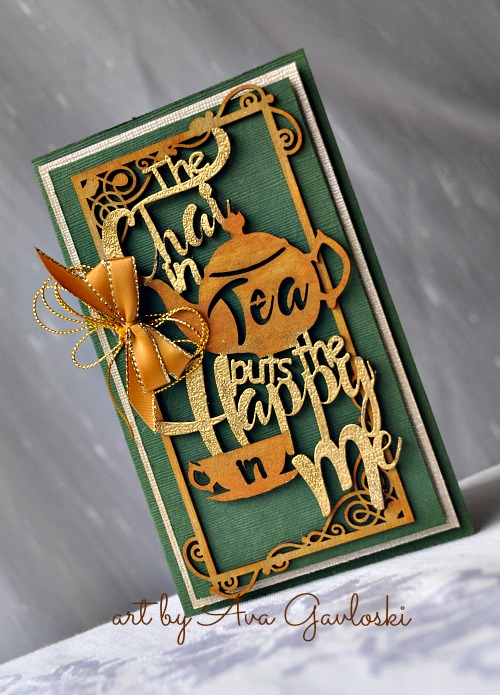
The Chai in Tea puts the Happy in Me Card by Ava Gavloski

Hello and Welcome to Southern Ridge Trading Company.
Ava here to share a jewel tone green and gold card to cheer on St. Patrick’s Day.

I am super happy with the great presentation of this card.  
Truly showcases the WOW factor that Southern Ridge Trading Co.’s chipboard can create on this card front.

teacardfull.jpg

I had lots of fun testing the 2 tone effect on this chipboard piece.  
This is a new release in the store.

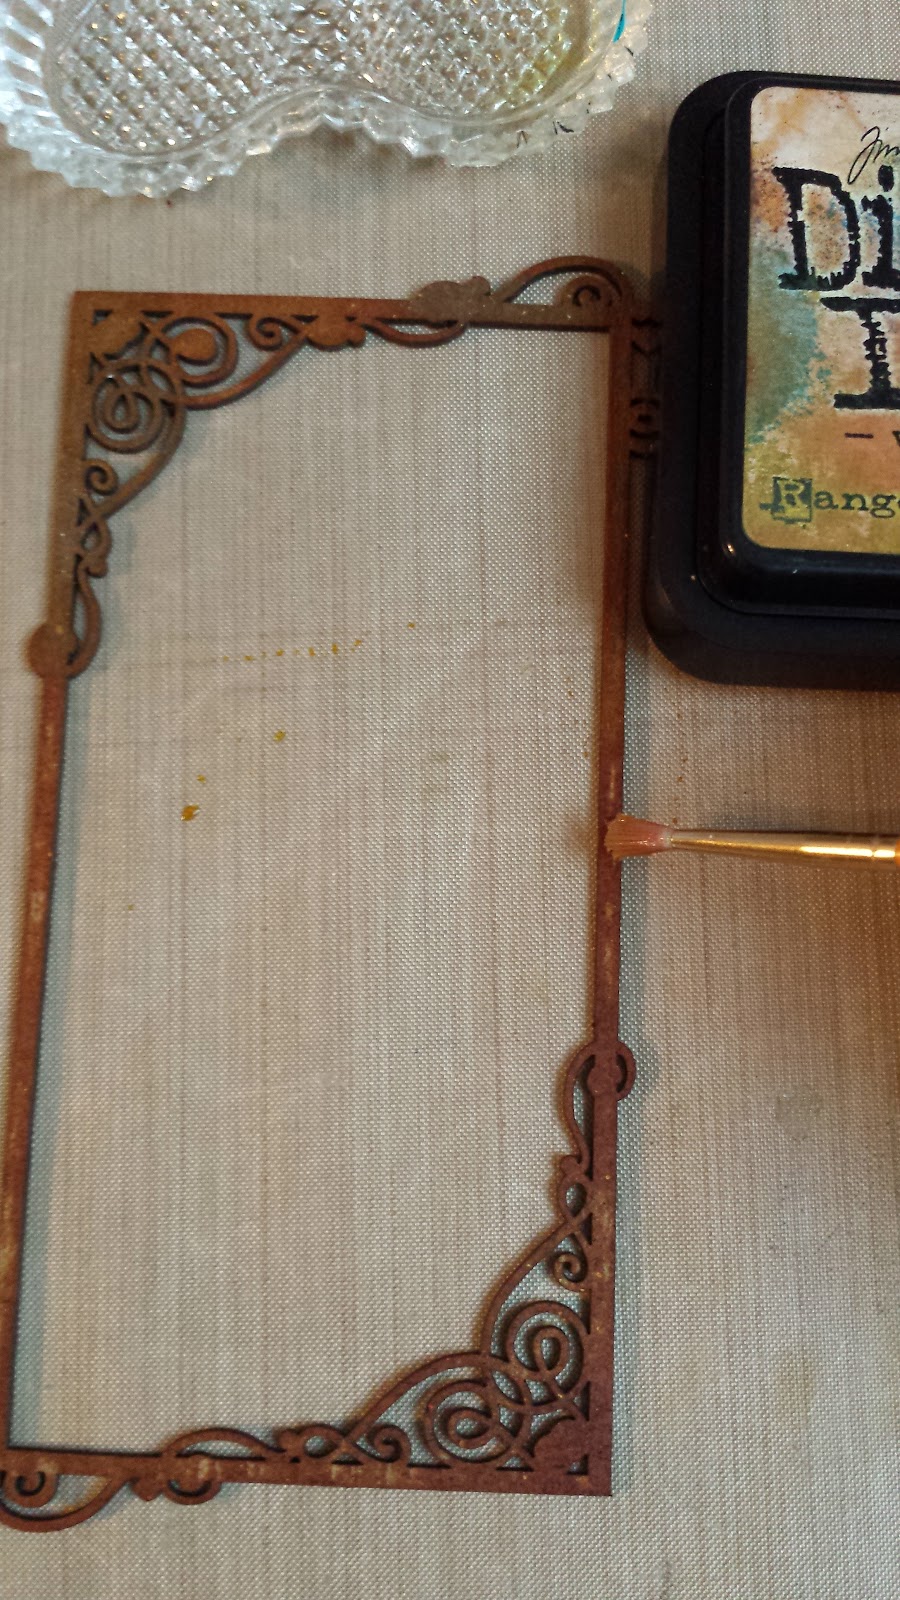
Let start with a few quick steps to get this chipboard prepared for the card base.

frame.jpg

Ink up the frame and use a little water on the paint brush to smooth out the colour.

ink.jpg

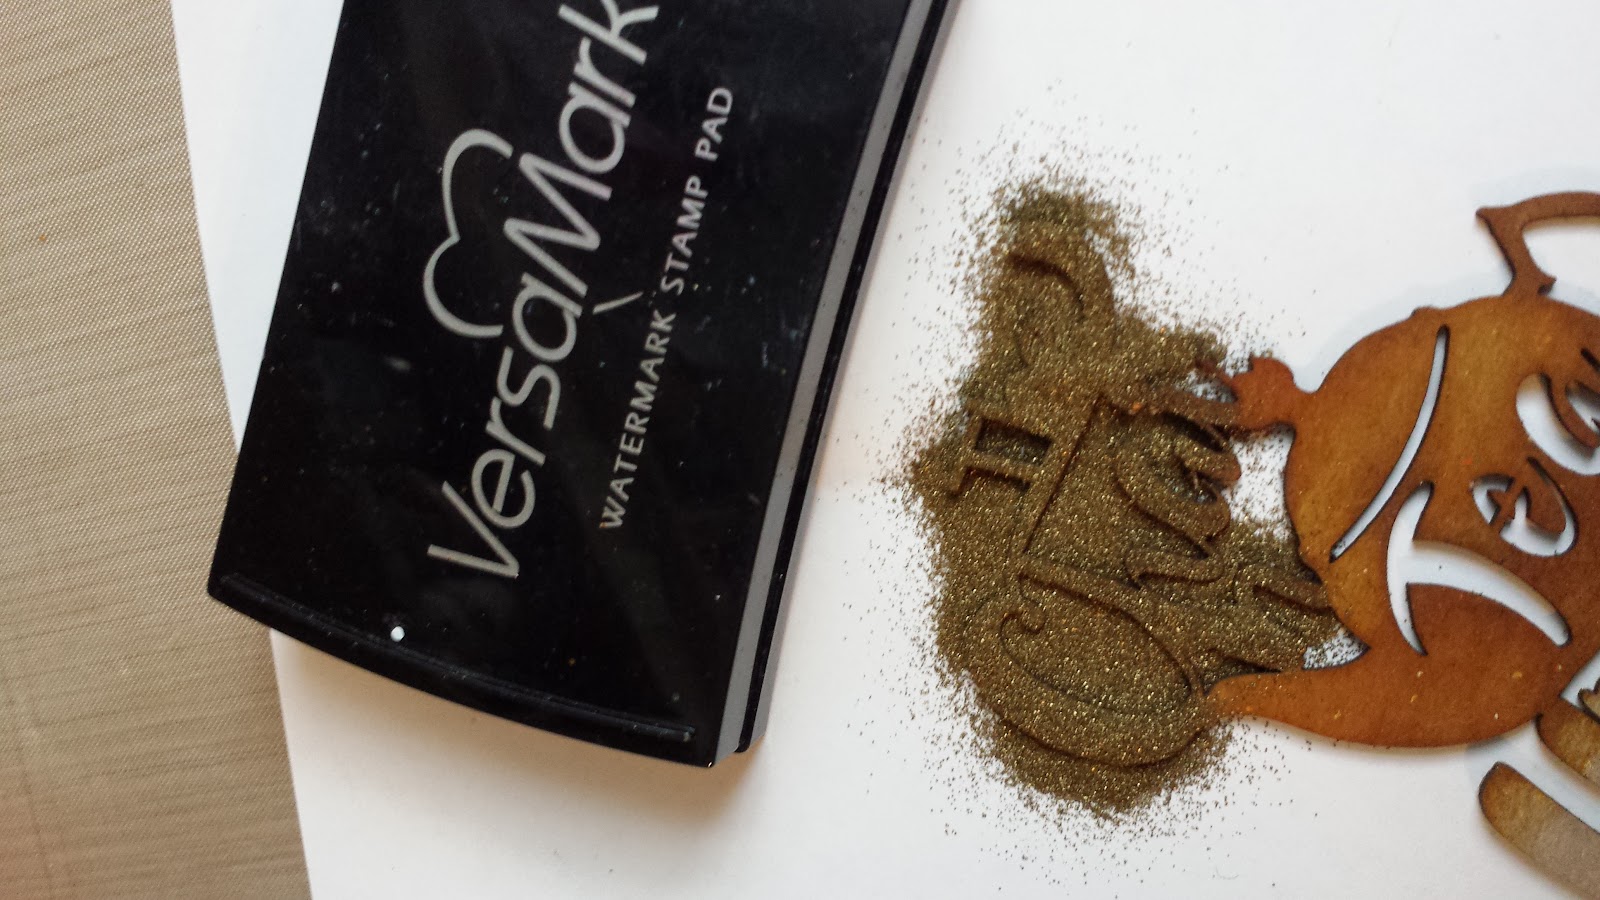
Ink up the tea pot and tea cup and smooth out the colour again with water and paint brush.
Then ink up the sentiment with VersaMark I used a  VersaMark pen and pad.
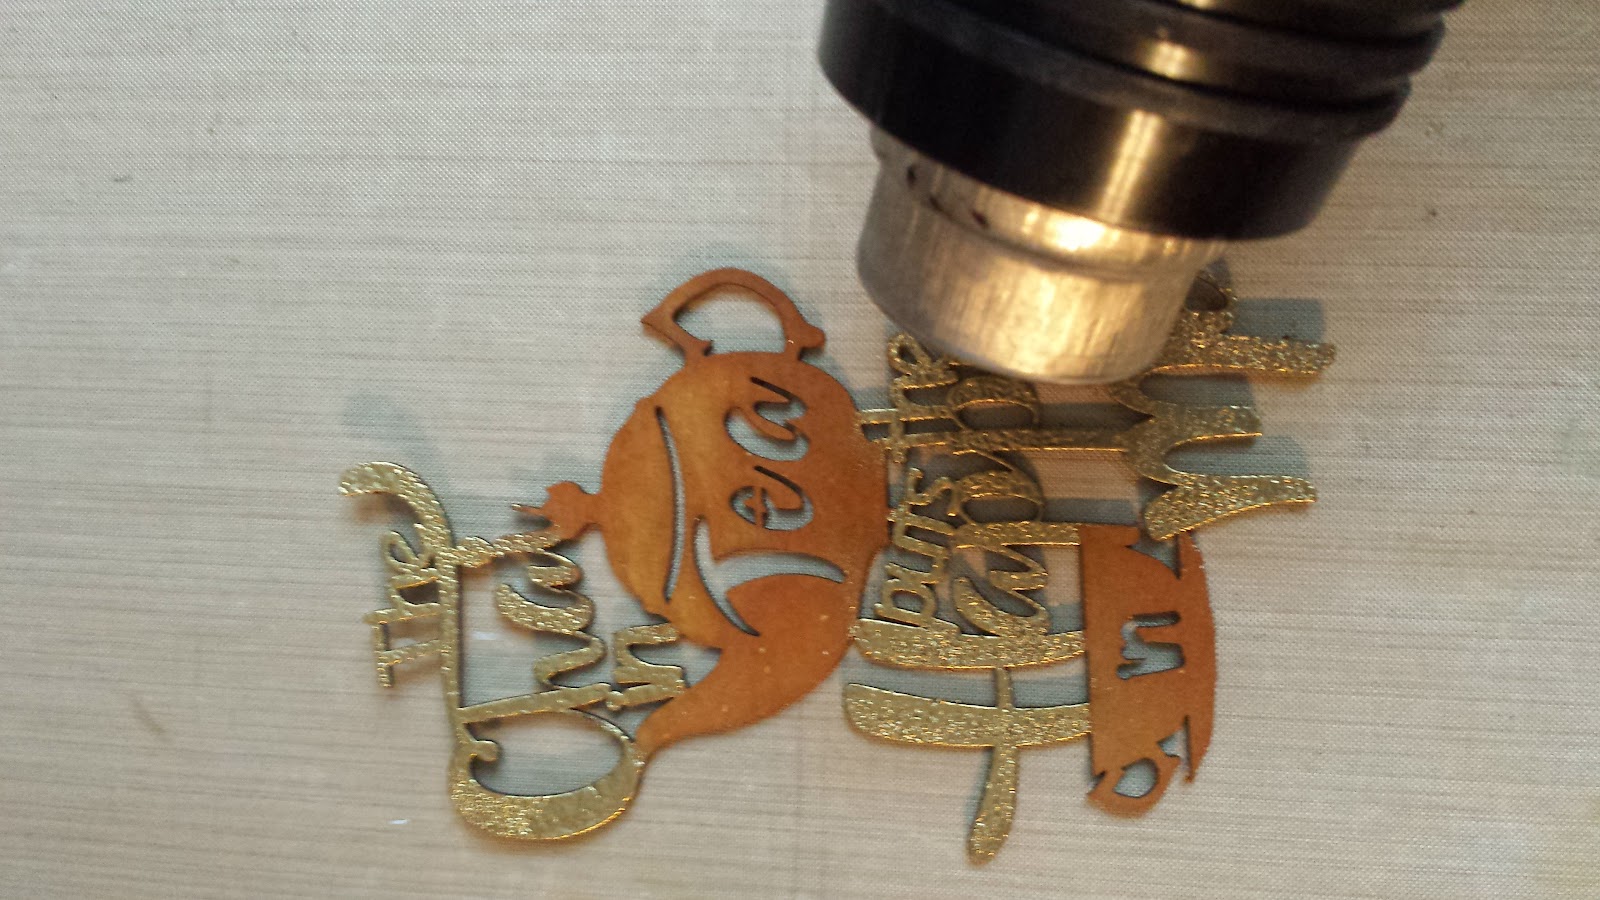
Sprinkle some gold embossing powder on the sentiment and heat set.

heat.jpg

Once the embossing powder has cooled, start to assemble the card.

me sentiment.jpg

Adhere the sentiment panel over the frame chipboard and adhere all to a green card stock mat.

chai sentiment.jpg

Mat panel with a gold panel and adhere to card base.  
Adhere a bow and gold cord to front of card.

angle shotfull.jpg

One last look of the impressive Southern Ridge chipboard pieces!

Southern Ridge Trading Company Products Used:

- Frame (coming soon)

Other Supplies Used:

- Embossing Powder
- Cardstock
- Foam and liquid Adhesive
- May Arts Ribbon
- Ink

Thanks for visiting and please become a member of our community.

- Ava