Showing posts with label Shine Word. Show all posts

Monday, May 21, 2018

Shine Scrapbook Layout with Katelyn Grosart

Hey Southern Ridge Trading Company fans, Katelyn here. For today's post, I'm excited that I get to share with you a scrapbook layout that I created for my mom for Mother's Day.  My Shine scrapbook layout features a variety of our chipboard pieces. You'll want to read below as I share with you how I transformed the chipboard pieces for my Shine Scrapbook Layout.


To start, you'll need three Vintage Scroll Keys. Apply two coats of Hickory Smoke Distress Paint to each key. Once the paint has dried, rub Black Soot and Hickory Smoke Distress Crayon along the edges of the keys.


Next you'll need the large frame from the Abstract Frame Set.  Apply two coats of Mustard Seed Distress Paint to the frame. After the paint has dried, rub Black Soot Distress Crayon along the edges of the keys.


Cut the Heart o Graph Doily in half. Apply two coats of Black Gesso to each of the doily pieces.


Take one Queen Anne's Drop from the package. Apply two coats of Ocean Acrylic Paint by Dina Wakley to the chipboard piece. 


The last chipboard piece to embellish is the Shine Word. Apply a coat of Emboss It Ink to the word. Sprinkle Onyx Frost Embossing Powder overtop of the word. Tap off the excess powder and emboss with a heat tool. 


Once all the patterned papers have been layered all together, I then added the photo and frame. In the bottom right hand side of the layout I layered in the drop, a key, the doily, the Shine word as well as some fussy cut images and a variety of flowers.


In the top left hand corner of the layout, I layered in the other half of the doily, the two keys as well as some fussy cut images and a variety of flowers.


And here's the finished layout with all the chipboard pieces added.


Southern Ridge Trading Company Supplies Used:

- Carnations: White & Yellow
- Roses 10mm: Light Blue and Black

Other Supplies Used:

- Tim Holtz for Ranger Ink: Distress Ink - Black Soot, Distress Crayons - Black Soot & Hickory Smoke, Distress Paint - Hickory Smoke & Mustard Seed and Blending Tool with Foam
- Dina Wakley for Ranger Ink: Acrylic Paint - Ocean & Black Gesso
- Ranger Ink: Emboss It Ink Dabber
- Emerald Creek Craft Supplies: Onyx Frost Embossing Powder 
- Graphic 45: Nature Sketchbook - Nature Sketchbook, Mother Earth, Harmonious Honeybees, Flora Fascination, Wildflower Bouquet, Every Blooming Thing, Plant Kingdom and Beautiful World
- Tombow: Mono Multi Liquid Glue
- Misc: Queen Anne's Lace, White Small Flowers and Heat Tool

Until Next Time!

- Katelyn


Friday, March 3, 2017

Shine Wall Hanging with Katelyn Grosart

Hey there Southern Ridge Trading Company fans, Katelyn here. Some of the chipboard pieces I've had waiting to be used on a project are a little bigger than what would fit nicely on a card, so today, I've created a feminine wall hanging featuring one of the larger frames along with a variety of other chipboard pieces. Read below and learn how I transformed my chipboard pieces for my Shine Wall Hanging.


To start, you'll need to take the Circle Lace Frame. Apply two coats of Vintage Lace Paint from Paper Artsy to 3/4" around the frame. Set the frame aside to dry. Once the front side of the frame has dried, paint the entire backside of the frame with two coats of Vintage Lace Paint. Let the frame dry. Once the frame has dried, using a blending tool and Black Soot Distress Ink, ink the edges of the frame.


While you still have the Vintage Lace paint out, paint three floral banners with two coats of paint. Let the banners dry. After the banners have dried, using a blending tool and Black Soot Distress Ink, ink the edges of the banners.


Next you'll need the Shine Word. Apply two coats of Victorian Velvet Distress Paint to the word. Once the word has dried, apply a coat of Emboss It Ink to the entire word. With the word covered in ink, sprinkle Fine Clear Gloss Embossing Powder over the entire word. Tap off the excess powder and emboss with your heat tool. With a blending tool and Black Soot Distress Ink, ink the edges of the word.


While you still have the Victorian Velvet Distress Paint out, apply two coats of paint to three plain banners. Once the banners have dried, apply a coat of Emboss It Ink to the entire word. With the banners covered in ink, sprinkle Fine Clear Gloss Embossing Powder over all three banners. Tap off the excess powder and emboss with your heat tool. With a blending tool and Black Soot Distress Ink, ink the edges of the banners.


The last chipboard piece that needs to be painted is the floral frame. Apply two coats of Carbon Black paint to the frame. Set the frame aside to dry.


With all the the chipboard pieces decorated, next you'll need to take a bowl that fits the inside the Circle Lace Frame. Once you have the right size bowl, trace around the bowl onto a piece of patterned paper. Cut out your circle and then edge distress the edges. After the edges have distressed, using a blending tool and Black Soot Distress Ink, ink the edges of the circle.


Die cut a 3" circle out of patterned paper. After the circle has been die cut, use an edge distressor and distress the edges of the circle. Once the edges have been distressed, using a blending tool and Black Soot Distress Ink, ink the edges of the circle. Die cut your picture using a  2 1/2" circle. 


When starting to adhere your elements onto the Circle Lace Frame, start by adhering the large patterned paper circle to the chipboard piece. Once that patterned paper circle has been adhered, then you can adhere the black floral frame as well as the 3" circle and your 2 1/2" photo circle. After the circles have been adhered, adhere your shine word slightly overtop of your photo.


For the banners in the top right hand corner, adhere the floral banners onto the regular banners. After the banners have been adhered together, string them onto a piece of black twine and adhere them in the top right corner. To finish the banners, adhere a cream or black rose to each banner.


In both the top left and bottom right hand corner of the frame, add a variety of cream, black and pink roses in varying 10, 15 and 20mm sizes.


To finish your wall hanging, add a piece of cream ribbon to the back of the frame which will act as the hanger part at the top of the wall hanging.


Southern Ridge Trading Company Supplies Used:

- Circle Lace Frame
- Small Floral Frame
- Floral Banners
- Plain Banners
- 10mm Roses: Cream and Pink
- 15mm Roses: Black
- 20mm Roses: Cream

Other Supplies Used:

- Emerald Creek Craft Supplies: Fine Clear Gloss Embossing Powder
- Tim Holtz for Ranger Ink: Distress Ink - Black Soot and Distress Paint - Victorian Velvet
- Ranger Ink: Emboss It Ink - Clear (dabber)
- Tim Holtz Ideaology: Found Relatives
- DecoArt Media Fluid Acrylics: Carbon Black
- Paper Artsy: Fresco Finish Chalk Acrylics - Vintage Lace
- Tombow: Aqua Mono Liquid Glue
- Prima Marketing: Wild & Free - Let's Be Adventurers and Love Clippings - All of Me Loves All of You
- Elizabeth Craft Designs: Stitched Circles
- Hug N' Snug Seam Binding Ribbon: Cream
- Misc: Heat Tool and Ribbon


Until Next Time!

-Katelyn 


Wednesday, September 14, 2016

Shine with Ava Gavloski

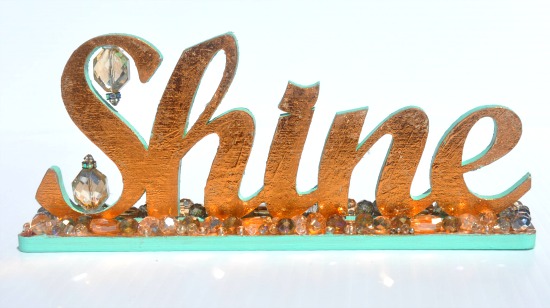
Hello, Ava here to share with you a home decor item to brighten your home.  Gold has made the cycle back into the Planning world.  Do you have a planner or have you noticed the planning trend?  To-day’s post is inspired by the gold mint colour trend within the planner industry.

shine1.jpg

Southern Ridge Trading Co. has a range of home decor words that would satisfy a wide range of rooms in any home or office.

Lets get started on Shine……

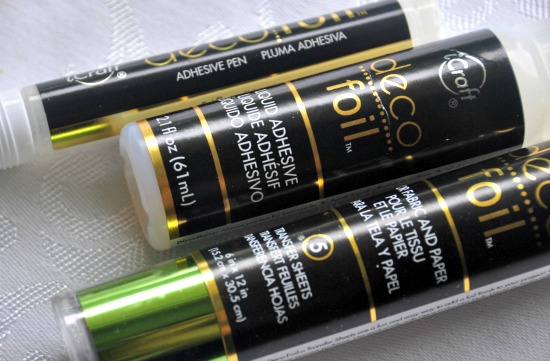
Collect your supplies.

shine2.jpg

ICraft, Deco Adhesive and Foil along with Deco Art Acrylic Paint.

shine3.jpg

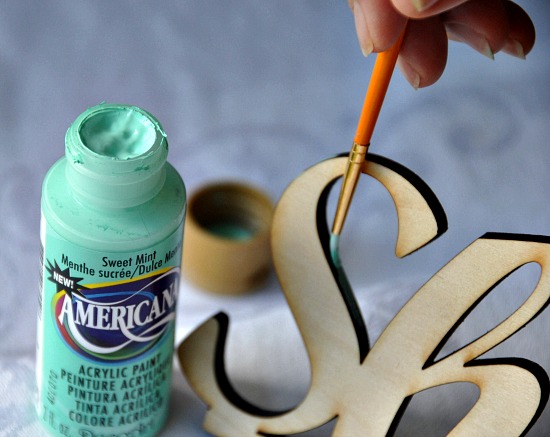
Start by painting the wooden Shine word edges.  Apply 2 coats of paint.  Dry.

Next up is the base of the word.
Apply a layer of Deco foil Adhesive and allow to dry tacky.  Read the instructions carefully before starting the application process.
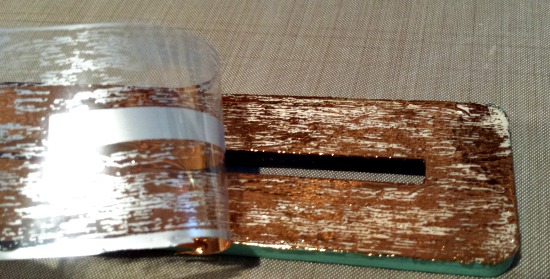
Apply a layer of deco foil over the top of the tacky glue  flat surface of the base stand.  Move slowly and apply lots of pressure to the base to transfer the foil.  The glue has to be just tacky enough to adhere the foil and not dried completely, otherwise the foil will not stick.  I use a bone folder, popsicle stick and the  flat part of your thumb nail to ensure a solid adhesion.  Lift the corner of the foil to see how the adhesion is working before lifting the full sheet off the wooden base.  Deco foil is very forgiving, so you can re-apply (adhesive/foil) many times until coverage is to your satisfaction.  Let it rest for an hour before proceeding to next step.

shine4.jpg

shine5.jpg

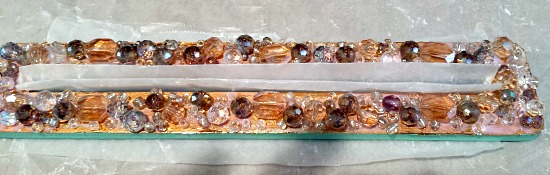
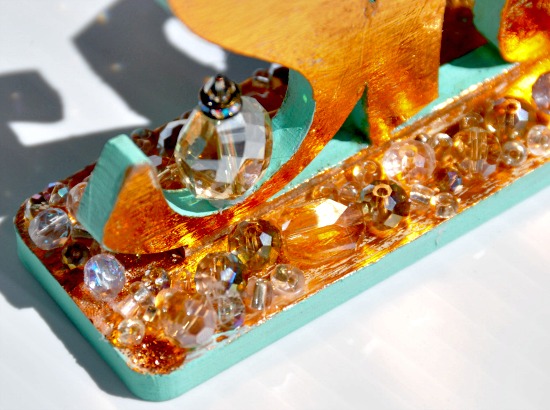
Next apply some gel medium and sprinkle on your beads of choice.  Dry overnight.

shine6.jpg

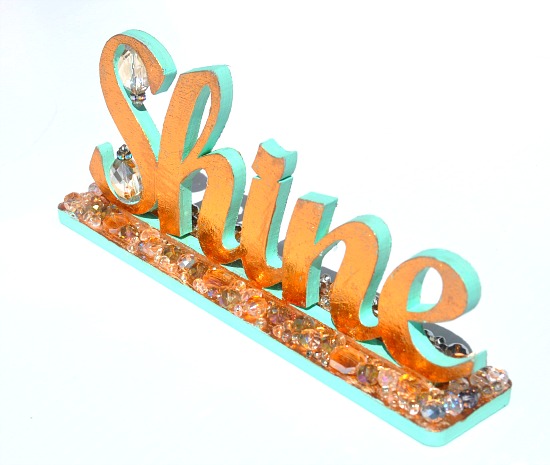
Apply foil to the word shine and let the project rest an hour.

shine7.jpg

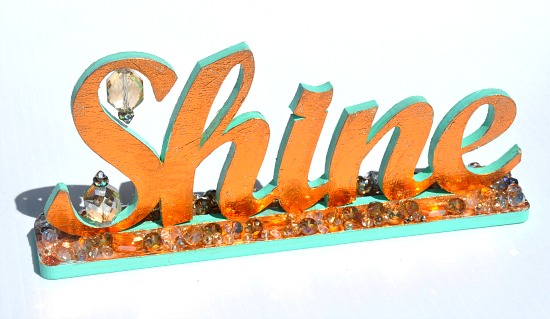
Here is a close up of the final embellished word SHINE.

shine8.jpg

shine9.jpg

Be sure to visit Southern Ridge Trading Co. for your home decor word at the shop.

Southern Ridge Trading Co. Supplies:


Other Supplies Used:

- ICraft Deco Foil and  adhesive by, Therm-o-Web
- Deco Art Americana Acrylic Mint paint
- Gel Medium, by Faber Castell
- Beads & gems

Hope you have been inspired to join in our September challenge, Your Favourites, you have a chance to win 4 designs from the online store – chipboard.ca. Can’t wait to see what you link up, happy creating!

- Ava