Friday, March 20, 2020

Heart of Spring with Ruchi

Hello friends!! Ruchi here from Ruchi's Crafeteria and I'm back with my inspirational project.

Today I've created a Layout on chipboard using mixed media technique. Here it is...


I chose some bright colours for my projects. Picked SRTC Plain Heart Mix Package which is a set of hearts chipboards in different sizes. Applied used dryer sheet along with Prima Gel Medium. Put that aside for drying and heat embossed some SRTC chipboards- Foliage Pieces and Heart Scroll Cage.


When the base dried, created texture with the help of texture paste and stencil and applied different mists and metallic paints.
I did some stamping and arranged all the elements together.


Lastly added art stones, sequins, and sparkling dust to complete the look.


That’s it for today!! I hope you like my today's project. Don’t forget to check the SRTC shop for these chipboards and some other awesome designs.

Southern Ridge Trading Company Supplies Used:


Other Supplies Used:

- Prima Marketing Inc.: Stamps, Flowers, Gel Medium, White Gesso and Mini Art Stones
- Expressions Craft: Metallic Paints and Deco Stones
- Ranger Ink: Embossing Powder
- Tim Holtz Idea-ology: Big Chat sticker
- Stencil, sequins, fussy cut elements are from my stash

See ya next time.
Till then happy crafting!!
Ruchi


Sunday, March 15, 2020

Easter Basket Card with Nancy Nickel

Hi, everyone!
It's Nancy here today with a fun Easter Basket Card,
using some fabulous items from Southern Ridge Trading Company!

This time I've combined the Detailed Easter Eggs

along with some Foliage Pieces.
I've also used the fun Basket Weave Stencil.

Here's my card:


Aren't the eggs gorgeous?
I knew that I wanted to create an Easter basket to put my eggs in.
I found a basket cut file, and adapted it to fit my 5 1/2" square card.
I cut the basket from yellow cardstock, 
and stenciled the design in a darker shade of yellow.


I wanted my basket to look full, so I traced around the chipboard eggs, 
and cut some eggs from pastel coloured cardstock.
I created a card base from the light yellow cardstock,
and added a background panel of very pale blue.


I wanted to give the basket some shape and dimension on the card.
I curled the shape with my fingers,
and then used adhesive along with foam tape to adhere it in place. 
I left some of the basket handle free, to add more dimension.


I coloured the chipboard pieces with various pastel shades of glitter glue:
yellow, turquoise, pink, and green.
They are so pretty and sparkly!


Once the chipboard was all dry, I added two of the eggs in place in the basket.
I tucked the cardstock eggs in behind, and added some foliage pieces.
I added the pink egg, along with one more foliage piece, outside the basket.
Finally, I added a pretty sheer bow to the basket handle.


 These eggs are so intricate and beautiful!
There are lots of ways to create an Easter project with them!

Southern Ridge Trading Company Products:

Other Materials Used:

- AC Cardstock
- Basket Cut File - Easter Egg Treat Basket
- Tim Holtz for Ranger Ink: Scattered Straw Distress Ink
- Glitter Glue: Yellow, Turquoise, Pink, and Green
- Celebrate It Ribbon

* * * * *
Thanks so much for stopping by today!
I'll be back soon with more creative fun!

* * * * *

Wednesday, March 11, 2020

Dream Card with Katelyn Grosart

Hey Southern Ridge Trading Company fans, Katelyn here. Today, I'm sharing with you my Dream Card perfect to add to give to that someone in your life who needs an extra special note to brighten their day. To create my card, I've used a variety of our popular frames, foliage and word chipboard pieces. You'll want to read below as I share with you how to recreate my Dream Card at home.


To start, you'll need the Leafy Frame. Apply two coats of Dina Wakley Heavy Body Acrylic Paint - Black to the frame. 


Next you'll need one of the Butterflies from the Butterfly Swirl Combo. Note: My butterfly is slightly different and no longer in stock, so that is why you'll need to choose one from the Butterfly Swirl Combo. Apply two coats of Impasto Paint - Crimson to the butterfly. 


Take out both Abstract Corner from the package. Apply Emboss It Ink to each corner. Sprinkle Molten Dimensions - White Wonder Embossing Powder over the entire surface of each corner. Tap off the excess powder and emboss with a heat tool. 


Next, you'll need the Dream Fun Word. Apply Emboss It Ink to the word. Sprinkle Molten Dimensions - White Wonder Embossing Powder over the entire surface of the word. Tap off the excess powder and emboss with a heat tool. 


From the Pussy Willows, cut four pieces off the branches. Apply two coats of Dina Wakley Heavy Body Acrylic Paint - Evergreen to the pussy willow pieces. 


From the Fern Leaf Foliage package, you'll need two of them. Apply two coats of Dina Wakley Heavy Body Acrylic Paint - Evergreen to the fern pieces. Once the paint has dried, rub Pine Needles Distress Crayon along the top of the ferns.


You'll need six magenta roses, four turquoise roses, one large white rose and five white roses. 


Choose two pieces of patterned paper from Nicole Wright Designs - Media Assemblage package. Die cut a 4" stitched rectangle out of one of the papers. Die cut a 4 1/2" stitched rectangle out of the other patterned paper. Distress the edges of the rectangles. Ink the edges of the rectangles using Black Soot Distress Ink and a blending tool with foam.


Adhere the 4" stitched rectangle to the 4 1/2" stitched rectangle. Adhere one of the corners to the bottom right corner of the 4" rectangle. Adhere the other corner to the top left corner of the 4" rectangle.


Adhere the leafy frame overtop of the corners on the 4" rectangle. Adhere two of the pussy willow pieces to the top left corner of the leafy frame. Adhere the other two pussy willow pieces to the bottom right corner of the leafy frame. 


Foam square the butterfly to the middle of the 4" rectangle. Adhere the Dream word to the middle of the butterfly. 


Adhere the two fern pieces to the bottom portion of the Dream word.


In the middle of the ferns, adhere one white rose, two magenta roses and two turquoise roses.


In the bottom right corner of the leafy frame, adhere three white roses, two magenta roses and two turquoise roses. In the top left corner of the leafy frame, adhere three white roses, two magenta roses and two turquoise roses.

To finish the card, cut a cardbase out of white cardstock that measures 5 3/4" x 9", score at 4 1/2". Adhere the cardfront to the cardbase.


Here are a few closeup photos of the finished card.


Here is the finished Dream Card.


Southern Ridge Trading Company Supplies Used:

- Roses: 10mm - Turquoise, Magenta and White
- Roses: 20mm - White

Other Supplies Used:

- Tim Holtz for Ranger Ink: Distress Ink - Black Soot, Distress Crayon - Pine Needles and Blending Tool with Foam
- Dina Wakley for Ranger Ink: Heavy Body Acrylic Paint - Evergreen and Black
- Ranger Ink: Emboss It Dabber
- Emerald Creek Craft Supplies: Eileen Hull Molten Dimensions - White Wonder Embossing Powder
- Prima Marketing Inc.: Impasto Paint - Crimson
- Elizabeth Craft Designs: Stitched Rectangles
- Wild Whisper Design: Nicole Wright Design - Media Assemblage
- Misc: White Cardstock

Thanks so much for joining my today!

- Katelyn


Friday, March 6, 2020

Sunkissed By A Mermaid Wall Hanging with Pam Bray


Hi Southern Ridge Trading Company Fans! Pam here today sharing a fun Sun Kissed By A Mermaid Wall Hanger using some of the fabulous Mermaid chipboard pieces. It won't be long and we will be all be able to be kissed by the warm summer sun. 


Begin by covering a round piece of chipboard with pattern paper. Paint Southern Trading Company Foilage Oval Frame with white paint. Dry and trim frame part off of leafy part of chipboard. Adhere to prepared circle. 


Apply embossing ink and Spearmint Rock Candy Embossing Powder to top of prepared Foilage Oval Frame. Repeat with Lemon Drop Rock Candy Embossing Powder.


Paint chipboard pieces from Southern Trading Company Mermaid Mix. Dry.


Apply Rock Candy Embossing Powder to top of prepared Mermaid Mix chipboard pieces. 


Adhere fussy cut images to top prepared circle. Adhere embossed Mermaid chipboard word to top of prepared circle. 


 Adhere fussy cut flowers and turtles to top of prepared circle. 


Add embossed chipboard seahorse. 


Adhere embossed Seaweed and fussy cut pieces to circle. 


Adhere embossed Mermaid chipboard circle along with fussy cut images. 


Cut Southern Trading Company Mini Mina Frame in half. Adhere half to back of prepared circle to complete the Sunkissed By A Mermaid Wall Hanger. 


Adhere the other half to the bottom. Hang and enjoy. Pam

Southern Ridge Trading Company Supplies Used:


Other Supplies Used:

- Graphic 45: Sun Kissed Collection
- Emerald Creek Craft Supplies: Rock Candy Embossing Powder - Blue Mojito, Butterscotch, Lemon Drop and Spearmint
- Embossing Ink
- Round Chipboard Circle
- White Paint
- Hot Glue Gun and Glue Sticks
- Adhesive

Monday, March 2, 2020

Foiled Tag Wall Hanging with Karla Yungwirth

Hello friends, it’s Karla back today with a fun project using a Chipboard Tag,  6”x6” Star Stencil and the Primitive Stars Chipboard. I’ve been having a great time with the new icraft /Thermoweb DecoFoil Transfer Gel Duo and Foils, so I thought I’d combine them with these fun SRTC products and a Simple Stories inspirational quote to make a foiled tag wall hanging.


I started by cutting down the 6x8 piece of Simple Stories paper to fit the chipboard tag. Then I used the DecoFoil pen to colour in the areas of the letters and applied Ranger Foil and DecoFoil by allowing it to dry for a couple minutes and then pressing the foils on. The Ranger foil will work with the pressure of your hand, but the DecoFoil needs to be put through a diecut machine - so I used my Cuttlebug. I achieved a variegated colour by pressing parts of different colours of the Ranger foil to each letter and then running it through the Cuttlebug with Iridescent DecoFoil over top.  I then used the star stencil and the transfer gel to apply a thin layer of gel to various areas of the background. By using washi tape I was able to do only 2 stars at a time. After that dried, about an hour, I used the Cuttlebug again to press the DecoFoil on. I used 2 extra pieces of cardstock as shims and ran it through as if I was using a steel die.


In a similar way, I used the deco foil pen to coat the chipboard stars (which come in a set of 18!) and then applied Lapis Watercolor DecoFoil to the top, running it through my diecut machine to adhere. The chipboard is thin enough that it ran through the machine using only the plates I would normally use with steel dies.


I glued the tag paper to the chipboard, trimmed any excess and inked the edges with Kraftin’ Kimmie Krafty Kolours Ink.


I added some white rope from the dollar store to the top of the tag, and glued on the stars , using foam tape to pop some up.


A few Wild Whisper sequins finished off this inspirational tag, which I can hang on my wall or give as a gift!


Southern Ridge Trading Company Supplies Used:

- Chipboard Tag

Other Supplies Used:

- Simple Stories Patterned Paper
- Thermoweb/iCraft DecoFoil: Transfer Gel Duo, Pen and Foils
- Ranger Ink: Foils
- Wild Whisper Designs: Sequins
- Kraftin’ Kimmie: Krafty Kolours Ink
- Cuttlebug Machine
- White Rope – Dollarama
Thanks so much for stopping by! I hope you have an amazing week ahead!
Hugs,
Karla

Saturday, February 29, 2020

Tea Time Card with Nancy Nickel

Hello, everyone! 
It's Nancy here with a fun new project share!

I've combined the Large Tags
and some pieces from the Tea Time Set.

Here's my card:


My card is an A2 size. 


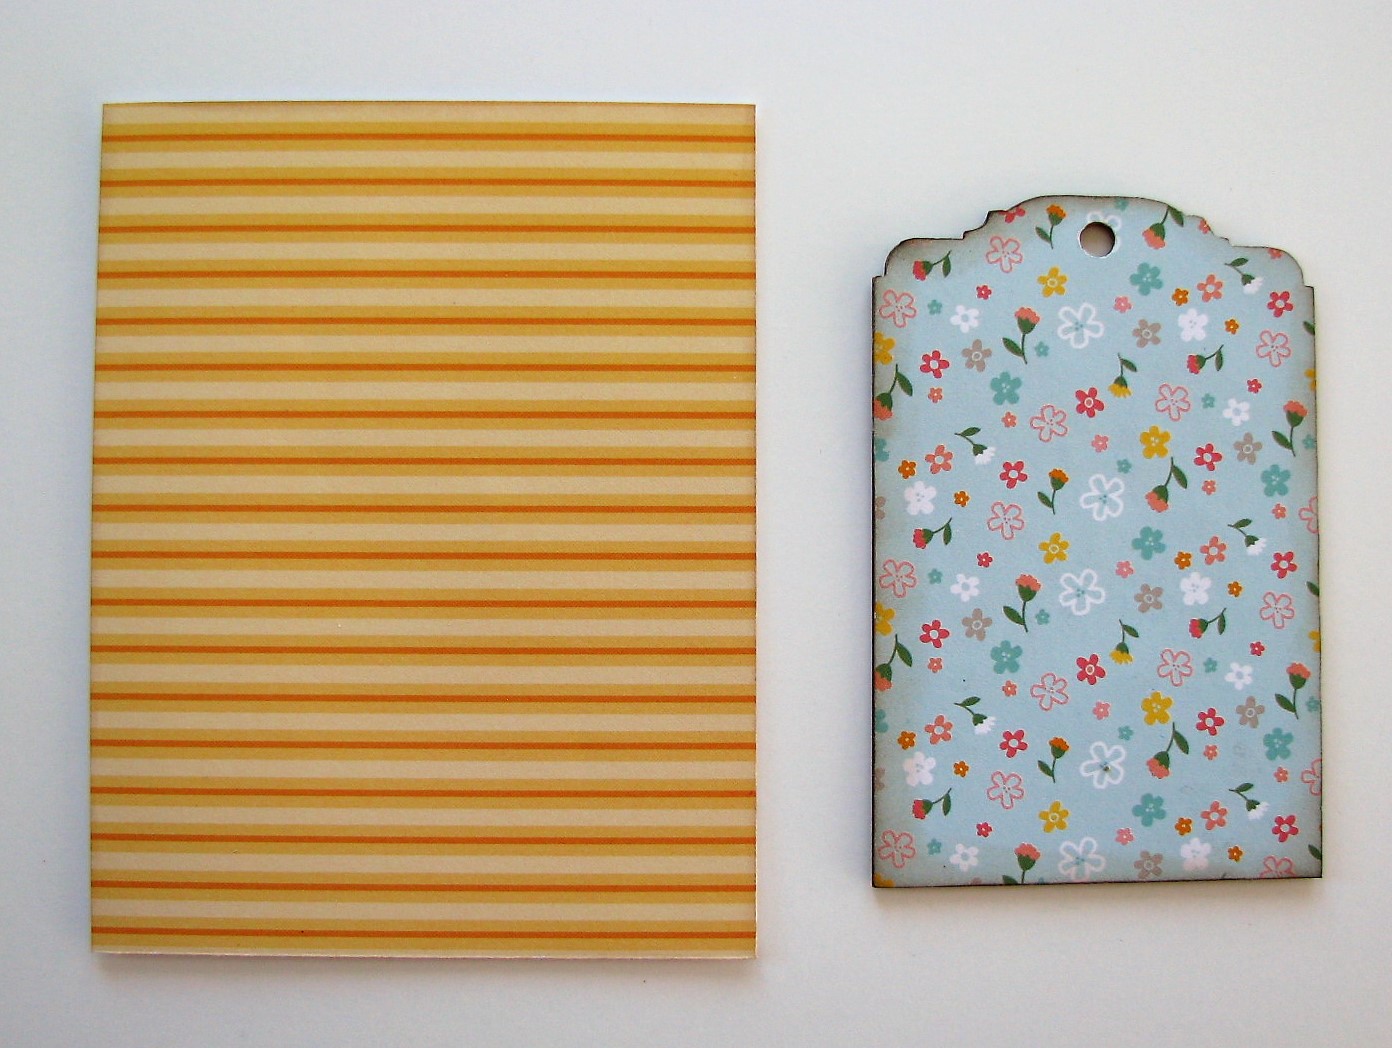
Here's a look at the pieces before I got started. 
The tag measures 4 1/2" x 3".
The Tea Time set has lots of elements. 
I used the "Tea Time" and one cup with saucer.


I made my card base from white cardstock, and covered it with a striped paper.
The I covered the tag with the pretty floral paper.
I added a white ribbon to the top of the tag,
and adhered the tag in place on the card base.


I then inked the chipboard pieces; first with yellow ink, and then with embossing ink.
I sprinkled everything with clear embossing powder, and heat set it.
I added a little piece of doily to the bottom of the tag,
and then adhered the chipboard pieces in place on the tag.


Here you can see how shiny the pieces are
with the floral design showing through nicely!
Finally, I added a few white sequins to the tag.


This would be such a fun card to send to a friend,
inviting her over for tea!

Southern Ridge Trading Company Products Used:


Other Supplies Used:

- American Crafts: Patterned Papers
- Imagine Crafts: Memento Dew Drop - Dandelion Ink
- Embossing Ink
- Clear Embossing Powder
- Heat Gun
- Offray Ribbon

* * * * *
Thanks so much for stopping by today!
I'll be back soon with more creative fun!

* * * * *