Showing posts with label Fern Leaf Foliage. Show all posts

Wednesday, March 11, 2020

Dream Card with Katelyn Grosart

Hey Southern Ridge Trading Company fans, Katelyn here. Today, I'm sharing with you my Dream Card perfect to add to give to that someone in your life who needs an extra special note to brighten their day. To create my card, I've used a variety of our popular frames, foliage and word chipboard pieces. You'll want to read below as I share with you how to recreate my Dream Card at home.


To start, you'll need the Leafy Frame. Apply two coats of Dina Wakley Heavy Body Acrylic Paint - Black to the frame. 


Next you'll need one of the Butterflies from the Butterfly Swirl Combo. Note: My butterfly is slightly different and no longer in stock, so that is why you'll need to choose one from the Butterfly Swirl Combo. Apply two coats of Impasto Paint - Crimson to the butterfly. 


Take out both Abstract Corner from the package. Apply Emboss It Ink to each corner. Sprinkle Molten Dimensions - White Wonder Embossing Powder over the entire surface of each corner. Tap off the excess powder and emboss with a heat tool. 


Next, you'll need the Dream Fun Word. Apply Emboss It Ink to the word. Sprinkle Molten Dimensions - White Wonder Embossing Powder over the entire surface of the word. Tap off the excess powder and emboss with a heat tool. 


From the Pussy Willows, cut four pieces off the branches. Apply two coats of Dina Wakley Heavy Body Acrylic Paint - Evergreen to the pussy willow pieces. 


From the Fern Leaf Foliage package, you'll need two of them. Apply two coats of Dina Wakley Heavy Body Acrylic Paint - Evergreen to the fern pieces. Once the paint has dried, rub Pine Needles Distress Crayon along the top of the ferns.


You'll need six magenta roses, four turquoise roses, one large white rose and five white roses. 


Choose two pieces of patterned paper from Nicole Wright Designs - Media Assemblage package. Die cut a 4" stitched rectangle out of one of the papers. Die cut a 4 1/2" stitched rectangle out of the other patterned paper. Distress the edges of the rectangles. Ink the edges of the rectangles using Black Soot Distress Ink and a blending tool with foam.


Adhere the 4" stitched rectangle to the 4 1/2" stitched rectangle. Adhere one of the corners to the bottom right corner of the 4" rectangle. Adhere the other corner to the top left corner of the 4" rectangle.


Adhere the leafy frame overtop of the corners on the 4" rectangle. Adhere two of the pussy willow pieces to the top left corner of the leafy frame. Adhere the other two pussy willow pieces to the bottom right corner of the leafy frame. 


Foam square the butterfly to the middle of the 4" rectangle. Adhere the Dream word to the middle of the butterfly. 


Adhere the two fern pieces to the bottom portion of the Dream word.


In the middle of the ferns, adhere one white rose, two magenta roses and two turquoise roses.


In the bottom right corner of the leafy frame, adhere three white roses, two magenta roses and two turquoise roses. In the top left corner of the leafy frame, adhere three white roses, two magenta roses and two turquoise roses.

To finish the card, cut a cardbase out of white cardstock that measures 5 3/4" x 9", score at 4 1/2". Adhere the cardfront to the cardbase.


Here are a few closeup photos of the finished card.


Here is the finished Dream Card.


Southern Ridge Trading Company Supplies Used:

- Roses: 10mm - Turquoise, Magenta and White
- Roses: 20mm - White

Other Supplies Used:

- Tim Holtz for Ranger Ink: Distress Ink - Black Soot, Distress Crayon - Pine Needles and Blending Tool with Foam
- Dina Wakley for Ranger Ink: Heavy Body Acrylic Paint - Evergreen and Black
- Ranger Ink: Emboss It Dabber
- Emerald Creek Craft Supplies: Eileen Hull Molten Dimensions - White Wonder Embossing Powder
- Prima Marketing Inc.: Impasto Paint - Crimson
- Elizabeth Craft Designs: Stitched Rectangles
- Wild Whisper Design: Nicole Wright Design - Media Assemblage
- Misc: White Cardstock

Thanks so much for joining my today!

- Katelyn


Friday, June 29, 2018

Memories Wall Hanging with Katelyn Grosart

Hey Southern Ridge Trading Company fans, Katelyn here. For today's post, I'm excited to share with you my Memories Wall Hanging that's perfect to add to your home decor.  My Memories Wall Hanging features a variety of our chipboard pieces. You'll want to read below as I share with you how to recreate my Memories Wall Hanging at home.


To start, you'll need a 5"x7" canvas. Apply two coats of Walnut Stain Distress Paint Ink around the edges of the canvas. Rub Ground Espresso Distress Crayon around the edges of the canvas.


Apply two coats of Black Paint to the Memories Fun Word. After the paint has dried, rub Aged Brass and Brushed Iron Art Alchemy Metallique Wax over top of the word.


Take one Drifting Feathers out of the package. Apply two coats of Walnut Stain Distress Paint on the feather. Once the paint has dried, rub Ground Espresso Distress Crayon along the edges of the feather.


Take two Fern Leaf Foliage pieces out of the package. Apply two coats of Peeled Paint Distress Paint to the fern pieces. After the paint has dried, rub Peeled Paint Distress Crayon along the edges of both fern pieces. 


Next you'll need is the Doily Frame. Apply Emboss It Ink to the frame and sprinkle Oil Rubbed Bronze Embossing Powder overtop of the piece. Tap off the excess powder and emboss with a heat tool.


The last chipboard piece you'll need is the Delicate Lace Doily. Cut the piece in half and then in quarters. Apply two coats of Walnut Stain Distress Paint to two of the doily quarters.


Choose a Found Relative. Die cut the found relative using the 3" Stitched Circle Die. Ink the edges of the circle using Ground Espresso Distress Ink and a blending tool with foam.


Choose one of the Anthology papers and die cut the 3 1/2" stitched circle out of it. Ink the edges of the circle using Ground Espresso Distress Ink and a blending tool with foam. 


From a second Anthology paper, cut a piece that measures 4 1/4" x 6 1/4". Ink the edges of the circle using Ground Espresso Distress Ink and a blending tool with foam. At the top right of the piece of paper, tear a bit down and do the same at the bottom left of the paper.


From a third Anthology paper, cut a piece that measures 4 1/2" x 6 1/2". Ink the edges of the circle using Ground Espresso Distress Ink and a blending tool with foam. At the top right of the piece of paper, tear a bit down and do the same at the bottom left of the paper.


From the same piece of Anthology paper that you cut the circle out of, cut a piece that measures 4 3/4" x 6 3/4". Ink the edges of the circle using Ground Espresso Distress Ink and a blending tool with foam. 


Adhere the 4 3/4" piece of patterned paper to the canvas. Adhere one piece of the doily chipboard to the top right side of the canvas. Adhere the other piece of doily chipboard to the bottom left side of the canvas.


Adhere the 4 1/2" piece of patterned paper overtop of the 4 3/4" patterned paper piece. Adhere the 4 1/4" patterned paper piece overtop of the the 4 1/2" patterned paper piece.


If desired, adhere the lace to the middle of the patterned paper. Adhere the found relatives to the 3 1/2" circle. Foam square the 3 1/2" circle to the middle of the canvas.


Adhere the doily frame overtop of the circles. Adhere one of the fern leaf foliage piece to the top left portion of the frame. Adhere the other fern leaf foliage piece and feather in the bottom right side of the frame.


Adhere the Memories word underneath the photo.


In the top left side of the frame, adhere one large cream rose, two brown roses, four black roses and two cream roses.


In the bottom right hand side of the frame, adhere one large cream rose, two cream roses, two brown roses and two black roses.


To finish off the memories wall hanging, add a black ribbon hanger.


Here are a few close up photos of the wall hanging.


Southern Ridge Trading Company Supplies Used:

- Doily Frame
- 10mm Roses: Brown and Black
- 15mm Roses: Cream
- 20mm Roses: Cream

Other Supplies Used:

- Emerald Creek Craft Supplies: Oil Rubbed Bronze Embossing Powder
- Tim Holtz for Ranger Ink: Distress Ink - Ground Espresso, Distress Crayons - Peeled Paint and Ground Espresso, Distress Paint - Ground Espresso and Peeled Paint and Blending Tool with Foam
- Ranger Ink: Emboss It Ink Dabber
- Elizabeth Craft Designs: Stitched Circles
- PaperArtsy: Little Black Dress Paint
- Prima Marketing: Art Alchemy Metallique Wax - Brushed Iron and Aged Brass
- Kaisercraft: Anthology - Apothecary, Herbs and Botanist
- Tim Holtz Ideaology: Found Relatives
- Tombow: Mono Multi Liquid Glue
- Misc: Lace, 5"x7" Canvas, Black Ribbon and Heat Tool

Until Next Time!

- Katelyn


Friday, September 8, 2017

Hello Autumn Card with Katelyn Grosart
Hey there Southern Ridge Trading Company fans, Katelyn here. It's hard to believe that Fall will soon be here and hopefully the weather will start to cool down a bit because on the west coast of Canada the weather has been super hot. So today, I've created for you a beautiful Fall "Hello Autumn"  card, that's perfect to give to a lover of fall. You'll want to read below as I share with you how I embellished the chipboard elements on my "Hello Autumn" card.

For the middle of the card I used the Small Vintage Oval Mirror Plan and the Horizontal Filigree Frame. To embellish the small vintage oval mirror plain, I applied two coats of Walnut Stain Distress Paint to the frame. For the Horizontal Filigree Frame, I applied Burnt Copper Leaves Embossing Powder to the entire frame and then embossed with a heat tool.


In the bottom left hand corner of the frame, I used a couple of Fall Leaves, a Pumpkin Leaf and two Fern Leaf Foliage. The Pumpkin leaf was painted with two coats of Walnut Stain Distress Paint and one of the fall leaves was painted with Evergreen Acrylic Paint from Dina Wakley.  To embellish both of the Fern Leaf Foliage pieces, I embossed them with Copper embossing powder. For the other Fall leaf, apply two coats of Cheddar Acrylic Paint from Dina Wakley and then once the paint has dried, emboss the leaf with Clear Gloss Embossing Powder.


In the top right hand corner of the frame, I used three Fall Leaves and a  Pumpkin Leaf. The Pumpkin leaf was painted with two coats of Walnut Stain Distress Paint. Two of the fall leaves were painted with Evergreen Acrylic Paint from Dina Wakley. To embellish the other Fall leaf, apply two coats of Cheddar Acrylic Paint from Dina Wakley and then once the paint has dried, emboss the leaf with Clear Gloss Embossing Powder.


To finish the card adhere flowers to the top right hand corner by the chipboard pieces as well as to the left hand corner beside the chipboard pieces. 


Southern Ridge Trading Company Supplies Used:

- 10mm Roses: Orange and Brown
- 15mm Roses: Cream


Other Supplies Used:

- Emerald Creek Craft Supplies: Burnt Copper Leaves, Copper and Fine Clear Gloss Embossing Powder
- Tim Holtz for Ranger Ink: Distress Ink - Vintage Photo, Distress Paint -  Walnut Stain, and Distress Crayons - Gathered Twigs and Peeled Paint
- Dina Wakley for Ranger Ink: Acrylic Paint - Cheddar & Evergreen
- Ranger Ink: Emboss It Ink - Dabber
- Prima Marketing: Amber Moon - Pumpkin Season, Thankful & Humble
- Tombow: Aqua Mono Liquid Glue
- Creative Scrapbooker: Super Stock
- Misc: Heat Tool

Until Next Time!

-Katelyn 


Wednesday, April 26, 2017

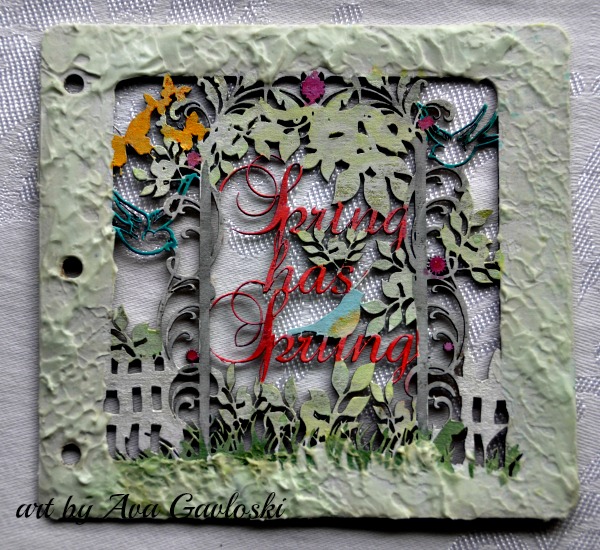
Spring Has Sprung Mini Album with Ava Gavloski

Hello and Welcome to Southern Ridge Trading Co.
Ava here and wanted to share with you a album in progress….

Let’s celebrate Spring.
Spring is here in various degrees of temperature, so let promote flowers, cool breezes and lots of sunshine.

front cover.jpg

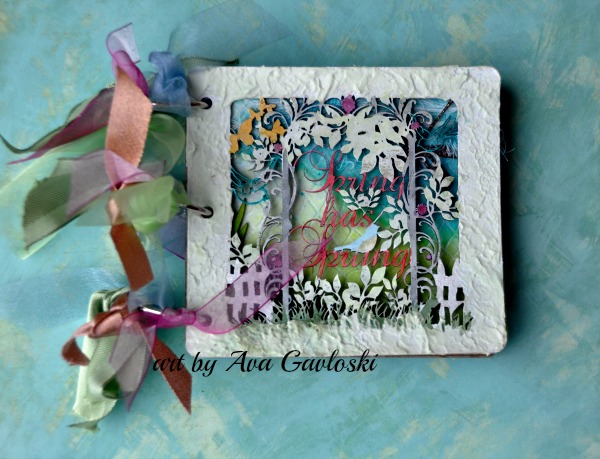
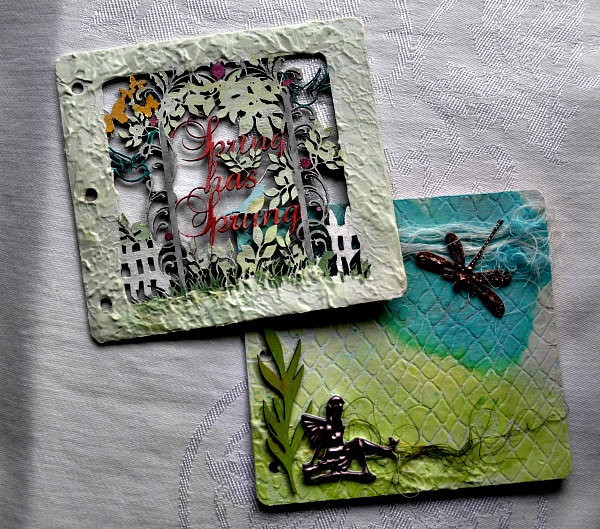
This album cover is my delicate vision of new beginnings in Spring Time.  This album cover has been retired from the store and you can now find new designs in the store.

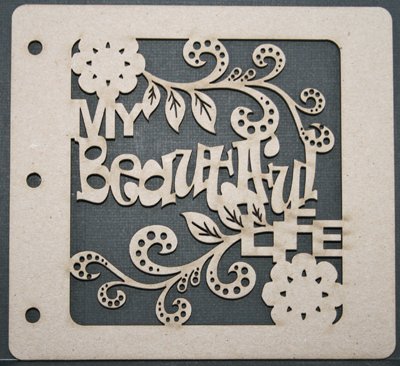
Here is one cover that would be great to design with.

RUYyRUY5OUE4RTc2NEJEQ0NGQ0M6Yzk1NWQ0ODA1NGJjNjkxZWEyM2MyMjRjNWUyOTM2MDk6Ojo6OjA=

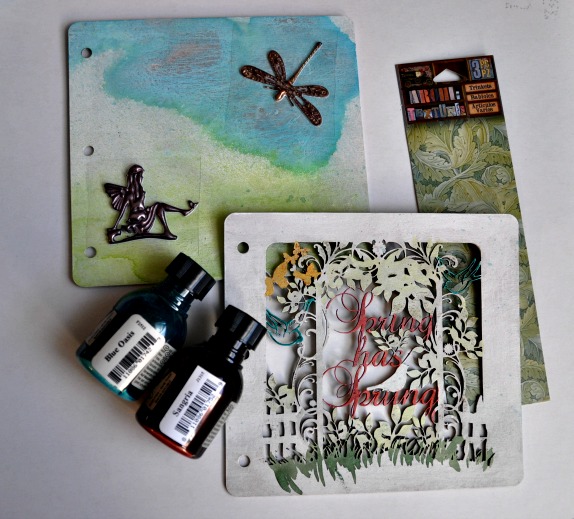
So, let’s get started with the supplies to gather in preparation for applying many treatments to his album cover.

stencil photo.jpg

A wide range of stencils can be found in the Stencil tab of the store.

gesso.jpg

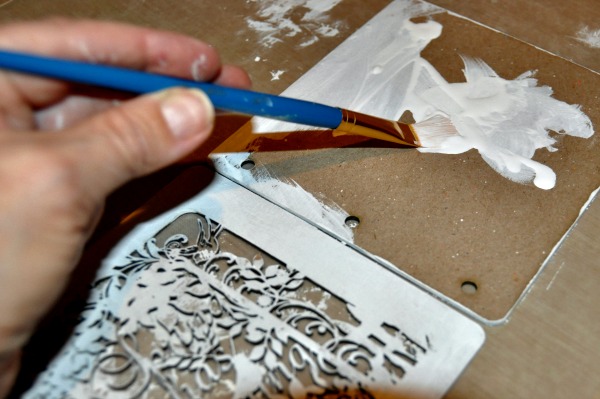
Apply gesso to the chipboard as a base treatment to lighten up the chipboard and have the mist mediums to have nice absorption.

glam painting.jpg

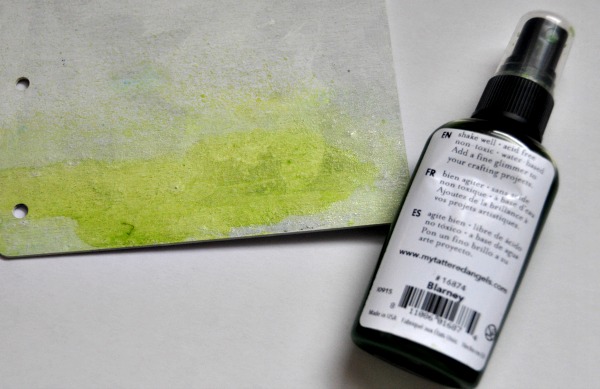
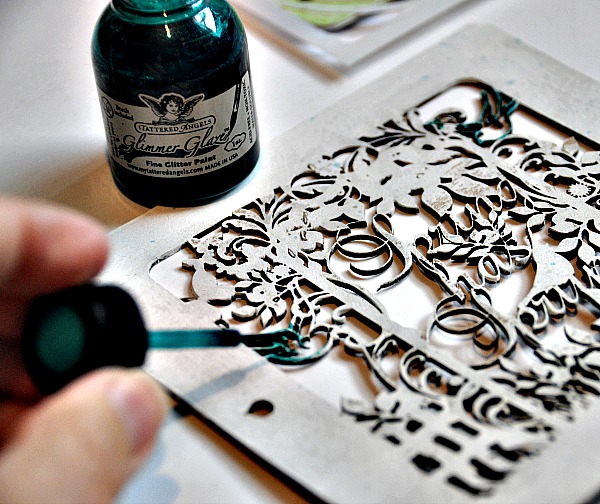
A little Glam painting and then of course some glimmer painting.

glimmer mist.jpg


decoArt modeling paste.jpg

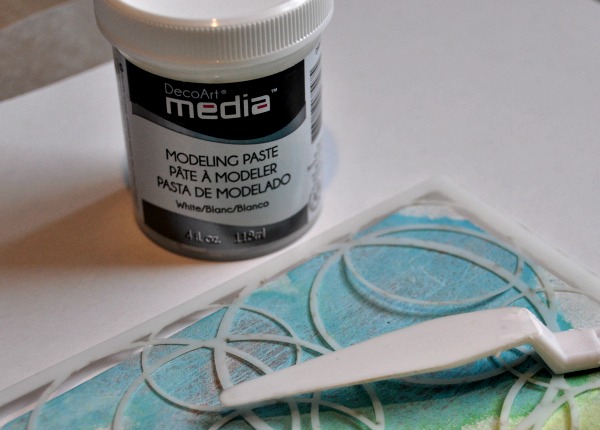
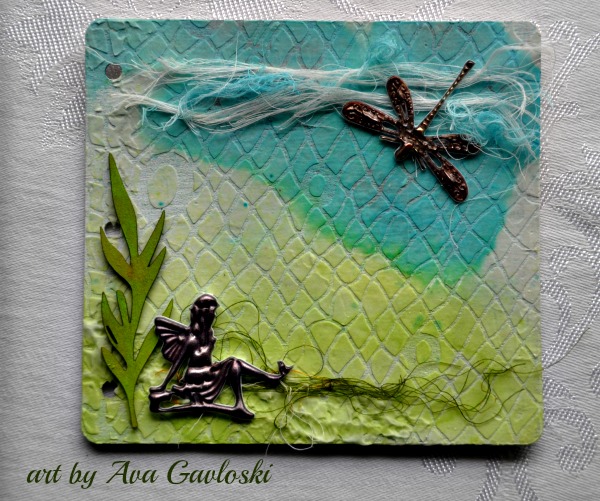
Remember the modeling paste to add texture to your project.  
You can see on page 2 I used the small stencil.

Tip:  DecoArt Media Modeling paste will mix well with your glimmer mist as in this project  to colour the paste from white to your desired colour.  I added a small amount of green glimmer mist to the paste, mixed well and stippled the front cover outer edges of the album.

archtextures supplies.jpg

Add a few embellishment to my pages and my album is ready for photos.

pg2 full.jpg

Here are the 2 pages side by side.

both pgs overlap.jpg

Once I placed the album cover and page 1 back onto the rings, I wanted to create some fullness to the front cover and I achieved this with beautiful ribbons to cover the metal rings.

So, here is your look at the front cover.  I think this will be a continuous work of art as I continue to create pages throughout the next few months.

ribbon cover.jpg

Southern Ridge Trading Company Supplies Used:


Other Supplies Used:

- Tattered Angels: Glimmer Mist, Glam and Architextures
- DecoArt Modeling Paste
- May Arts Ribbon
- Scrapbook Adhesives by 3L

Thanks for stopping by.