Friday, August 16, 2019

Thanks...You're The Best Card with Pam Bray


Hello Southern Ridge Trading Company Fans!!!
Pam here today sharing my Thanks ... You're the Best Card using fabulous Southern Ridge Trading Company chipboard.


Begin by adhering pattern paper card stock and Wild Whisper Nature Bliss pattern paper to front of card. 


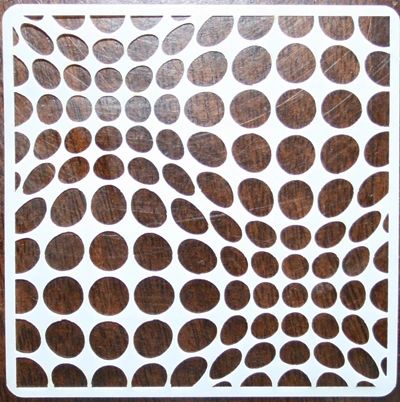
Lay Bubble Wrap Stencil on top of card front; apply modeling paste to top with palette knife. Dry. 


and Spring Fresh Swirl Corners Chipboard with Deco Art Americana Titan Buff paint. Dry. 


Paint Southern Ridge Trading Company Butterfly Mix Chipboard using Deco Art Americana Cobalt Teal Hue; dry. Paint Southern Ridge Trading Company Spring Fresh Swirl Corners Chipboard using Deco Art Americana Yellow Oxide paint; dry. 


Stamp "Thanks...You're the Best" sentiment to top or prepared card front with ColorBox Clear Ink.
Emboss with Emerald Creek Craft Supplies Glacier White Embossing Powder. 


and Spring Fresh Swirl Corners Chipboard with Emerald Creek Craft Supplies Butterscotch and Blue Mojito Rock Candy embossing powder.


Adhere prepare embossed pieces to front of card. 


Adhere flowers to front of prepared card. 


Add twine and ribbon bow to card front. 

Southern Ridge Trading Company Supplies Used:


Other Supplies Used: 

- Wild Whisper Designs: Nature Bliss 6" x 6" Paper Pack 
- Emerald Creek Craft Supplies: Glacier White Embossing Powder, Butterscotch and Blue Mojito Rock Candy Embossing Powder (Coming Soon...Contact Emerald Creek Craft Supply)

- DecoArt Media: Modeling Paste

- DecoArt Americana: Cobalt Teal Hue, Titan Buff and Yellow Oxide
- ColorBox Clear Blends Ink
- Ranger Ink: Thank You Stamp Set
- Xyron: Adhesive
- 5" x 6 1/2" Card Base
- Blue and Red Pattern Paper Card Stock
- Teal Ribbon
- Tan Twine
- Flowers
- Pop Dots

Thank you so much for stopping by and have a wonderful weekend!
Happy crafting!
Pam

Monday, August 12, 2019

Mixed Media Tag - Grow with Ruchi

Hello friends!! Ruchi here from Ruchi's Crafeteria and I'm back with my inspirational project.


Today I've created a simple mixed media tag.


I picked a piece of cardboard  and applied cotton gauge using Prima Clear Gesso. Sprayed immix Fuchsia Pink sprinkle mist from Expressions Craft.


Picked SRTC Heart Scroll Cage and SRTC Vintage Scroll Key chipboards, and applied Prima White gesso all over them. Once it dried, applied Colorbox- White Chalk ink and heat embossed it with WOW clear embossing powder.


Arranged all the elements like SRTC chipboards, Prima flowers, stamped and coloured leaves, butterfly and washi tape. Glued them on my tag base. For completing the look, added half pearls and glitter here n there on elements.


That’s it for today!! Hope you like my today's project. Don’t forget to check SRTC shop for these chipboards and some other awesome designs.


Southern Ridge Trading Company Supplies Used:


Other Supplies Used:

- Prima Marketing:  Heavy Gesso White, Gesso- Clear and flowers
- Wow: Clear Embossing Powder
- Colorbox: White Chalk Ink
- Honey Bee stamp: Hello Gorgeous stamp set
- Concord & 9th: Hello Lovely stamp set
- Expressions Craft: Immix Fuchsia Pink Sprinkle Mist 
- Tim Holtz Idea-ology: Big Chat Stickers  

Cardboard, half pearls, butterfly, twine, glue, cotton gauge are from my stash.

See ya next time.
Till then happy crafting!!
Ruchi


Friday, August 9, 2019

Charming Scrapbook Layout with Gloria Lee

Hello crafty friends!
Happy Friday!!!

Gloria here today and happy to share of my project.
 I made a scrapbooking layout using Word Mix #2 , Sideview Butterfly and    chipboard die cut and Chicken Wire Stencil from Southern Ridge Trading Company Shop.

I made a 12 x 12" layout with my son's photos.


First, I coloured the chipboard cut with white paint.
I love this big butterfly. It is so beautiful!


I chose two baby photos and OH, Happy Day! paper pack from Simply Stories.
Here are a few step outs showing how I got my pieces together.


I blended with Chicken Wire Stencil and Peacock feather, Salty ocean Distress Oxide inks on the base paper using mini blending tools.
And adhere all the elements as shown using double - sided tape and glue pen and added some stickers.


Southern Ridge Trading Company Supplies Used:


Thank you so much for stopping by and have a wonderful day!
Happy crafting!

- Gloria

Wednesday, August 7, 2019

Seaside Ship Wheel with Katelyn Grosart

Hey Southern Ridge Trading Company fans, Katelyn here. It's hard to believe that August is already here and summer will be gone in a blink of an eye. For today's project you guessed it,  I have a Seaside Ship Wheel summer themed project, perfect to add to any area of your home. You'll want to read below as I share with you how to recreate my Seaside Ship Wheel at home.


To start, you'll need to cut a decent size piece of cheesecloth and put it in a ziploc bag. Spritz Worn Leather Colour Bloom in the bag, making sure the entire piece of cheesecloth gets covered. Pull the cheesecloth out and set aside to dry.


Next, cut a piece of netting the will sit overtop of the cheesecloth.


Take one Mini Wood Sand Dollar from the package.


From the Mini Wood Clam Shell package, take four clam shells out. 


Choose a variety of seashells to embellish your project. You'll end up needing eleven seashells.


Take three Mini Wood Starfish out of the package. Apply two coats of Spiced Marmalade Distress Paint to each starfish. Once the starfish have dried, rub Ground Espresso Distress Crayon overtop of the starfish.


Next, you'll need the Chain Anchor. Apply two coats of Brushed Pewter Distress Stain to the anchor. Once the anchor has dried, sand parts off. Use a stencil brush to apply Bronze Age Metallique Wax to areas of the anchor.


You'll need two Coral pieces. Apply a coat of Emboss It Ink to the coral pieces. Sprinkle White Satin Pearl Embossing Powder over each piece. Tap off the excess powder and emboss with a heat tool. 


Next, you'll need two Wood Seahorses. Apply a coat of Emboss It Ink to the coral pieces. Sprinkle Magical Mysteries - Mermaid Fin Embossing Powder over each piece. Tap off the excess powder and emboss with a heat tool. 


From the Mini Ocean Set, you'll need three starfish. Apply two coats of Seedless Preserves to the starfish. Once the starfish have dried, rub Ground Espresso Distress Crayon on the starfish.


Apply a coat of Emboss It Ink to the Seaside Wood Word. Sprinkle Baked Texture - Deep Sea Embossing Powder overtop of the word. Tap off the excess powder and emboss with a heat tool. Repeat the previous step a second time.  


From the Anchors package, take five out. Use a stencil brush to apply Bronze Age Metallique Wax to each anchor.


Apply a coat of Emboss It Ink to the Ship Wheel. Sprinkle Weathered Wood Embossing Powder over the entire surface of the ship wheel. Tap off the excess powder and emboss with a heat tool. 


For the base of the ship wheel, apply two coats of Mud Splat paint. 


Adhere the ship wheel to the ship wheel base. 


Adhere the cheesecloth to the left hand side of the ship wheel. Adhere the netting overtop of the cheesecloth.


In the top portion of the ship wheel, adhere the chain anchor, two anchors, coral, two clam shells, a orange starfish and one seahorse.


Down the rest of the netting, adhere the remaining pieces as well as the Seaside word as desired. 


Once the chipboard pieces have been adhered, to finish off the piece, adhere the seashells and gemstones as desired. 


Here are a few closeups of the finished ship wheel. 


Here is the finished Seaside Ship Wheel.


Southern Ridge Trading Company Supplies Used:

- Wood Seahorses
- Ship Wheel with Backer

Other Supplies Used:

- Emerald Creek Craft Supplies: Magical Mysteries Embossing Powder - Mermaid Fin, Baked Texture Embossing Powder - Deep Sea, Weathered Wood Embossing Powder, White Satin Pearl Embossing Powder, Seashells and Gemstones
- Tim Holtz for Ranger Ink: Distress Paint - Seedless Preserves & Spiced Marmalade, Distress Stain - Brushed Pewter and Distress Crayon - Ground Espresso 
- Ranger Ink: Emboss It Dabber
- Prima Marketing: Art Alchemy Metallique Wax - Bronze Age, Stencil Brush and Colour Bloom - Worn Leather
- PaperArtsy: Fresco Finish Chalk Acrylic - Mud Splat
- Misc: Cheesecloth and Netting

Until Next Time!

- Katelyn


Thursday, August 1, 2019

Under The Sea Layout with Reverse Stenciling and Dylusions with Karla Yungwirth

Hello friends! Karla here today with a fun summer layout using the fabulous Southern Ridge Mermaid Mix Chipboard Set and the Fish Net Stencil. These were perfect to pair with my beachy pics from a recent camping trip to Little Bow Provincial Park in Alberta! Be sure to watch the video linked at the bottom of the post to see exactly how I put it together with the help of my lovely assistant, my 12 year old daughter Amie!


I used the negative image of the stencil by spritzing Dylusions Ink on my craft mat, dipping the stencil in, and then laying it on my background and diecut circle. This stencil is so cool! I kept the layout title simple by covering it with a layer of Tattered Angels Chalk Mist for a translucent glimmer.


There are 18 awesome images in the Mermaid Mix chipboard set – and they are cut so fine and detailed! We decided to paint the silhouettes with Dylusions paints, which are bright and fun – matching the summer vibe and those colourful towels and beach floaties.


We added some more colour with ink splatters and painted more fish, shells and the wonderful seahorse.


Be sure to check out the process VIDEO here! 

https://youtu.be/d2lmBi2-a6M

Southern Ridge Trading Company Supplies Used:


Other Supplies Used:

- Dylusions Ink Sprays and Paints
- Wild Whisper Designs: Watercolor Papers by Pam Bray
- Project Life App to print photos and journaling
- Tattered Angels Chalk Mist
- Dies by Lawn Fawn & Kaisercraft
- Scrapbook Sketch by Scrapbook & Cards Today

Thanks so much for stopping by! I hope you have a wonderful week – don’t forget to head over to the Southern Ridge Trading Company shop to see what inspires you to create!

Hugs,
Karla