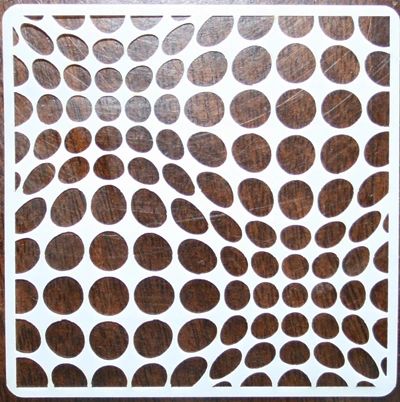
Showing posts with label Bubble Wrap Stencil. Show all posts

Thursday, October 17, 2019

Rip...Halloween Candy Holder with Pam Bray


Hi Southern Ridge Trading Company fans! Pam here sharing how to create a some special candy holders for all your favourite Trick or Treaters or to give to coworkers, teachers, family, etc. 


Begin by die cutting a notebook die from pattern paper and cutting off one of the covers. If you don't have a die...that's okay. Simply cut a piece of paper to measure about 5" by 5" or larger depending on the size of your candy bars and score two 1/4" lines to create fold. Ink edges with black ink. Form the back of candy holder. 


Adhere Tombstone to pattern paper; trim edges. Sand with sanding block. Ink edges with black ink. 


Repeat by turning prepared Tombstone; adhere, trim, sand and ink edges. 


Adhere prepared Tombstone to prepared candy holder back. 


Adhere Closed Gate  to top of pattern paper. Adhere to top of Tombstone


Paint top part of Tombstone with paint; dry. Lay Bubble Wrap Stencil to top of prepared Tombstone using black paint; dry. 


Stamp prepared Tombstone using Boo! Halloween Planner Stamps. 


Adhere border strip to bottom of  prepared Tombstone to top of prepared candy holder. Adhere  Mini Pumpkins to front. 


Adhere blank card stock to inside of candy holder to create belly band. 


Add favourite candy bars to inside. 


Adhere Ephemera Card and sticker to inside of candy holder to hid ribbon ties. 


Add stickers to front of prepared cover. 


Tie Rip...Candy Holder together with bow tie.

Southern Ridge Trading Company Supplies Used:


Other Supplies Used:

- Authentique Twilight Collection
- DecoArt Media Paint: Pyrrole Orange, Cadmium Orange Hue, and Carbon Black
Black Ink
- Sizzix Notebook Die
- MayArts Orange Silk Ribbon
- Blank Page Muse: Boo! Halloween Planner Stamp
- Candy Bars
- Xyron Adhesive 
- Black Card Stock
- Stencil Brush

Happy Halloween Pam

Friday, September 27, 2019

Amazing Card with Gloria Lee

Hello everyone!
Happy Friday!!!

Gloria here today and happy to share of my project.


To create this card, I made a 5.25" x 4" background paper using paper trimmer and blended the edges with pumice stone distress ink using a mini blending tool.
I blended with pumice stone distress ink and covered with Champagne mist metallix gel from decofoil using Bubble Wrap stencil .


And I choose Retro LightbulbsWord Mix #2 chipboard die cut and mini wood gears and coloured them with paint.


I choose a pattered paper from yearbook collection paper pad from Studio Calico for base paper and made it 5.5"x4.25" size using paper trimmer.


And adhere all elements as shown a top-folded card using double sided tape and a glue pen. 


 Southern Ridge Trading Company Supplies Used:


Thank you so much for stopping by and have a wonderful day!
Happy crafting!

- Gloria

Wednesday, September 18, 2019

Drifting Feathers Mixed Media Fall Canvas with Pam Bray


FALL...
officially is in a few days!
 Blowing leaves, cooler weather, sweaters, coats and  "drifting feather" as birds fly south for the winter!


Let's start the celebration with creating a mixed media canvas celebrating "drifting feathers"!
Begin by apply the 6 x 6 pattern paper to top of canvas. 


Lay stencil on top of prepared canvas; apply white crackle paste to top of stencil. Dry. 


Adhere Southern Ridge Trading Company Fish Net Pattern  to top of prepared canvas. 


Apply embossing powder to top of each feather; heat emboss. 


Adhere prepared feathers to top of canvas. 


Adhere bow to top of feathers. 


Adhere flowers around top of feathers. 


Adhere a corner from Southern Ridge Trading Company Demask Corners pack to canvas. 


Adhere finished canvas to top of 6 1/2" x 6 1/2" frame.

Southern Ridge Trading Company Supplies Used:


Other Supplies Used:

- Wild Whisper: Nature Bliss 6x6 Paper Pack
- Emerald Creek Craft Supplies: Rock Candy Embossing Powder - Java Plum, Peppermint, Marshmellow, Butterscotch and Spearmint
- Gold Ribbon and Tan Twine
- White Crackle Paste
- Embossing Ink
- Adhesive

Thanks for stopping by today and make sure to stop by the Southern Ridge Trading Company store to see all the new holiday products! Enjoy Pam 

Friday, August 16, 2019

Thanks...You're The Best Card with Pam Bray


Hello Southern Ridge Trading Company Fans!!!
Pam here today sharing my Thanks ... You're the Best Card using fabulous Southern Ridge Trading Company chipboard.


Begin by adhering pattern paper card stock and Wild Whisper Nature Bliss pattern paper to front of card. 


Lay Bubble Wrap Stencil on top of card front; apply modeling paste to top with palette knife. Dry. 


and Spring Fresh Swirl Corners Chipboard with Deco Art Americana Titan Buff paint. Dry. 


Paint Southern Ridge Trading Company Butterfly Mix Chipboard using Deco Art Americana Cobalt Teal Hue; dry. Paint Southern Ridge Trading Company Spring Fresh Swirl Corners Chipboard using Deco Art Americana Yellow Oxide paint; dry. 


Stamp "Thanks...You're the Best" sentiment to top or prepared card front with ColorBox Clear Ink.
Emboss with Emerald Creek Craft Supplies Glacier White Embossing Powder. 


and Spring Fresh Swirl Corners Chipboard with Emerald Creek Craft Supplies Butterscotch and Blue Mojito Rock Candy embossing powder.


Adhere prepare embossed pieces to front of card. 


Adhere flowers to front of prepared card. 


Add twine and ribbon bow to card front. 

Southern Ridge Trading Company Supplies Used:


Other Supplies Used: 

- Wild Whisper Designs: Nature Bliss 6" x 6" Paper Pack 
- Emerald Creek Craft Supplies: Glacier White Embossing PowderButterscotch and Blue Mojito Rock Candy Embossing Powder (Coming Soon...Contact Emerald Creek Craft Supply)

- DecoArt Media: Modeling Paste

- DecoArt Americana: Cobalt Teal Hue, Titan Buff and Yellow Oxide
- ColorBox Clear Blends Ink
- Ranger Ink: Thank You Stamp Set
- Xyron: Adhesive
- 5" x 6 1/2" Card Base
- Blue and Red Pattern Paper Card Stock
- Teal Ribbon
- Tan Twine
- Flowers
- Pop Dots

Thank you so much for stopping by and have a wonderful weekend!
Happy crafting!
Pam

Tuesday, April 23, 2019

“Loved” Mixed Media Tag with Karen Jiles


Hi there,

It’s Karen sharing a “Loved” Mixed Media Tag that I created with the Bubble Wrap Stencil and chipboard border. I love the combination. The use of the stencil enabled me to add a pop of colour and the chipboard border added some great elements throughout the tag. The chipboard and stencil really paired well with the flowers and pins that I embellished the tag with.  The Stone Drops added some vintage and aged effects. Take a look at how this tag came together in the tutorial below.


Step 1: Lay Bubble Wrap stencil on top of manila tag and secure stencil using washi tape. Transfer Bubble Wrap pattern onto tag using a Blending Dauber and Panama Rose ink.


Step 2: Cut chipboard border down to size of tag and adhere to tag. Note: Save the leftover chipboard for a future project. Add flowers, leaves and clear pebbles to tag.


Step 3: Add additional flowers, metal charm, beaded pins and dyed ribbon. Distress edges to tag using Panama Rose ink.


Step 4: Add White Stone Drops to edges of tag and heart pins.


Step 5: Using white paint and a paint brush, highlight the flowers, leaves and dyed ribbon.


Step 6: Tap on white paint with paint brush to enhance the overall design.


Step 7: Add crystals to the tag using Crystal Katana tool.

Step 8: Continue adding texture to the tag. Note: I added white Stone Drops to the chipboard border to add some more texture.
Step 9: Continue embellishing as desired.

Southern Ridge Trading Company Supplies Used:

- Floral Border

Other Supplies Used:

- Manila Tag
- Blending Daubers
- White Paint
- Panama Rose Ink
- White Stone Drops
- Dyed Ribbon
- Flowers and Leaves
- Metal Charm
- Beaded Pins
- Acrylic Clear Pebbles
- Scissors
- Paintbrush
- Washi Tape
- Crystal Katana Tool
- E6000
- Hot Glue

I really enjoyed creating this “Loved” Mixed Media Tag and I hope that it inspired you. It’s amazing how elements like chipboard pieces and stencils add so much fun and creative inspiration to art. They pair well with various embellishments and are perfect for mixed media projects.
Thanks so much for stopping by today.
Karen