Showing posts with label Lil Faries. Show all posts

Friday, August 10, 2018

All You Need is Love with Emma Ivemey

Hello there Southern Ridge fans! Emma here to share with you a fun art piece I’ve created with the oh-so-versatile chipboard pieces we all love.

I’ve used canvas paper for my base this time; if you haven’t tried it out I would highly recommend it. It’s very heavy weight (180lb / 296 gsm), which means you can use all kinds of liquid media on it. Plus, it has the texture of a real canvas that gives a little more interest to your art than a simple plain piece of paper.

This background colour happened by accident, as I was experimenting with colours for another project. This scheme didn’t suit the other project, so I put it aside. (There’s quite a few layers of colour on that paper.. I’m not sure I could recreate it again exactly, but that’s the fun of experimenting).


I felt that the kind of fantasy twilight glow would perfectly suit black silhouettes, so that inspired me to use the fairy and butterfly pieces. To create the black sparkle on the chipboard, I used Emerald Creek Onyx Frost Allure embossing powder. I then added some stamps on the background in white, grey, brown and black to enhance the twilight atmosphere. Some sequins gave the finishing touches here and there.

Southern Ridge Trading Company Supplies Used:


Other Supplies Used:

- Emerald Creek Craft Supplies: Onyx Frost Embossing Powder
- Bienfang Canvas Paper
- Paper Artsy / Seth Apter Fresco Finish Paint: Snowflake, Spanish Mulberry, Glacier Ice, Steel Grey and Venice Blue
- Crafter’s Companion: Stamps
- Imagine Crafts: Versamark Watermark Ink, Versafine Ink - Black Onyx and Memento Ink - London Fog
- Wild Whisper Designs: Wood Heart and Sequins
- Close to my Heart Ink: White Daisy and Slate
- Ranger Ink:  Archival Ink - Coffee

Thanks for visiting Southern Ridge today, I hope you are inspired to create something with silhouettes.

~~ Emma ~~


Friday, April 20, 2018

Shine On with Sandy McTier


I’ve always loved the mystical, magical and whimsy of fairies!  
When I saw the SRTC Fairy chipboard pieces, I just knew I had to create with them!!


Prepping the Pieces:
  • I painted the Mason jar surface with DecoArt’s All Purpose Sealer and let completely dry.
  • Once dried, I gave it a light sanding and then painted a smooth layer of DecoArt Media Gesso and let completely dry again. Once dried, I gave it another light sanding to remove any dust.

Fairy:
  • I painted the fairy with Lamp Black and let dry.
  • I wanted her to be just a silhouette but also wanted her wings to shine just a bit. So, I painted DecoArt Interference in Violet and Turquoise on her wings.

Mason Jar:
  • I painted over the jar with some Glazing Medium and then, using an Angle brush, floated White in the center, Desert Turquoise on the outer edges of the white and then finished with Dioxazine Purple along the edges. I softly blended between the colors with a mop brush so that the colors would transition into one another. I let the purple run right up into the lid too.
  • Next, I stenciled some of the colors used in the jar over a piece of Punchinella and finished by stenciling some White here and there. I also wanted some smaller dots, so I stenciled over a piece of dry wall tape with circles on it.
  • Using a liner brush and thinned down White, I added some sparkles here and there in the jar.
  • I dry brushed some Dioxazine Purple swirls up from her hand and, once dried, I dry brushed some White over that… going for a misty look. I added some dots and sparkles with the liner brush and thinned down White.


Mason Jar (cont.):
  • I painted the lid with a mixture of Lamp Black and White and then floated in a line to separate the sections.
  • Once dried, I dry brushed some Dioxazine Purple and Desert Turquoise on the sections. Then, I dry brushed some White on the left side and on each of the sections, as shown in the picture.  

Finishing Touches:
  • I used a small letter stamp set and stamped the words “Shine On” using a black Staz-On ink pad. Even though I lined it up with a piece of painters tape, those letters aren’t always straight on the block, so I wasn’t too fussed if they lined up exactly or not.
  • Once dried, I painted a layer of DecoArt Media Soft-Touch Varnish over the entire piece.
  • Next, I used the On Point Glue by Imagine to glue the fairy onto the jar and then shaded underneath her arm, skirt and lower wing with Dioxazine Purple.
  • Finally, I looped some armature wire through the holes and, using needle nose pliers, wrapped it around the back wire and then into a little twirl.  

Optional:  Glamour Dust the swirls, if desired.

Southern Ridge Trading Company Supplies Used:


Other Supplies Used:

- Surface: Mason Jar from www.cdwood.com Item#31-L352
- Dynasty Brushes: Black Gold 1/2" Angle, 3/8" Angle, IPC Large Oval Foam, Medium Tracy Morea Stencil Brush, Small Mezzaluna, and a liner brush of choice.
(All available from TheBrushGuys.com – use promo code: sandymc for an additional discount)
- DecoArt Americana Acrylics: Desert Turquoise, Snow Titanium White, Lamp Black and Dioxazine Purple
- DecoArt Media Interference: Turquoise and Violet
- DecoArt Media Gesso: White
- DecoArt Media Varnish: Soft-Touch
- DecoArt Glazing Medium
- Imagine On Point Glue
- Misc. Supplies: Punchinella, Circle Dry Wall Tape, Needle Nose Pliers, Staz-on Ink Pad, Small Sanding Block, Wire and an Alphabet Stamp Set.


©2018 Shine On, Sandy McTier Designs ~ all rights reserved

Y’all have a GREAT day and Happy Creating!!  Sandy


Wednesday, October 12, 2016

Fairy Cards with Ava Gavloski

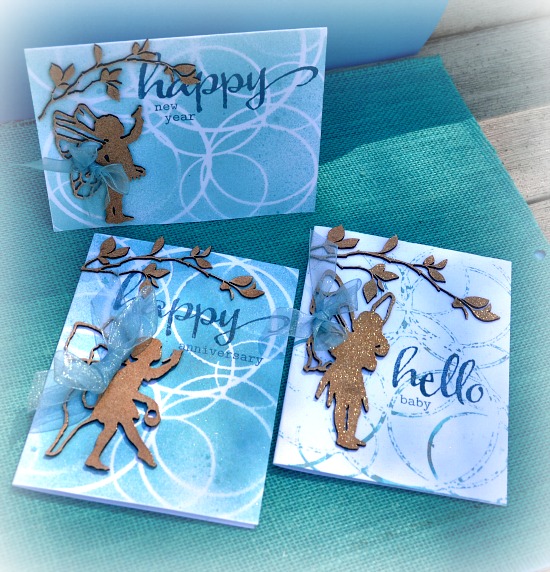
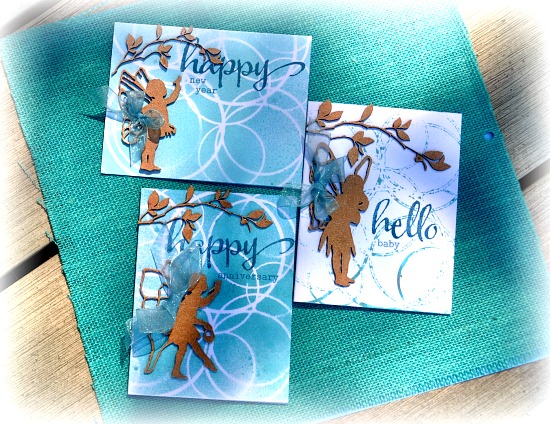
Hello and Welcome to Southern Ridge Trading Co., Ava here to share some cards I made featuring the lovely Lil fairies from the Fairy Garden section of the shop.

opening all.jpg

I really like how these cards turned out.  Gold sparkle on the chipboard with the turquoise blue truly shows off the stencil and chipboard fairies by Southern Ridge Trading Co.

happynewyr closeup sparkle.jpg

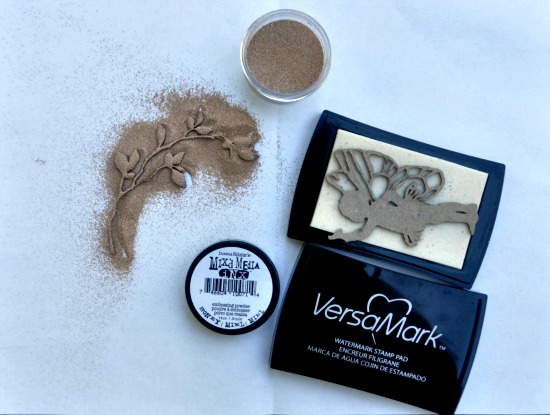
Let's get started with the supplies..

supplies.jpg

To prepare the chipboard pieces, press the chipboard into Versa Mark to apply the glue, sprinkle some embossing powder onto the chipboard, heat set and let the sparkle show off the chipboard.

Next is to prepare the card front.  Lay the Intersecting Circles stencil (from the Stencils section of the shop) onto the card front, spray some Tattered Angels Glimmer mist onto the stencil.

Have your next card base nearby in preparation for the “negative” transfer technique.  Carefully lift the sprayed wet stencil from your card and lay the wet side of the stencil down onto the other card base.  Gently press the stencil to transfer the mist onto the second card.

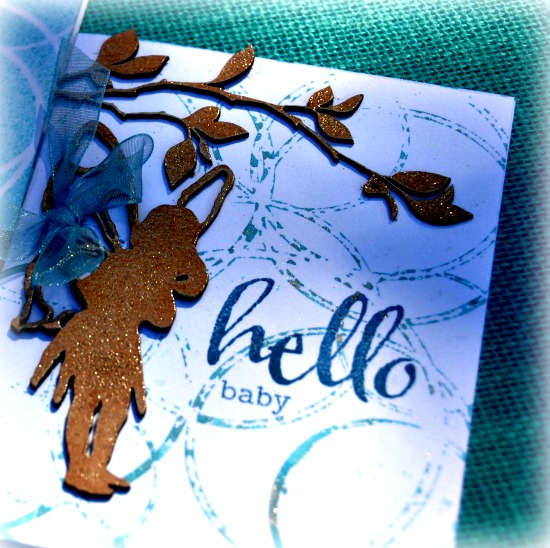
Here you can see the negative card stencil transfer results with the Hello Baby card.

hello baby closeup.jpg

White card base with the coloured Intersecting circle stencil imprint onto the card.  
So when you purchase a stencil, you can achieve 2 looks.  

happynewyearclose.jpg

The Leafy branches from the Nature and garden section of the shop really frames the card well and adds dimension to the card.

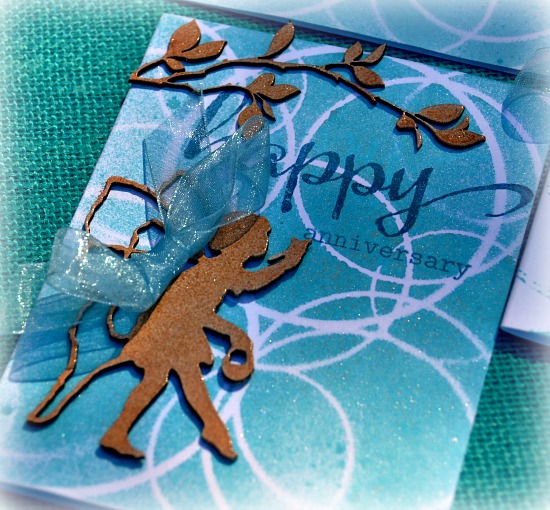
happy anniversaryclose.jpg

I like the crispness that the stencil gives to these cards and the design does give dimension  to the card.

Pick up a couple of stencils from the shop and have fun designing your card backgrounds….

all3 flat.jpg

Can you see the unlimited options that you can apply to cards by using a stencil from Southern Trading Co.?  Thanks for joining me today and take time out to design this week.

Southern Ridge Trading Co. Supplies Used:


Other Supplies Used:

- Tattered Angels: Glimmer Mist
- May Arts Ribbon
- Tsukineko/Imagine Crafts: VersaMark
- Clearsnap: Mix’d Media Gold Embossing Powder


Remember to play along in the monthly challenge on the 
Southern Ridge Trading Company blog. Each month enter for your chance to win 4 designs from the online store - chipboard.ca -$20 (before tax) retail value of YOUR OWN CHOOSING! 

- Ava