Showing posts with label Butterflies. Show all posts

Wednesday, February 28, 2018

Sparkle Wall Hanging with Sandy McTier


SPARKLE!!

SPRING! SPRING! SPRING!
I am so ready for spring aren’t you?

Butterflies, bees, flowers and warmer weather are just a few of the things I love about SPRING – oh and all the COLOUR!

Here’s what I did to create my “Sparkle” Tag

Prepping the Surface:
  • I painted the surface with DecoArt’s All Purpose Sealer and let completely dry.
  • Then, I painted a smooth layer of DecoArt Media Gesso and let completely dry.
  • Next, I spritzed the surface with DecoArt Media Shimmer Mister Turquoise and Yellow Green and let it drip down the surface. Once dried, I painted a layer of watered down Gesso over it and wiped it back with a soft paper towel. This helped tone down the background colours.


  • I laid the Southern Ridge Trading Company Intersecting Circle Stencil (small) in place and stenciled some Titanium White on the surface.


Design Elements:
  • I drew out and painted the shape of a butterfly on the surface and then outlined it with an Identi-Pen.
  • I painted the wings and chipboard butterflies with Gesso and let dry.
  • Once dried, I spritzed the Shimmer Mister Turquoise and Purple on the chip board butterflies and Purple on the butterfly wings. I laid a paper towel on the wings to soften and lift some of the color.
  • Next, I loaded the toe of a 3/8” Angle brush with Phthalo Blue and shaded around the inside edge of the wings. I lightly brushed some of this colour on the wings as well.


  • Then I stenciled on some elements from an M2 stencil (M2-5) that screamed, ‘butterfly wing adornment’!
  • I decided to outline the elements with the Identi-Pen, and well… let’s just say thank goodness for hand sanitizer and a Mezzaluna brush because I was able to get the pen markings off and re-stroke some of the white back in place. ☺
  • I painted the body with a mixture of Green Gold and Titanium White and then shaded each section with Sap Green.  Then I added a small highlight of white on each section.
  • I shaded underneath the wings and left side of the body with Paynes Grey to lift the design a bit from the surface.
  • I re-outlined the wings, the antenna and body with the Identi-Pen.
  • I added another element of texture with drywall tape and Titanium White in the background.
I spritzed the circle stencil with the Shimmer Mister Turquoise and then pressed it on the background here and there – to add a reversed image ☺ from the stencil.


  • I added some details to the chipboard butterflies with the Identi-Pen.
  • I painted the ‘Sparkle’ chipboard piece with a mixture of DecoArt Metallic Lustre – White Frost and Shimmer Mister Purple.
  • I loaded a wet brush with a touch of Metallic Lustre – White Frost and painted over the chipboard butterflies as well as the butterfly wings on the surface to give them more of a sparkle.

Finishing Touches:
  • I splattered some Shimmer Mister Purple and Titanium White on the surface and then laid a paper towel over the surface to soften the look.
  • I glued both of the butterfly pieces in place with E6000 glue. Notice that I cut the little butterflies off the one chipboard piece.
  • Once everything was painted, glued and dried, I painted the surface with Soft Touch Varnish to protect the painted design.
I hung mine with green floral wire. ☺

Southern Ridge Trading Company Supplies Used:

- Butterflies

Other Supplies Used:

- Surface: Scallop Dome Ornament #31-L206 (available – www.cdwood.com )
- M2-5 Stencil (available – www.sandymctierdesigns.com )
- DecoArt Media Fluid Acrylics: Titanium White, Phthalo Blue, Paynes Grey, Sap Green & Green Gold
- DecoArt Media Metallic Lustre: White Frost
- DecoArt Media Misters: Shimmer Mister Turquoise, Purple & Yellow Green
- DecoArt All Purpose Sealer, Media Gesso & Soft Touch Varnish
- Dynasty Brushes: Black Gold 3/4", #8 Shader, 3/8" Angle, 1/4" Angle, Stencil Brush and a liner brush of choice. (Available from TheBrushGuys.com – use promo code: sandymc for an additional discount)
- Identi-Pen
- E6000 Glue
- Drywall Tape
- Green Floral Wire


©2018 SPARKLE, Sandy McTier Designs ~ all rights reserved

Y’all have a GREAT day; Happy Creating!!  Sandy

Friday, July 21, 2017

Feminine Happy Birthday Tag with Katelyn Grosart

Hey there Southern Ridge Trading Company fans, Katelyn here. Today, I've created for you a beautiful Happy Birthday tag, that's perfect to give to that special woman in your life for their birthday. You'll want to read below as I share with you how I transformed each of my chipboard pieces to create my Feminine Happy Birthday Tag.


To start, you'll need a half a piece of the Delicate Lace Doily. Once you have a half piece of the doily, cut the doily in half again. Apply two coats of Spun Sugar Distress Paint to each delicate lace doily piece. Set the pieces aside to dry. After the pieces have dried, apply the Spun Sugar Distress Crayon to portions of the doily. Rub the crayon in with your finger. 


Pull out two Mini Wood Feathers. Apply three coats of Bundled Sage Distress Stain to each feather. Set the feathers aside to dry. 


From the Leaves set, cut out one leaf of your choice. Apply three coats of Weathered Wood Distress Stain to the leaf. Set the leaf aside to dry.


Cut out one of the Happy Birthday Sentiments from the Birthday Greetings package. Apply two coats of Victorian Velvet Distress Paint to the Happy Birthday sentiment. Set the sentiment aside to dry. Once the sentiment has dried, go over it with a Victorian Velvet Distress Crayon. Rub the crayon in with your finger.


Trace the top portion of the dress form onto a piece of patterned paper. Cut the dress form image out. Using Antique Linen Distress Paint, paint both dress form pieces. Once the paint has dried, apply Antique Linen Distress Crayon to the chipboard piece. Rub the crayon in with your finger. Adhere the patterned paper dress form piece to the chipboard dress form. 


Adhere the wire portion of the dress form to the dress form. 


Now you can assemble your Feminine Happy Birthday tag. Start by adhering the large patterned paper piece to the tag. Adhere the doily pieces onto the patterned paper. Adhere the smaller patterned paper piece overtop of the large patterned paper piece.


Embellish and add whatever else you might want to your wire dress form. Foam square the wire dress form to the middle of the tag.
Adhere the Happy Birthday sentiment to the bottom portion of the wire dress form.


To finish off your tag, add a light pink ribbon bow to the top of the tag. Your Feminine Happy Birthday Tag is now complete. 


Southern Ridge Trading Company Supplies Used:

- Butterflies (coming soon)
- Leaves (coming soon)
- 10mm Roses: Light Pink 
-  15mm Roses: Cream

Other Supplies Used:

- Tim Holtz for Ranger Ink: Distress Ink - Black Soot, Distress Paint -  Victorian Velvet, Antique Linen and Spun Sugar, Distress Stains - Weathered Wood and Bundled Sage and Distress Crayons - Victorian Velvet, Antique Linen and Spun Sugar.
- Tombow: Aqua Mono Liquid Glue
- Bo Bunny: Serendipity - Serendipity and Love
- May Arts Ribbon: Light Pink and White Ribbon
- Graphic 45: Large Ivory Tag Album

Until Next Time!

-Katelyn 


Monday, May 25, 2015

Birhtday Card 150 | 2 x 75


Hi Everyone, i hope you are all doing well?
Here in germany we have a great spring day :)
I'm happy you stopped by, to see todays inspiration
with the Southern Ridge Craft Stuff from my (Dunja) side.


I made a card for the big birthday of my in-laws. 
Both were 75 years, so together 150. 
That was a big party and it needed a special card.

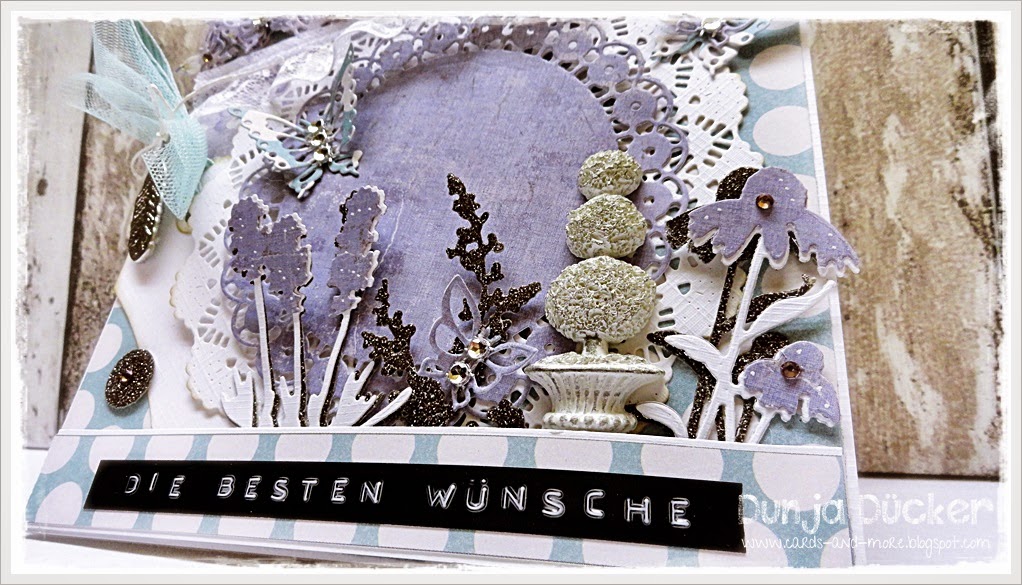
I decorated the inner part with the magnificent Chipboard element.
I've used the BAN-500 Garland

BAN-500.jpg


I have drawn the circles and ovals on design paper, cut them out and  
pasted them on the surfaces. I embossed the remaining space of the chipboard. 


After that i put some selfadhesive Numbers to the Circles and Ovals.


Here are some more Detailpics of the card.


I hope you like my card as much as the recipients :)

Have a fabolous day!

And DO NOT MISS OUR CURRENT CHALLENGE.
The SPRING is perfect this time. 
And remember, you also have the chance 
to win an awesome generous prize from Southern Ridge! 

Monthly Challenge Here


Hugs Dunja


Friday, April 24, 2015

some special moments


Hi Everyone, i'm glad you stopped by today. 
It's my (Dunja) turn, to show you a new inspiration 
with the stunning Chipboards from Southern Ridge. 


For my Card i used dotet Designpapers, Sequins and some 
Flowers. I've added the Chipboard Elemente of  
Southern Ridge. This time i did not embossed or 
glittered the Stuff. They have a natural look and this 
matches perfect with the kraftpaper ;)


I used the following chipboard's

FLO-251            INS-255
FLO-251.jpg  INS-255.jpg  


Thank you very much for stopping by.
Hope you'll all have a great weekend,

see you soon, Dunja xox

Friday, April 10, 2015

A Hug....


Hi Everyone, Germany (Dunja) is here today :) I'm happy to be back with a new card for you made with the adorable Southern Ridge Chipboards. I made a Spring Card using two of the Chipboard Articles from Southern Ridge: COR-420 and INS-255

COR-420.jpg INS-255.jpg 


The flowers were decorated on the Chipboard Swirl. I inked the edges with a soft brown ink pad.


For the Butterfly i used White Gesso. I sprinkle the Twinklets in the wet gesso. It is a great effect, what do you think?


Thanks so much for stopping by. I hope you'll like my spring card. I hope to see you soon :)

And please remember, our monthly Challenge is on - yes, it's new, so check it out!!!


How easy is that??? See you there :)


Sunny Greetings from Germany,

Dunja