Monday, December 12, 2016

Baking Cookies Scrapbook Layout with Charlene Byrd


Hello everyone,
Thanks for joining me today. I LOVE when my boys were little and they enjoyed doing a little Christmas baking with me! They’re teenagers so they’re too old for that now, good thing I have nieces and nephews who will bake with me!


I used Perfect Pearls to create the snowflake frame and the individual snowflakes. Start by adding some embossing ink to the chipboard. The Perfect Pearls that I used was in a powder form so I used a dry paint brush to apply it. Dip your brush into the powder, tap off excess and then brush it over the chipboard. I randomly applied all 3 colours. I cut off the tips of 2 of the snowflakes so that they are peeking out from the paper.


Then I simply used gold embossing powder on the word JOY.

Southern Ridge Trading Company Products Used:


Other Products Used:

- Imaginese Paper
- Bazzill Cardstock
- Heidi Swapp Letter stickers
- Websters tiny letter stickers
- Washi Tape
- Perfect Pearls
- Embossing Ink
- Border Punch

Remember to play along in the monthly challenge over on the Southern Ridge Trading Company blogEach month enter for your chance to win 4 designs from the online store - chipboard.ca -$20 (before tax) retail value of YOUR OWN CHOOSING! 

Happy Creating and Merry Christmas to ALL!
Charlene


Friday, December 9, 2016

Snowman Merry Christmas Card with Katelyn Grosart

Hey there Southern Ridge Trading Company fans, Katelyn here and I'm on the blog today to share  some inspiration with you from our current monthly challenge which is all about "Christmas & New Years". Today I've got a Snowman Merry Christmas card for you that will be sure to inspire you to recreate it. Grab a cup of coffee or tea and learn how I transformed my chipboard pieces and assembled my card to create my fun Christmas card. 


To start, take out six Mini Wood Snowflakes. Cover each snowflake in two layers of Picket Fence Distress Stain. Once the stain has dried, cover the snowflakes in a layer of VersaMark Ink and sprinkle Iridescent Shimmer Embossing Powder overtop of each of the snowflakes. Tap off the excess powder and emboss with a heat tool. Set the snowflakes aside to cool. Once the embossing powder has cooled down, add a red glitter/gold glitter dot to the centres of each snowflake.


Next, you'll need the Ornate Square Frame #2. Apply two coats of Picket Fence Distress Stain to the frame. Once the distress stain has dried, cover the snowflakes in a layer of VersaMark Ink and sprinkle Soft Fallen Snow Embossing Powder overtop of the frame. Tap off the excess powder and emboss with a heat tool. 


Pull out six Snowflakes 712 out of the package. Apply two coats of Picket Fence Distress Stain on each snowflake. Set aside the snowflakes to dry.


Take out one sleigh from the Sm. Wood Sleighs package. Apply two coats of Walnut Stain Distress Stain to the sleigh. Set the sleigh aside to dry.


Pull out four Sm. Primitive Stars out of the package. Apply two coats of Brushed Pewter Distress Stain on each star. Set aside the stars to dry. 


Next, you'll need to pull one Merry Christmas banner and four stars from the Mini Wood Stars. Blend Barn Door Distress Ink onto the Merry Christmas banner. Blend Fossilized Amber Distress Ink to the four wood stars. Once the banner and stars have been inked, use a blending tool ink the edges of the banner and stars using Walnut Stain Distress Ink.


Take three mittens out of the package. Apply two coats of Candied Apple Distress Paint. Once the mittens have dried, use a blending tool and ink the edges of the mittens using Walnut Stain Distress Ink.


Next, you'll need to get out your paper trimmer. Trim the snowman image down to 2 7/8" x 2 7/8", trim the large snowflake patterned paper to 5 1/4" x 5 1/4",  trim the small snowflake patterned paper to 5 1/2" x 5 1/2" and trim the plaid patterned paper to 5 3/4" x 5 3/4".  Edge distress all the edges of the patterned paper and then ink the edges of the patterned paper and image using a blend tool and Walnut Stain Distress Ink.


Adhere the small snowflake patterned paper to the plaid patterned paper. Adhere the large snowflake patterned paper to the small snowflake patterned paper.


Adhere the snowman image to the middle of the large snowflake patterned paper. Once the snowman image has been adhered, adhere the ornate frame overtop of the snowman image.


Adhere three white stained snowflakes in the bottom left hand corner of the frame. Adhere the other three white stained snowflakes in the top right hand corner of the frame.


Adhere two of the brushed pewter stars in the bottom left hand corner of the frame overtop of the snowflakes. Once the stars have been adhered in the bottom right hand corner, adhere two of the wood stars in the bottom left hand corner. Adhere the other two brushed pewter stars in the top right hand corner of the frame overtop of the snowflakes. Once the stars have been adhered in the top right hand corner, adhere the other two wood stars in the top right hand corner. 


Before adhering the sleigh in the bottom left hand corner, add a piece of twine to the sleigh. In the bottom left hand corner, adhere the banner, sleigh a mitten and a snowflake. In the top right hand corner, adhere the two mittens and three snowflakes.


In the bottom left hand corner, adhere six red roses, four black roses and three dark brown roses as desired. In the top right hand corner, adhere seven red roses, five black roses and three dark drown roses as desired. Once the roses have been adhered, adhere the card front to 6" card base.


Here is the snowman Merry Christmas finished.


Here are some close up of the snowman Merry Christmas card once all the elements had been added.


Southern Ridge Trading Company Supplies Used:

- Sm. Wood Mittens
- Merry Christmas Banner
- 10mm Dark Brown, Red and Black roses

Other Supplies Used:

- Emerald Creek Craft Supplies: Soft Fallen Snow Embossing Powder and Iridescent Shimmer Embossing Powder 
- Tim Holtz for Ranger Ink: Distress Ink - Walnut Stain, Fossilized Amber and Barn Door,  Distress Stain - Picket Fence and Brushed Pewter & Distress Paint - Candied Apple
- Ranger Ink: Glossy Accents 
- Tsukineko/Imagine Crafts: VersaMark Ink
- Elizabeth Crafts Design: Red/Gold Glitter Dots
- Authentique: Wintery - Wintery Six, Wintery Five, Wintery Three and Wintery One
- Graphic 45: Kraft Regular Tags
- May Arts Ribbon: Dark Brown Twine
- Tombow: Aqua Mono Glue
- Misc: Heat Tool

Remember to play along in the monthly challenge over on the Southern Ridge Trading Company blogEach month enter for your chance to win 4 designs from the online store - chipboard.ca -$20 (before tax) retail value of YOUR OWN CHOOSING! 

Until Next Time!

-Katelyn  


Wednesday, December 7, 2016

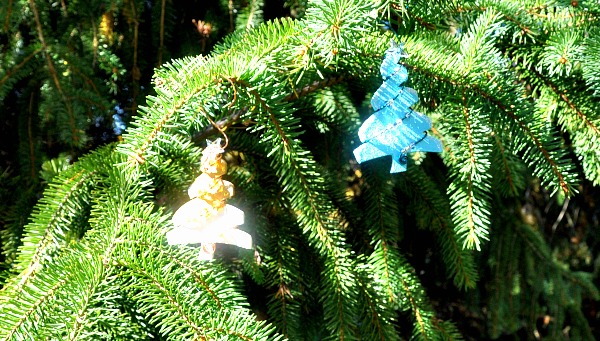
Festive Christmas Ornaments with Ava Gavloski

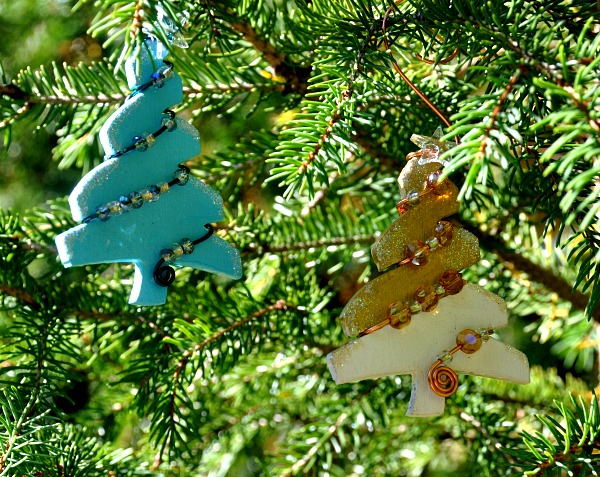
Hello and welcome to Southern Ridge Trading Company’s blog today.  Ava here to share an ornament for your festive holiday tree this season.

close up both.jpg

Find these wooden die cut chipboard tree’s in our Christmas and Holiday section of our website. Think outside the box and combine wooden chipboard with the jewelry industry.

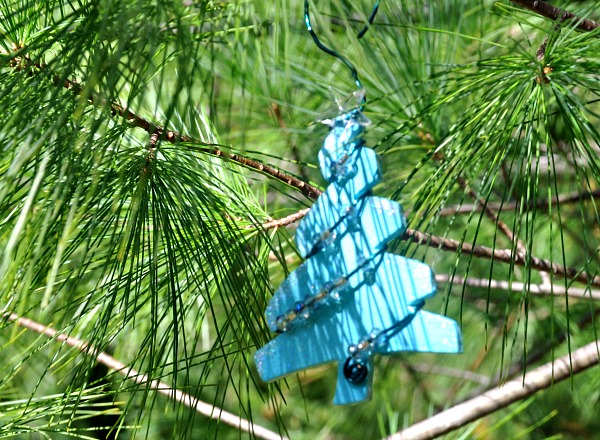
pine bue.jpg

Here you can see the Blue Christmas tree ornament with a blue themed wire wrap with clear beads wrapping the boughs of the tree like a garland.  Paint the chipboard the colour of your choice and you have a quick and easy new decoration for your tree. I applied a bit of liquid glue to the edges of the bough’s and sprinkled a bit of Twinkle Fairy Dust.

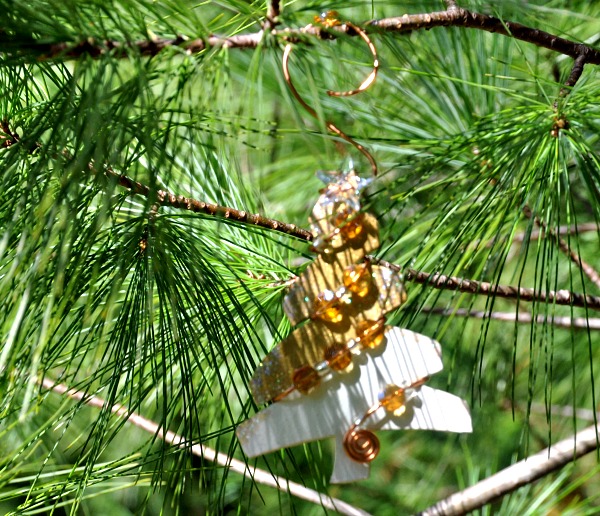
gold pin.jpg

Tip: When wrapping your chipboard wooden tree, measure plenty of wire so that you can incorporate a hook, which will never loosen and get displaced from each holiday season.

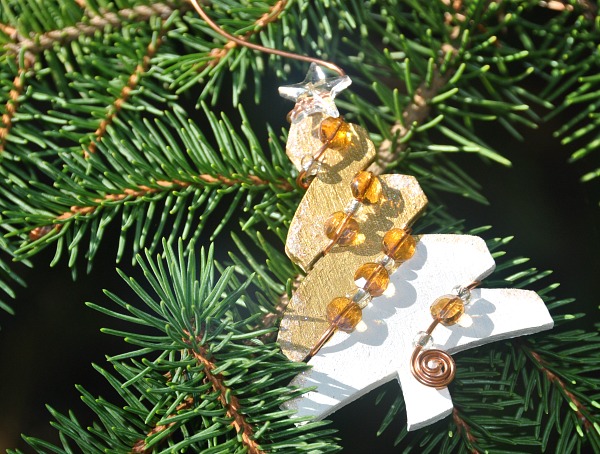
gold laydown.jpg

I think the gold themed wooden tree is my favourite.  What colour is your tree decorations going to be this season ?  Let us know here in the comments section so that we at Southern Ridge Trading Co. can see what is trending in our homes this 2016 season.

both oranments.jpg

Thanks for visiting today and let’s get the tree out and decorated.

Southern Ridge Trading Co. Supplies Used:


Other Supplies Used:

- Decor Art Acrylic paint
- Clearsnap: Glue Gloss and Twinkle Fairy Dust
- Wire
- Beads

Remember to play along in the monthly challenge on the Southern Ridge Trading Company blogEach month enter for your chance to win 4 designs from the online store - chipboard.ca -$20 (before tax) retail value of YOUR OWN CHOOSING! 

Thanks for visiting.


Tuesday, December 6, 2016

November Challenge Winner

It's the start of a new month and it's time to reveal November's Monthly Challenge Winner. I'm Design Team Member Katelyn and I'm back to announce November's "Christmas" Challenge Winner. Thank you to everyone who participated this month. The participation was fantastic for our November Challenge and we hope that you will continue that momentum for our monthly challenge in December and that it'll inspire you to submit. You will find all of the details on how to enter and what the rules are here. November's Christmas Challenge Winner is Marty F. Who created a fabulous Christmas Tag:


Marty F please contact me at Katelyngrosart@gmail.com. Thank you to everyone who participated and we can't wait to see what you create in December for our challenge.

Until Next Time!
-Katelyn

Friday, December 2, 2016

Believe Christmas Card with Deb Riddell

Thank you to everyone who participated in last month's monthly challenge. The response was great and we loved seeing all of your creations. Thank you to everyone who entered our challenge last month and stay tuned for the winner in Katelyn's post on Tuesday, December.6th.

This month's will be an easy one as it's all about Christmas and New Years! So we would love to see projects both Christmas themed as well as New Years themed.


Each month enter for your chance to win 4 designs from the
 SRTC online store $20 (before tax) retail value
of YOUR OWN CHOOSING! 

And ... it's a completely RANDOM DRAW!

Please note: That as of January, we will be changing our Monthly Challenge. We will expect at least one piece of Southern Ridge chipboard on your entry.

RULES:


- Must follow the theme
 - Your item can be a card, mixed media piece or project, whatever you can call "ART".  

- You can use any image, embellishments and any chipboard pieces you like.
- As of now, there is no limit for entries
- Must be a new project
- Can be combined with 10 other challenges
- Please link back to our blog http://southernchipboard.blogspot.ca/
- Ends December.31st, 2016 at 6pm PST

**If you use product from SRTC, that will count as TWO entries but please make sure we know via your blog post attached via Mr. Linky below or a message below this post!!


Deb has created a fabulous Christmas card for you today to get our new challenge started!

----------------------------------------------------------------------------------------

Hello and welcome!  It’s Deb here today to share a Christmas card with you that I made for our new December challenge.  I used Southern Ridge Trading Company’s beautiful Believe laser cut sentiment along with their Snowflakes 714 embellishments.


I started out by colouring the reindeer and the sleigh on the Believe sentiment with Distress stains (Gathered Twigs for the reindeer and Festive Berries for the sleigh).  I love how the finely cut details and wood grain still show through the stain!  Next, I heat embossed the runners on the sleigh with silver embossing powder and the lettering and antlers on the reindeer with gold embossing powder.


Three of the snowflakes were then heat embossed with Soft Fallen Snow embossing powder.  I did two coats of embossing powder on each snowflake for good coverage.

I had a piece of leftover background paper I had made for another project and decided it was the perfect night sky background for my Christmas card.  110 lb. white cardstock was first stenciled with clear Distress ink through the Speckles layering stencil and then heat embossed with Iridescent Shimmer embossing powder.  The card was then dragged through a puddle of Blueprint Sketch and Chipped Sapphire Distress stain on my craft sheet, repeating several times and spritzing here and there with water to achieve the depth of colour I wanted.


A Christmas Word Band was attached to the upper right corner of the prepared background with a couple of gold Jingle Brads.  The lettering on the word band was enhanced by adding a layer of Black Soot Distress crayon and then rubbing it back with a soft cloth so the crayon was left only in the recessed lettering.

A piece of red and cream Nordic print scrapbook paper from the Tidings paper stash was then adhered to the back of the embossed and stained background with a ¼” reveal on all sides.


And then the prepared chipboard embellishments were applied.  The Believe sentiment was adhered in the center at an angle as if Santa’s sleigh and reindeer were flying through the night sky on Christmas Eve.


The embossed snowflakes were positioned around the Believe sentiment.


And as a finishing touch a couple of snowflakes that had been die cut with the Mini Paper Snowflakes die from cardstock coloured with various shades of blue Distress inks were added here and there on the card front.


I hope that you have enjoyed seeing my Believe Christmas card!


Southern Ridge Trading Company Supplies Used:


Other Supplies Used:

- Tim Holtz/Ranger Ink: Distress Stain, Distress Ink & Distress Crayons
- Tim Holtz/Sizzix: Mini Paper Snowflakes die
- Tim Holtz/Stampers Anonymous: Speckles Layering stencil
- Tim Holtz/Advantus: Christmas Word Bands, Jingle Brads & Tidings Paper Stash
- Emerald Creek Craft Supplies: Soft Fallen Snow Embossing Powder & Iridescent Shimmer Embossing Powder
- Miscellaneous: 110 lb white cardstock, gold and silver embossing powder, paint brush, E6000 glue, Scotch Tacky Adhesive & double sided tape

I hope you will join in our December challenge, you have a chance to win 4 designs from the online store - chipboard.ca - a $20.00 (before tax) retail value of YOUR OWN CHOOSING!  Thanks again for stopping by today and happy creating!

Deb xo