Wednesday, October 12, 2016

Fairy Cards with Ava Gavloski

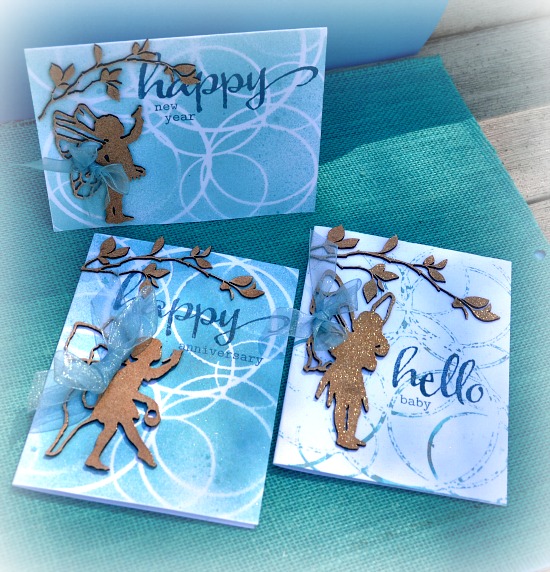
Hello and Welcome to Southern Ridge Trading Co., Ava here to share some cards I made featuring the lovely Lil fairies from the Fairy Garden section of the shop.
opening all.jpg

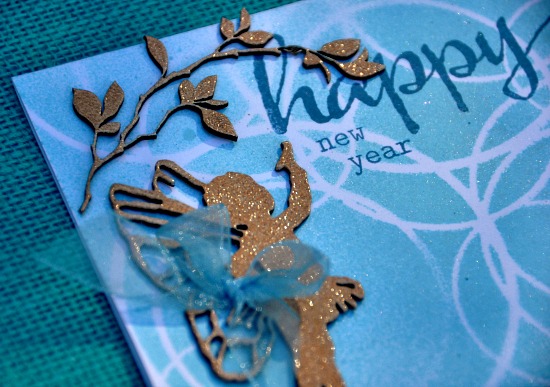
I really like how these cards turned out.  Gold sparkle on the chipboard with the turquoise blue truly shows off the stencil and chipboard fairies by Southern Ridge Trading Co.
happynewyr closeup sparkle.jpg

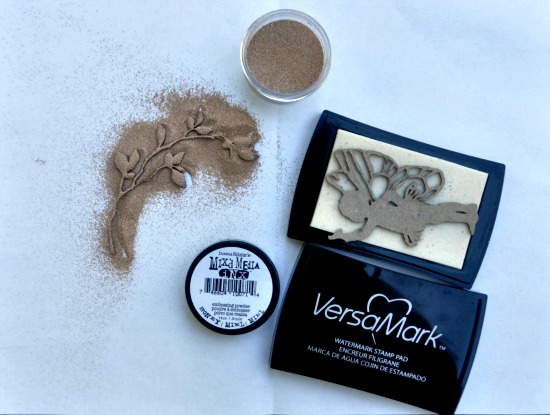
Let's get started with the supplies..
supplies.jpg

To prepare the chipboard pieces, press the chipboard into Versa Mark to apply the glue, sprinkle some embossing powder onto the chipboard, heat set and let the sparkle show off the chipboard.

Next is to prepare the card front.  Lay the Intersecting Circles stencil (from the Stencils section of the shop) onto the card front, spray some Tattered Angels Glimmer mist onto the stencil.

Have your next card base nearby in preparation for the “negative” transfer technique.  Carefully lift the sprayed wet stencil from your card and lay the wet side of the stencil down onto the other card base.  Gently press the stencil to transfer the mist onto the second card.

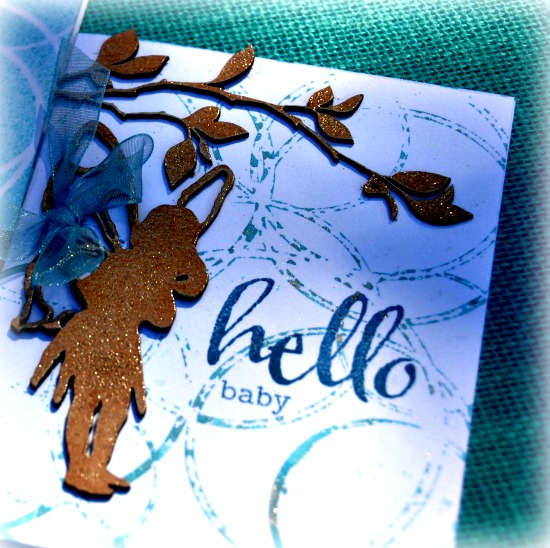
Here you can see the negative card stencil transfer results with the Hello Baby card.
hello baby closeup.jpg

White card base with the coloured Intersecting circle stencil imprint onto the card.  
So when you purchase a stencil, you can achieve 2 looks.  
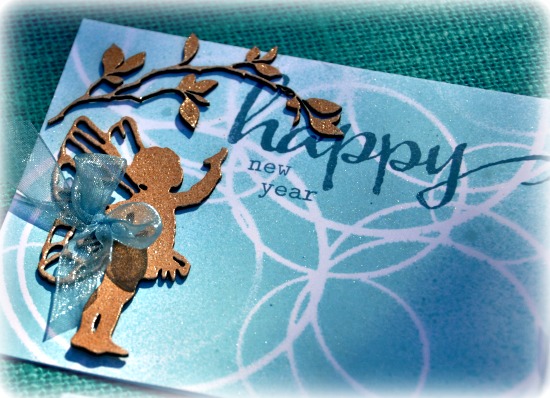
happynewyearclose.jpg

The Leafy branches from the Nature and garden section of the shop really frames the card well and adds dimension to the card.
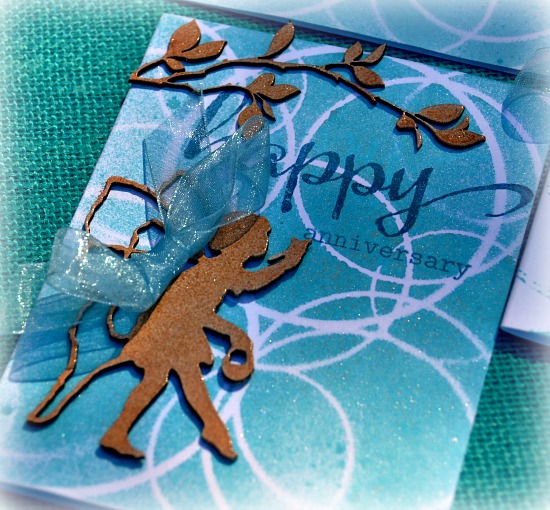
happy anniversaryclose.jpg

I like the crispness that the stencil gives to these cards and the design does give dimension  to the card.

Pick up a couple of stencils from the shop and have fun designing your card backgrounds….
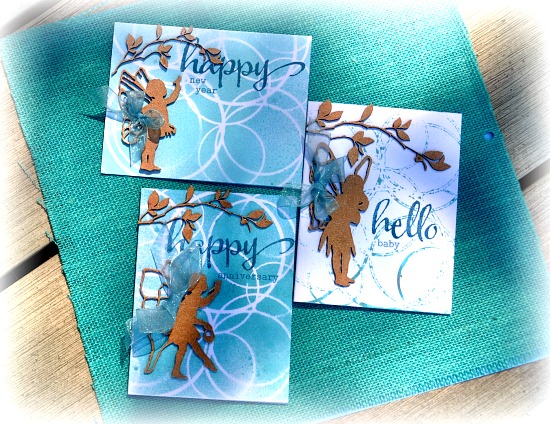
all3 flat.jpg

Can you see the unlimited options that you can apply to cards by using a stencil from Southern Trading Co.?  Thanks for joining me today and take time out to design this week.

Southern Ridge Trading Co. Supplies Used:


Other Supplies Used:

- Tattered Angels: Glimmer Mist
- May Arts Ribbon
- Tsukineko/Imagine Crafts: VersaMark
- Clearsnap: Mix’d Media Gold Embossing Powder


Remember to play along in the monthly challenge on the 
Southern Ridge Trading Company blogEach month enter for your chance to win 4 designs from the online store - chipboard.ca -$20 (before tax) retail value of YOUR OWN CHOOSING! 

- Ava

Monday, October 10, 2016

Hand Bound Journal with Corina Finley


Hello

Happy Thanksgiving to all fellow Canadians! It has been a very busy time around my household. We have even had our first snow fall - it did not stay so I'm okay with it!!

For today's post, I decided to share an upcoming class I will be teaching at the end of the month in Prince George and in November here in my town of Quesnel. I love creating my own Hand bound books - I can customize each lovely Book/Journal for the recipient needs, character and likes!


For this Journal, I added the Victorian Round Frame and a Keyhole to the cover. I painted with acrylic coffee paint and then used UTEE (ultra thick embossing powder) on top. I love the extra texture and shine this gives.


Southern Ridge Trading Company Product Used:

- Keyhole

Remember to play along in the monthly challenge on the Southern Ridge Trading Company blogEach month enter for your chance to win 4 designs from the online store - chipboard.ca -$20 (before tax) retail value of YOUR OWN CHOOSING! 

Thanks for joining me today!

Take care,

Live, Laugh & Create!

Friday, October 7, 2016

Falling Leaves Mixed media Plaque with Deb Riddell

Hello and happy fall!  It’s Deb here today to share with you my falling leaves mixed media plaque that I made for our current Fall challenge.  I used the cover from Southern Ridge Trading Company’s Fall Album along with some Pumpkin Leaves and Fall Leaves.


I’ve a few step out pictures on how I made it so grab a cup of your favourite fall beverage and read on.

I started by filling in the ring binding holes on the album cover with paper clay.  Once it had dried, I stippled the edges of the Fall Album frame with Americana acrylic paints in Dark Chocolate, Heritage Brick and a touch of Ebony Black with a stiff stencil brush.


Ranger Transparent Texture Paste was then applied to the unpainted areas of the album cover and to the chipboard leaves as I wanted to use Distress Crayons on these elements.  The Distress Crayons blend easier on surfaces that have been prepared with gesso or collage mediums and the transparent texture paste worked well also.

I coloured the prepared leaves and unpainted album areas with various colours of Distress Crayons, layering and blending the colours as I went.


After I was happy with the depth of colour, I sealed all of the chipboard elements with Satin varnish and then added a bit of silver and black embossing powder to the wheelbarrow and rake on the Fall album cover.

I backed the album cover with a piece of pale blue cardstock that I lightly stenciled with Tumbled Glass Distress ink through Southern Ridge’s Intersecting Circles stencil.


It’s very subtle and hard to see in the pictures but the swirls remind me of mare’s tail clouds that you often see high in the sky on a cool fall day!

More leaves were then die cut and punched from cardstock that I coloured with various shades of Distress inks in the colours of fall leaves.


I used a Recollections Oak Leaf punch and the leaf dies from the Sizzix/Tim Holtz Tiny Tattered Florals set.

The four chipboard leaves were adhered to the corners of the fall album cover and the cardstock leaves were scattered around all four sides.


I love the touch of metallic embossing on the wheelbarrow and rake.  I used Ranger’s Clear Embossing Ink pen, it allowed me to add the ink and embossing powder lightly to specific areas on the plaque.


You can also see some scratched lines on the tree in the picture above, I used a pin to add some ‘bark’ texture by lightly scratching through the layers of Distress Crayon, worked like a charm!

I hope that you’ve enjoyed seeing a new way to use the wonderful chipboard albums available from Southern Ridge Trading Company.  I still have 9 more album pages left that I can use for other projects so it’s an amazing value for the money and who knows, I might even use some of them to make an actual album!


Southern Ridge Trading Co. Supplies Used:


Other Supplies Used:

- Tim Holtz/Ranger Ink: Distress Crayons; Distress Ink; Transparent Matte Texture Paste; Clear Embossing Pen
- Tim Holtz/Sizzix: Tiny Tattered Florals die
- Recollections: Oak Leaf punch
- Deco Art: Americana Acrylic paint; Satin varnish

I hope you will join in our Fall Challenge.  You have a chance to win 4 designs from the online store - chipboard.ca - a $20.00 (before tax) retail value of YOUR OWN CHOOSING!  Can’t wait to see what you link up, happy creating!

Deb xo


Wednesday, October 5, 2016

Shabby Chic Frame - All That's Gold with Karen Bearse

Hello Inky Chipboard Fans, Karen Bearse here today with a shabby, chic frame with gold accents. I am helping my 12 year old daughter to move into her gone to college brother’s room. I thought I would surprise her with a custom DIY frame using the colours she has chosen. This project is actually quite simple and the only hard part is waiting on crackle paste to dry!


Here is my finished frame. The picture is one of my favourites from when my daughter was very young.  Let’s get started! You can use any wooden frame, I just bought an inexpensive one from the craft store but this would also be a great way to repurpose one you already own.


Step 1: Cover frame with acrylic paint, I used a combo of paint to get the desired colour. Make sure to paint the sides also. Tint Texture Sand Paste with similar colours & scrape it thinly in random spots on the frame. Distress as desired including sides of frame.


Step 2: White crackle paste can be coloured by mixing in 20% fluid or regular acrylic paint. I choose to leave mine white.  Place a chip board piece with open spaces in it & scrap a layer of your crackle paste using a spatula, in the open spaces. Keep the paste level with the chip piece by scrapping across the top. Gently remove chippie. For this step I used part of the Tiny Bubbles cutting out the pieces I wanted. I let the paste dry on the chipboard & carefully picked it off using a pokey tool. Designer’s choice- either heat emboss or paint the chipboard pieces. Set the frame aside to let the crackle cure. Do not heat set. This will take a few hours. The cool part is the background paint shows through the cracks.


Step 3: Paint and heat emboss a few accent chipboard pieces using your chosen colour palette. I painted the pussy willows white, & used an embossing pen to heat emboss the leaves of this chippie in gold. The peacock feather was painted in Bahama Blue & distressed with some white. It was then stamped with a detailed image using embossing ink & heat embossed in the same gold colour.


Step 4: Assembly! Once the crackle paste is dry on your frame, replace your chosen chippies back into place using a strong wet glue. Adhere your other pieces. Pop your photo in & voila!! I hope you enjoyed this tutorial. Leave any questions or comments below. Have a fun inky day and remember to join us this month in our challenge-you could win chippie$$$!!!

Southern Ridge Trading Co. Supplies Used:


Other Supplies Used:

- Deco Art: fluid acrylic & Americana acrylic paint, Crackle Paste, Texture Sand Paste.
- Ranger Ink: stamps, perfect medium.
- Recollections: embossing powder.
- Zig: embossing pen.
- Michaels: Unfinished Frame.

- Karen


Tuesday, October 4, 2016

September Challenge Winner

It's the start of a new month and that means it's time to reveal September's Monthly Challenge Winner. I'm Design Team Member Katelyn and I'm back to announce September's "Your Favourites" Challenge Winner. Thank you to everyone who participated this month. The participation was awesome for our September Challenge and we hope that we will continue that momentum for our monthly challenge in October and that it'll inspire you to submit. You will find all of the details on how to enter and what the rules are here. September's Your Favourites Challenge Winner is Cathy. Who created a fantastic layout:


Cathy please contact me at Katelyngrosart@gmail.com. Thank you to everyone who participated and we can't wait to see what you create in October for our challenge.

Until Next Time!
-Katelyn

Monday, October 3, 2016

Fall Memories by Charlene Byrd

Thank you to everyone who participated in last month's monthly challenge. The response was great and we loved seeing all of your creations. Thank you to everyone who entered our challenge last month and stay tuned for the winner in Katelyn's post on Tuesday.

This month's will be an easy one as it's all about Fall! This could mean anything Fall, Halloween or giving thanks.


Each month enter for your chance to win 4 designs from the
 SRTC online store $20 (before tax) retail value
of YOUR OWN CHOOSING! 

And ... it's a completely RANDOM DRAW!

RULES:

- Must follow the theme
 - Your item can be a card, mixed media piece or project, whatever you can call "ART".  
- You can use any image, embellishments and any chipboard pieces you like.
- As of now, there is no limit for entries
- Must be a new project
- Can be combined with 10 other challenges
- Please link back to our blog http://southernchipboard.blogspot.ca/
- Ends October.31st, 2016 at 6pm PST

**If you use product from SRTC, that will count as TWO entries but please make sure we know via your blog post attached via Mr. Linky below or a message below this post!! 

Charlene has created a fabulous layout for you today to get our new challenge started!

----------------------------------------------------------------------------------------

Hello ladies!

Bring on FALL….It’s one of my most favourite times of the year! Last year we took the most amazing all day boat ride with friends along the St. Lawrence River. It’s was an absolutely perfect, sunny, warm day and the river was so calm in some parts. Along our journey we pasted Boldt Castle, an enchanting castle that I have toured several times.


For those interested in this beautiful castle here is a bit of background info. Construction began on Boldt Castle in 1900 at the bidding of millionaire hotel magnate George C. Boldt as a tribute to his beloved wife Louise. Boldt Castle was designed as their summer dream home on the St. Lawrence River, in the heart of the 1000 Islands. However it was not to be, Mrs. Boldt passed away suddenly just months before the completion of the castle. Mr. Boldt was inconsolable and immediately stopped all construction on Heart Island, leaving the property vacant for over seventy year. Today Boldt Castle, located near Alexandria Bay, NY in the famed 1000 Islands is once again becoming what it was always meant to be, the premier home and attraction in the region. 

Ok, now that we’re done our history lesson for the day let’s get back to what we’re really here for…creating!


To create the berry branches I simply used Walnut Distress Ink and dabbed or pounced the ink onto the chipboard. With the pads linen like texture it make a very nice finish on the chipboard.


I started with the same technique as I used on the berry branches to start making the hinges. I then added some VersaMark and UTEE to the hinges and heat set it. Once it was dry I randomly dabbed a little Antique Gold paint to the top of the hinge. Then a hinge wouldn’t be complete without some cute tiny brad fasteners!


To create the Memories title I simply dabbed Black Soot Distress Stain on it. I liked the matte finish of the stain as it coordinates with the pattern paper.

Southern Ridge Trading Company Chipboard Used:


Other Products Used:

- Bo Bunny Paper
- Tim Holtz for Ranger Ink: Walnut Stain Distress Ink
- Tsukineko/Imagine Crafts: VersaMark
- Ranger Ink: UTEE
- Antique Gold Paint
- Lace
- Hemp
- Tim Holtz Idea-ology: Mini Brad Fasteners
- Alpha stickers
- Pearl
- Seam Binding Ribbon
- String
- Edge Distressor

Remember to play along in the monthly challenge over on the Southern Ridge Trading Company blogEach month enter for your chance to win 4 designs from the online store - chipboard.ca -$20 (before tax) retail value of YOUR OWN CHOOSING! 

Thanks for joining me!
Happy Creating!

- Charlene