Wednesday, September 14, 2016

Shine with Ava Gavloski

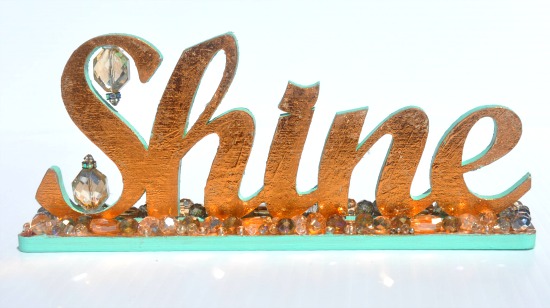
Hello, Ava here to share with you a home decor item to brighten your home.  Gold has made the cycle back into the Planning world.  Do you have a planner or have you noticed the planning trend?  To-day’s post is inspired by the gold mint colour trend within the planner industry.

shine1.jpg

Southern Ridge Trading Co. has a range of home decor words that would satisfy a wide range of rooms in any home or office.

Lets get started on Shine……

Collect your supplies.

shine2.jpg

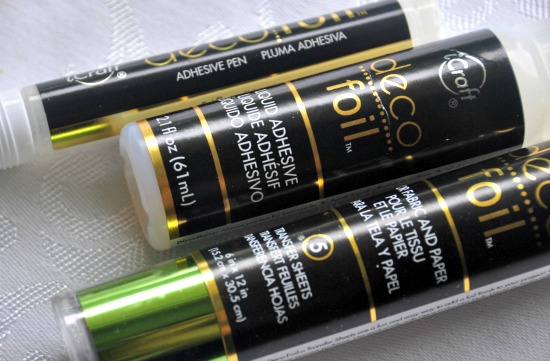
ICraft, Deco Adhesive and Foil along with Deco Art Acrylic Paint.

shine3.jpg

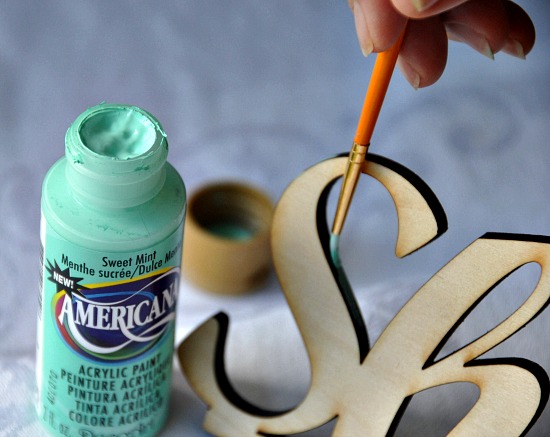
Start by painting the wooden Shine word edges.  Apply 2 coats of paint.  Dry.

Next up is the base of the word.
Apply a layer of Deco foil Adhesive and allow to dry tacky.  Read the instructions carefully before starting the application process.
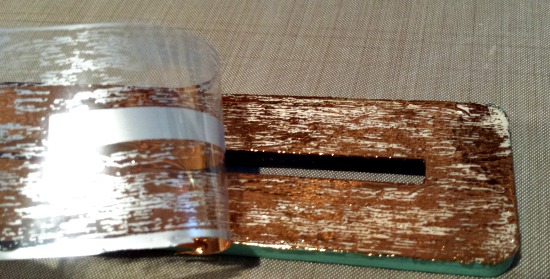
Apply a layer of deco foil over the top of the tacky glue  flat surface of the base stand.  Move slowly and apply lots of pressure to the base to transfer the foil.  The glue has to be just tacky enough to adhere the foil and not dried completely, otherwise the foil will not stick.  I use a bone folder, popsicle stick and the  flat part of your thumb nail to ensure a solid adhesion.  Lift the corner of the foil to see how the adhesion is working before lifting the full sheet off the wooden base.  Deco foil is very forgiving, so you can re-apply (adhesive/foil) many times until coverage is to your satisfaction.  Let it rest for an hour before proceeding to next step.

shine4.jpg

shine5.jpg

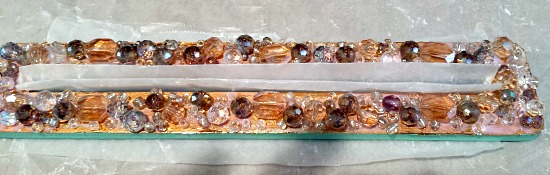
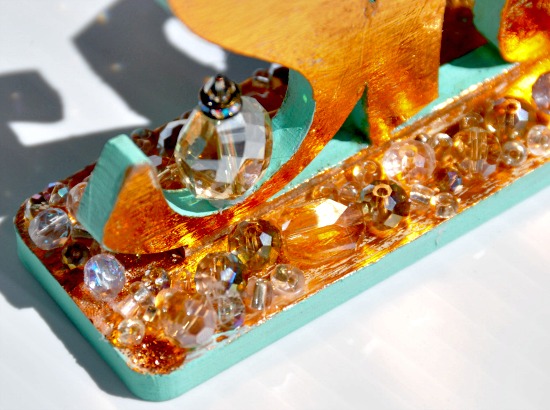
Next apply some gel medium and sprinkle on your beads of choice.  Dry overnight.

shine6.jpg

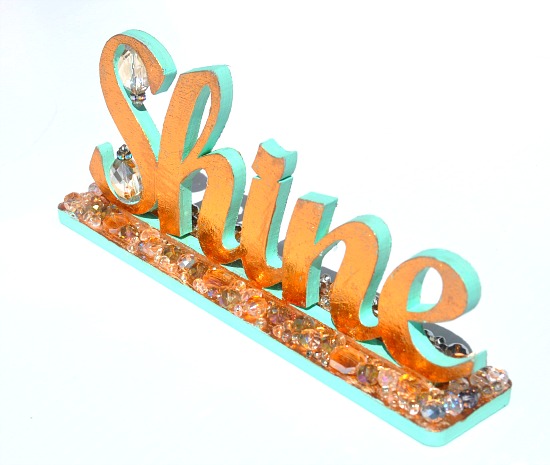
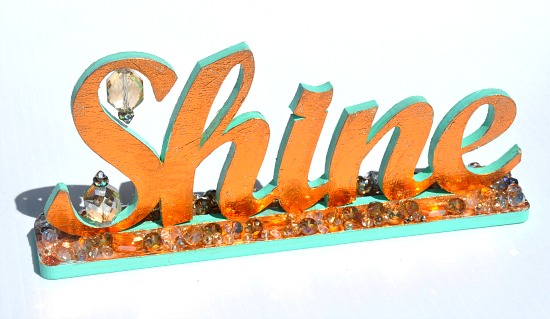
Apply foil to the word shine and let the project rest an hour.

shine7.jpg

Here is a close up of the final embellished word SHINE.

shine8.jpg

shine9.jpg

Be sure to visit Southern Ridge Trading Co. for your home decor word at the shop.

Southern Ridge Trading Co. Supplies:


Other Supplies Used:

- ICraft Deco Foil and  adhesive by, Therm-o-Web
- Deco Art Americana Acrylic Mint paint
- Gel Medium, by Faber Castell
- Beads & gems

Hope you have been inspired to join in our September challenge, Your Favourites, you have a chance to win 4 designs from the online store – chipboard.ca. Can’t wait to see what you link up, happy creating!

- Ava


Monday, September 12, 2016

Enjoy the Ride Card with Corina Finley


Hello & Happy September!

I am back on the blog today, to share my card using the awesome Retro Bike. I absolutely love altering the Chipboard pieces. It allows you to make each piece special and colour coordinated to each project.


For the Retro Bike, I used True Blue Stickles on the bike frame and Brushed Pewter Distress Stain on the spokes & basket. I applied Black Enamel to the tires, chain, pedal, seat and handle bars. Add a tucked stamped sentiment that worked perfectly!


I used white Paper Roses and coloured them using Glimmer Mist and Brushed Pewter Distress Spray. I added a little True Blue Stickles to the edges of the blue dyed roses.

For the Gears, I heat embossed using silver embossing powder and versamark.

Southern Ridge Products used:

Steampunk Header


Remember to play along in the monthly challenge on the Southern Ridge Trading Company blogEach month enter for your chance to win 4 designs from the online store - chipboard.ca -$20 (before tax) retail value of YOUR OWN CHOOSING! 

Thanks for joining me today!

Take care,

Live, Laugh & Create!

Friday, September 9, 2016

Sit A Spell Shadow Box with Deb Riddell

Hello, Deb here today to revisit some of my favourite chipboard pieces from Southern Ridge Trading Company for our current Your Favourites challenge.  I used these three chipboard embellishments - Andorandak Chairs, Bushy Trees and Small Bird Mix - on my Memories of Summer plaque in July and so decided to reimagine them for the upcoming fall season by incorporating them into a fall shadow box.


I started with a Vignette Box by Tim Holtz and gave it a wash of white acrylic paint.


Ranger matte texture paste was colourized with Tea Stain and Gathered Twigs Distress stains and applied to the top and outer sides of the shadow box through Tim Holtz’s Burlap stencil.

I wasn’t real happy with the whiteness of the box against the texture paste, so ended up giving the outside and back a wash of Gathered Twigs Distress stain once the texture paste had dried. I also covered the exposed edges of the front and back of the shadow box with Tim Holtz’s Regions Beyond Design tape and sealed everything with satin varnish.


For the inside of the box, I chose two patterned papers from Recollections’ Blossoms and Bliss paper stack and did a second generation stamping with a script and flying bird stamps using Potting Soil Archival ink.  As you will see in subsequent pictures I also ended up stamping Emerald Creek Craft Supplies Eldergrove stamp onto the background paper.  The papers were then adhered to the inside of the box with Distress Matte Collage medium.

I gathered up my favourite chipboard pieces plus added a new favourite, Berry Branch, and coloured them all with acrylic paints.  I stippled the paint onto the Berry Branch and Bushy Tree with a small stencil brush to simulate the dappled colours of the leaves as they change in the fall.  All of the chipboard pieces were given a protective coating of the same satin varnish once the paint had dried.


The tree and bird were elevated on some black fun foam and glued into place and the berry branch was adhered to the outer frame of the shadow box (it’s underneath my Distress ink minis I was using to keep it in place as it dried!)  I added some putka pod ‘pumpkins’ to the base of the shadow box just in front of the tree.  You can see the Eldergrove stamp that I added to the background scrapbook paper in the photo above.

Leaves were die cut with Tim Holtz’s Tiny Tattered Florals die from some Distress ink stained cardstock scraps I had in my stash (I knew I was keeping all of those tiny pieces for a reason!)


The leaves were then scattered around the bottom of the shadow box and onto the putka pod pumpkins and glued into place.

The word FALL was assembled from Tim Holtz’s Alpha Dice.  The dice were sanded and painted with Walnut Stain Distress paint and after the paint got slightly tacky, it was wiped away from the front of the dice.  The four dice were then glued together.


Some flowers were die cut with the same Tiny Tattered Florals die from more Distress ink stained cardstock scraps for the top of the shadow box.

I added a strip of burlap around the Alpha Dice and applied them to the top of the shadow box.  The Tattered Florals flowers and more fall leaves were scattered about on top.


The Andorandak chair was adhered to the front of the shadow box and four mini wooden spools from my stash, painted with Walnut Stain Distress paint, were added for feet.


My cozy blanket wrapped over the arm of the Andorandak chair was made from a piece of the baby wipe I used on this project to wipe up excess paints and stains.  I just added some ‘plaid’ stripes with Distress markers and cut some fringes on the ends and voila, a blanket to wrap yourself up in on those crisp fall days!

Here are a few more closeups of the finished shadow box.


I hope you’ve enjoyed seeing how the shadow box came together and how I reimagined my favourite chipboard pieces for this project.


Southern Ridge Chipboard Supplies Used:


Other Supplies Used:

- Tim Holtz/Ranger Ink - Distress ink, Distress stain, Distress paint, Distress markers, Archival ink, Distress Collage medium, Ranger Matte Texture paste
- Tim Holtz/ Advantus - Vignette box, Alpha Dice, Regions Beyond Design tape
- Tim Holtz/ Stampers Anonymous - Burlap layering stencil
- Tim Holtz/Sizzix - Tiny Tattered Florals die
- Emerald Creek Craft Supplies - Eldergrove stamp
- DecoArt - Americana acrylic paints, Satin varnish
- Michaels - Recollections Blossoms and Bliss paper stack, Script stamp
- Miscellaneous - burlap, black fun foam, scissors, paint brush, paper cutter, mini wooden spools, putka pods, adhesive

I hope that you will feel inspired to join in our challenge and show us your favourite chipboard, ink, embellishments or any other crafting supply that you love!  Each month you have a chance to win 4 designs from the online store - chipboard.ca - a $20.00 (before tax) retail value of YOUR OWN CHOOSING!  Thanks again for stopping by and happy creating!

Deb xo


Wednesday, September 7, 2016

Journal Cover with Chippies with Karen Bearse

I love making books. Mini scrap books, art journals, smash books. The best part is designing the covers. Most often I like to do this at the end of the project once I get a feel for it. This month’s Southern Ridge Trading Co… challenge theme is “your favourite”. I have a few in this project, from chippies to techniques. This is a fairly easy tutorial that can be applied to your book project.


I decided to cover a composition book that I am using for Simelle Laine’s Learn Something New Every Day, #LSNED. A while back I received this mixed paper pack from Recollections and thought this paper would look great for the cover.


I adhered my paper and added a piece of washi tape down the side and covered with decoupage glue so it will stay down. Adding a little bit of paint using a foamie through a few stencils, in some random spots just cause. I love the new circle stencil “Cheerio”.  For the chippies I did some of my favourite techniques.


One of my new favourite techniques for chippies is to use alcohol ink. Cover the chipboard with gesso, let dry and dab alcohol ink, using felt on a dabber.


For the # tag paint with gesso, dry and paint with Dylusions. Dry and add some stencil marks with gesso on a foam piece. The key is to use very little paint so a sharp image is achieved. After this was adhered I decided to add a layer of glossy accents to help the chippie shine. Just add the glossy accents in a heavier coat then if you were to glue, it is self-leveling. If there are bubbles just pop them using a pin. Let dry naturally.


Gears are one of my favourite things & I wanted to add more but I also wanted the paper to stand out. This is also one of my favourite techniques as it is so simple. Just paint using Distress Paint dabber in black. Let dry & add highlights of metallic. Done.


Bird chippies- hee hee love this! I wanted to do something different so I again painted with gesso. Why all the gesso you ask? The chippies are beige and affect the colour of anything you put on them. If you gesso them first you start with white so your colours are real. Plus gesso is a foundation that most products work well on. Once the gesso was dry I stamped in archival ink and added Distress ink with a dabber sponge. Adding wire and some beading to the large bird gave it a nice touch.


Lastly assembly time! Use a strong glue to adhere everything down. I like glossy accents for this. I used letters from my stash for the title and added some doodle lines. Finished my project by distressing the edges with some paint. I hope you enjoyed this tutorial! Chippies just add great dimension to any book!

Southern Ridge Trading Co Supplies Used:
Chippies:

Stencils:

Other Supplies Used:
- Recollections: Paper & Title letters
- Ranger: Distress Ink, Glossy Accents, Dylusions Paint, Alcohol Ink, Archival
- Gesso
- Seth Apter: Stamp
- Posca: White pen
- Eileen Hull for Sizzix: Flower Dies

Remember to play along in the monthly challenge over on the Southern Ridge Trading Company blogEach month enter for your chance to win 4 designs from the online store - chipboard.ca -$20 (before tax) retail value of YOUR OWN CHOOSING! 

- Karen


Tuesday, September 6, 2016

August Challenge Winner

It's the start of a new month and that means it's time to reveal August's Monthly Challenge Winner. I'm Design Team Member Katelyn and I'm back to announce August's "Anything Goes" Challenge Winner. Thank you to everyone who participated this month. The participation was awesome for our August Challenge and we hope that we will continue that momentum for our monthly challenge in September and that it'll inspire you to submit. You will find all of the details on how to enter and what the rules are here. August's Anything Goes Challenge Winner is Niki. Who created this awesome Shabby Garden Box:


Niki please contact me at Katelyngrosart@gmail.com. Thank you to everyone who participated and we can't wait to see what you create in September for our challenge.

Until Next Time!
-Katelyn

Monday, September 5, 2016

Vroom Layout with Charlene Byrd

Hello ladies!
For any of you that know me, know that I have 2 boys….so when asked to use my favourite pieces of chipboard, I automatically go to gears! I love gears! They are so vintage and grungy…just my style!


My 2 boys are 16 and 18 now so the days of cute little boy pictures are long gone, but I am so blessed to be a great auntie to these 2 cuties! Twin boys…that live across the street from me! How awesome is that!


To start the grungy process I started by rubbing Walnut Distress Stain across the entire chipboard surface.


I then used VersaMark and 3 colours of UTEE –Black, Platinum and clear. I simply used my fingers to sprinkle the UTEE to random parts of the frame one colour at a time, making sure to shake any excess off the frame before adding the next colour. (I did get a few different flakes mixed into my jars of UTEE but oh well!) I then heat set it all. You can work in sections if you wish. Or you could even heat set one colour at a time so you don’t mix your powders. Totally up to you! Make sure you use the colours randomly and overlap the colours.


Then once it’s cooled I daubed a bit of Antique Gold Distress paint in random spots of the gears. If you get too much paint on just add more embossing powder until you’re happy with the results.


I used a makeup sponge to apply some Metallic Rubons to the keys. I just kept adding different colours until I was happy with the look.


The stars, mini gears and the VROOM letters were embossed with regular black embossing powder.

Southern Ridge Chipboard used:

Other Products used:
- Kaisercraft paper
- Tim Holtz Grundgeboard letters
- Bazzill Cardstock

Remember to play along in the monthly challenge over on the Southern Ridge Trading Company blogEach month enter for your chance to win 4 designs from the online store - chipboard.ca -$20 (before tax) retail value of YOUR OWN CHOOSING! 

Thanks for joining me today!
Happy Creating!
- Charlene