Hey Southern Ridge Trading Company fans, Katelyn here and I'm on the blog today to share with you some inspiration using our current monthly challenge which is all about "Winter". Today I've created a Winter Scrapbook Layout for you that will be sure to inspire you to recreate it at home. Read below and learn how I transformed my chipboard pieces to create my Winter Scrapbook Layout.
To start, you'll need the large nested square frame. Apply a coat of Ranger Ink: Emboss It Dabber to the entire piece. Once the ink has been applied, sprinkle Soft Fallen Snow embossing powder over the entire surface. Tap off the excess powder and emboss with a heat tool. Set the frame aside to allow the powder to cool. If there isn't enough embossing powder on the frame, reapply the Emboss It Ink to the frame and sprinkle Soft Fallen Snow embossing powder over the entire surface. Tap off the excess powder and emboss with a heat tool. Set the piece aside to cool.
Next you'll need two Lg. Wood Snowflakes. Apply Ranger Ink - Emboss It ink to both snowflakes. Once the ink has been applied, sprinkle Soft Fallen Snow embossing powder over each snowflake. Tap off the excess powder and emboss with a heat tool. Set the snowflakes aside to allow the powder to cool. If there isn't enough embossing powder on the snowflakes, reapply the Emboss It Ink to each snowflake and sprinkle Soft Fallen Snow embossing powder over the entire surface. Tap off the excess powder and emboss with a heat tool. Set the piece aside to cool.
You'll need to take five Snowflakes 712 out of the package. Make sure three match of the five and two match of the five. Apply Ranger Ink - Emboss It ink to both snowflakes. Once the ink has been applied, sprinkle Ultra Puff White embossing powder over each snowflake. Tap off the excess powder and emboss with a heat tool. Set the snowflakes aside to allow the powder to cool. If there isn't enough embossing powder on the snowflakes, reapply the Emboss It Ink to each snowflake and sprinkle Ultra Puff White embossing powder over the entire surface. Tap off the excess powder and emboss with a heat tool. Set the piece aside to cool.
Next, you'll need one Wood Small Marked Reindeer. Apply two coats of Brushed Pewter Distress Stain to the reindeer. Set aside the reindeer to dry.
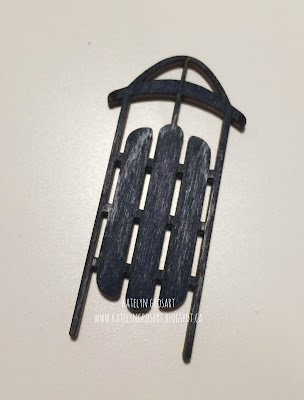
Take one Sm. Wood Sleigh out of the package. Apply two coats of Chipped Sapphire Distress Stain to the sleigh. Set aside the sleigh to dry.
Next, you'll need two Mini Wood Stars. Apply two coats of Chipped Sapphire Distress Stain to the stars. Set aside the stars to dry.
The last piece that you'll need is one of the Scroll Borders. Using a blending tool and Chipped Sapphire Distress Ink, cover the entire surface of the scroll. Once the surface is covered, use a second blending tool and ink the edges with Black Soot Distress Ink.
When adhering the chipboard elements to the layout, make sure to adhere the picture first and then adhere the scroll border. Once the scroll border is adhered, foam square the square frame over top of the picture.
With the frame adhered in the middle, now it's time to add the chipboard elements in the bottom right hand corner. You'll need to adhere two of the three smaller matching snowflakes on the left and right corner of the frame. Once they've been adhered, adhere the sleigh between them and adhere the large snowflake over top of the sleigh. To finish the corner add the two stars and last matching snowflake to the corner. To embellish the small snowflakes, add Red/Gold Glitter dots to the centres and a large jewel to the centre of the large snowflake.
In the bottom left hand corner adhere the reindeer.
In the top left hand corner, adhere the large snowflake in the top left corner of the frame. Once the large snowflake has been adhered, adhere one of the small matching snowflakes to the right of the large snowflake and adhere the second small matching to the left of the large snowflake. To finish the corner add the two stars and last matching snowflake to the corner. To embellish the small snowflakes, add Red/Gold Glitter dots to the centres and a large jewel to the centre of the large snowflake.
To finish your layout, take watered down white gesso and a splatter brush. Splatter sections of your layout as desired.
Southern Ridge Trading Company Supplies Used:
- Nested Squares
Other Supplies Used:
- Emerald Creek Craft Supplies: Soft Fallen Snow Embossing Powder and Ultra Puff White Embossing Powder
- Tim Holtz for Ranger Ink: Distress Ink - Chipped Sapphire and Black Soot, Distress Stain - Chipped Sapphire and Brushed Pewter & Splatter Brush
- Ranger Ink: Emboss It Ink - Clear (dabber)
- Prima Marketing: Heavy White Gesso
- Authentique: Wintery - Wintery One, Two, Five and Six
- Elizabeth Craft Designs: Red/Gold Glitter Dots
- Misc: Heat Tool and Jewels
Remember to play along in the monthly challenge over on the Southern Ridge Trading Company blog. Each month enter for your chance to win 4 designs from the online store - chipboard.ca -$20 (before tax) retail value of YOUR OWN CHOOSING!
Until Next Time!
-Katelyn


Beautiful winter layout, Katelyn! I love the Soft Fallen Snow and Ultra Puff White on those chippies! Great design! Brrrr! We are feeling some of that cold weather here, too, and actually had the slightest dusting of snow, layered on top of a crust of ice. Yuck! Hugs to you!
ReplyDeleteThanks Sara Emily! I love using the embossing powder on the chippies!! Hopefully you get out of your cold snap soon.
ReplyDeleteLove this layout-you look very cold!!!
ReplyDeleteThanks Karen!
Delete