Hey there Southern Ridge Trading Company fans, Katelyn here. Some of the chipboard pieces I've had waiting to be used on a project are a little bigger than what would fit nicely on a card, so today, I've created a feminine wall hanging featuring one of the larger frames along with a variety of other chipboard pieces. Read below and learn how I transformed my chipboard pieces for my Shine Wall Hanging.
To start, you'll need to take the Circle Lace Frame. Apply two coats of Vintage Lace Paint from Paper Artsy to 3/4" around the frame. Set the frame aside to dry. Once the front side of the frame has dried, paint the entire backside of the frame with two coats of Vintage Lace Paint. Let the frame dry. Once the frame has dried, using a blending tool and Black Soot Distress Ink, ink the edges of the frame.
While you still have the Vintage Lace paint out, paint three floral banners with two coats of paint. Let the banners dry. After the banners have dried, using a blending tool and Black Soot Distress Ink, ink the edges of the banners.
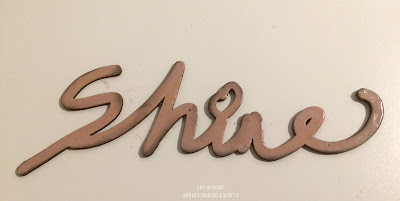
Next you'll need the Shine Word. Apply two coats of Victorian Velvet Distress Paint to the word. Once the word has dried, apply a coat of Emboss It Ink to the entire word. With the word covered in ink, sprinkle Fine Clear Gloss Embossing Powder over the entire word. Tap off the excess powder and emboss with your heat tool. With a blending tool and Black Soot Distress Ink, ink the edges of the word.
While you still have the Victorian Velvet Distress Paint out, apply two coats of paint to three plain banners. Once the banners have dried, apply a coat of Emboss It Ink to the entire word. With the banners covered in ink, sprinkle Fine Clear Gloss Embossing Powder over all three banners. Tap off the excess powder and emboss with your heat tool. With a blending tool and Black Soot Distress Ink, ink the edges of the banners.
The last chipboard piece that needs to be painted is the floral frame. Apply two coats of Carbon Black paint to the frame. Set the frame aside to dry.
With all the the chipboard pieces decorated, next you'll need to take a bowl that fits the inside the Circle Lace Frame. Once you have the right size bowl, trace around the bowl onto a piece of patterned paper. Cut out your circle and then edge distress the edges. After the edges have distressed, using a blending tool and Black Soot Distress Ink, ink the edges of the circle.
Die cut a 3" circle out of patterned paper. After the circle has been die cut, use an edge distressor and distress the edges of the circle. Once the edges have been distressed, using a blending tool and Black Soot Distress Ink, ink the edges of the circle. Die cut your picture using a 2 1/2" circle.
When starting to adhere your elements onto the Circle Lace Frame, start by adhering the large patterned paper circle to the chipboard piece. Once that patterned paper circle has been adhered, then you can adhere the black floral frame as well as the 3" circle and your 2 1/2" photo circle. After the circles have been adhered, adhere your shine word slightly overtop of your photo.
For the banners in the top right hand corner, adhere the floral banners onto the regular banners. After the banners have been adhered together, string them onto a piece of black twine and adhere them in the top right corner. To finish the banners, adhere a cream or black rose to each banner.
In both the top left and bottom right hand corner of the frame, add a variety of cream, black and pink roses in varying 10, 15 and 20mm sizes.
To finish your wall hanging, add a piece of cream ribbon to the back of the frame which will act as the hanger part at the top of the wall hanging.
Southern Ridge Trading Company Supplies Used:
- Circle Lace Frame
- Small Floral Frame
- Floral Banners
- Plain Banners
- 10mm Roses: Cream and Pink
- 15mm Roses: Black
- 20mm Roses: Cream
Other Supplies Used:
- Emerald Creek Craft Supplies: Fine Clear Gloss Embossing Powder
- Tim Holtz for Ranger Ink: Distress Ink - Black Soot and Distress Paint - Victorian Velvet
- Ranger Ink: Emboss It Ink - Clear (dabber)
- Tim Holtz Ideaology: Found Relatives
- DecoArt Media Fluid Acrylics: Carbon Black
- Paper Artsy: Fresco Finish Chalk Acrylics - Vintage Lace
- Tombow: Aqua Mono Liquid Glue
- Prima Marketing: Wild & Free - Let's Be Adventurers and Love Clippings - All of Me Loves All of You
- Elizabeth Craft Designs: Stitched Circles
- Hug N' Snug Seam Binding Ribbon: Cream
- Misc: Heat Tool and Ribbon
Until Next Time!
-Katelyn


No comments:
Post a Comment