SPARKLE!!
SPRING! SPRING! SPRING!
I am so ready for spring aren’t you?
Butterflies, bees, flowers and warmer weather are just a few of the things I love about SPRING – oh and all the COLOUR!
Here’s what I did to create my “Sparkle” Tag
Prepping the Surface:
- I painted the surface with DecoArt’s All Purpose Sealer and let completely dry.
- Then, I painted a smooth layer of DecoArt Media Gesso and let completely dry.
- Next, I spritzed the surface with DecoArt Media Shimmer Mister Turquoise and Yellow Green and let it drip down the surface. Once dried, I painted a layer of watered down Gesso over it and wiped it back with a soft paper towel. This helped tone down the background colours.
- I laid the Southern Ridge Trading Company Intersecting Circle Stencil (small) in place and stenciled some Titanium White on the surface.
Design Elements:
- I drew out and painted the shape of a butterfly on the surface and then outlined it with an Identi-Pen.
- I painted the wings and chipboard butterflies with Gesso and let dry.
- Once dried, I spritzed the Shimmer Mister Turquoise and Purple on the chip board butterflies and Purple on the butterfly wings. I laid a paper towel on the wings to soften and lift some of the color.
- Next, I loaded the toe of a 3/8” Angle brush with Phthalo Blue and shaded around the inside edge of the wings. I lightly brushed some of this colour on the wings as well.
- Then I stenciled on some elements from an M2 stencil (M2-5) that screamed, ‘butterfly wing adornment’!
- I decided to outline the elements with the Identi-Pen, and well… let’s just say thank goodness for hand sanitizer and a Mezzaluna brush because I was able to get the pen markings off and re-stroke some of the white back in place. ☺
- I painted the body with a mixture of Green Gold and Titanium White and then shaded each section with Sap Green. Then I added a small highlight of white on each section.
- I shaded underneath the wings and left side of the body with Paynes Grey to lift the design a bit from the surface.
- I re-outlined the wings, the antenna and body with the Identi-Pen.
- I added another element of texture with drywall tape and Titanium White in the background.
- I added some details to the chipboard butterflies with the Identi-Pen.
- I painted the ‘Sparkle’ chipboard piece with a mixture of DecoArt Metallic Lustre – White Frost and Shimmer Mister Purple.
- I loaded a wet brush with a touch of Metallic Lustre – White Frost and painted over the chipboard butterflies as well as the butterfly wings on the surface to give them more of a sparkle.
Finishing Touches:
- I splattered some Shimmer Mister Purple and Titanium White on the surface and then laid a paper towel over the surface to soften the look.
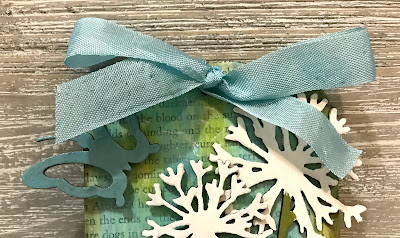
- I glued both of the butterfly pieces in place with E6000 glue. Notice that I cut the little butterflies off the one chipboard piece.
- Once everything was painted, glued and dried, I painted the surface with Soft Touch Varnish to protect the painted design.
Southern Ridge Trading Company Supplies Used:
- Butterflies
Other Supplies Used:
- DecoArt Media Fluid Acrylics: Titanium White, Phthalo Blue, Paynes Grey, Sap Green & Green Gold
- DecoArt Media Metallic Lustre: White Frost
- DecoArt Media Misters: Shimmer Mister Turquoise, Purple & Yellow Green
- DecoArt All Purpose Sealer, Media Gesso & Soft Touch Varnish
- Dynasty Brushes: Black Gold 3/4", #8 Shader, 3/8" Angle, 1/4" Angle, Stencil Brush and a liner brush of choice. (Available from TheBrushGuys.com – use promo code: sandymc for an additional discount)
- Identi-Pen
- E6000 Glue
- Drywall Tape
- Green Floral Wire
©2018 SPARKLE, Sandy McTier Designs ~ all rights reserved
Y’all have a GREAT day; Happy Creating!! Sandy


