Hey Southern Ridge Trading Company fans, Katelyn here. For today's post, I'm excited to share with you a floral birthday card that you can give to that special someone in your life. My Floral Happy Birthday Card features a variety of our chipboard pieces. You'll want to read below as I share with you how to recreate my Floral Happy Birthday Card at home.
To start, cut two small pieces off of the Cherrio Pattern. Apply two coats of White Paint to the pieces. Once the paint has dried, rub Hickory Smoke Distress Crayon on both pieces.
Choose one of the Happy Birthday sentiments from the Birthday Greetings chipboard. Apply two coats of Evergreen Paint to the Happy Birthday Sentiment. After the paint has dried, rub Mowed Lawn Distress Crayon overtop of the sentiment.
Cut out four foliage pieces from the Foliage Pieces chipboard. Apply two coats of Evergreen Paint to all of the foliage pieces. After the paint has dried, rub Peeled Paint Distress Crayon down the middle and edges of the foliage pieces.
The last chipboard piece you need is the Oval Peacock Feather Frame. Apply a coat of Emboss It Ink to the frame. Sprinkle Enhanced Ivory Pearl Embossing Powder overtop of the frame. Tap off the excess powder and emboss with your heat tool.
From the pink/white paper, cut a piece that measures 4 1/4" x 5 1/2". From the same piece of paper, die cut the 3" stitched oval. Ink the edges of the patterned papers using Black Soot Distress Ink and a blending tool with foam.
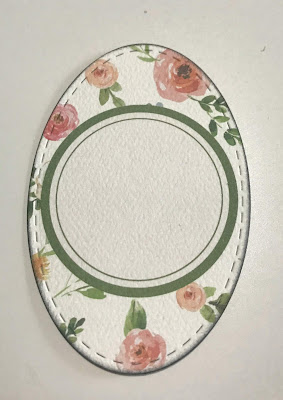
Cut the 3"x4" journal card that has the circle on it. Use the 2 1/2" stitched oval to cut the circle out. Ink the edges of the patterned paper using Black Soot Distress Ink and a blending tool with foam.
From the leaf patterned paper, you'll need to cut out two pieces. The first piece measures 4" x 5 3/8". The second piece measures 3 3/4" x 5". Ink the edges of the patterned papers using Black Soot Distress Ink and a blending tool with foam.
From the Whitewash Woodgrain paper, cut a piece that measures 3 7/8" x 5 1/8". Ink the edges of the patterned paper using Black Soot Distress Ink and a blending tool with foam.
Adhere the large grey/floral paper to the pink/white patterned paper. Adhere the small leaf patterned paper piece to the whitewash wood paper. Foam square the whitewash wood paper to the grey/floral paper.
On the top portion of the leaf/wood paper, tear down a bit of the paper. Adhere a piece of the Cheerio pattern to where the tear is, that way you can see part of it. On the bottom portion of the leaf/wood paper, tear up a bit of the paper. Adhere a piece of the Cheerio pattern to where the tear is, that way you can see part of it.
Adhere the 2 1/2" stitched oval to the 3" stitched oval. Adhere the 3" oval to the middle of the leaf paper. Adhere the Oval Peacock Feather Frame overtop of the stitched ovals.
Use foam squares and glue to adhere the Happy Birthday sentiment in the middle of the frame. Adhere two leaves at the top of the frame. Adhere four coral roses, three pink roses, one large white rose and four small white flowers.
Adhere two leaves at the bottom of the frame. Adhere two coral roses, two pink roses, one large white rose and four small white flowers.
Cut a cardbase out of white cardstock that measures 5 1/2" x 8 1/2", score at 4 1/4". Adhere the cardfront to the cardbase. To finish off the card add enamel dots in amongst the flowers on both the top and bottom.
Here are a few close up photos of the finished card.
And here's the finished card.
Southern Ridge Trading Company Supplies Used:
Other Supplies Used:
- Tim Holtz for Ranger Ink: Distress Ink - Black Soot, Distress Crayons - Hickory Smoke, Peeled Paint & Mowed Lawn and Blending Tool with Foam
- Dina Wakley for Ranger Ink: Heavy Body Acrylic Paint - Evergreen and White
- Ranger Ink: Emboss It Ink Dabber
- Emerald Creek Craft Supplies: Enhanced Ivory Pearl Embossing Powder
- Elizabeth Craft Designs: Stitched Ovals
- Carta Bella: Spring Market - Market Floral, Wreath Decor, 4x6 Journaling Cards, 3x4 Journaling Cards and Enamel Dots
- Tombow: Mono Multi Liquid Glue
Until Next Time!
- Katelyn


